Ma c int osh, Transferring thumbnails on a contact sheet – Kodak DC265 User Manual
Page 115
9-13
MA
C
INT
OSH
9
Transferring thumbnails on a contact sheet
To transfer thumbnails on a contact sheet:
1
In the application window viewing area, do either of the following:
✔
To transfer a single picture, double-click it.
✔
To transfer multiple pictures, select the pictures you want to include on
the contact sheet. To transfer pictures in a burst or time-lapse folder,
expand the folder and then select the pictures.
☞
For information on changing the color for the contact sheet
background, slide mount frame, and text, see “Setting preferences”
on page 9-16.
2
In the Transfer As section, click Contact Sheet.
3
Click Transfer.
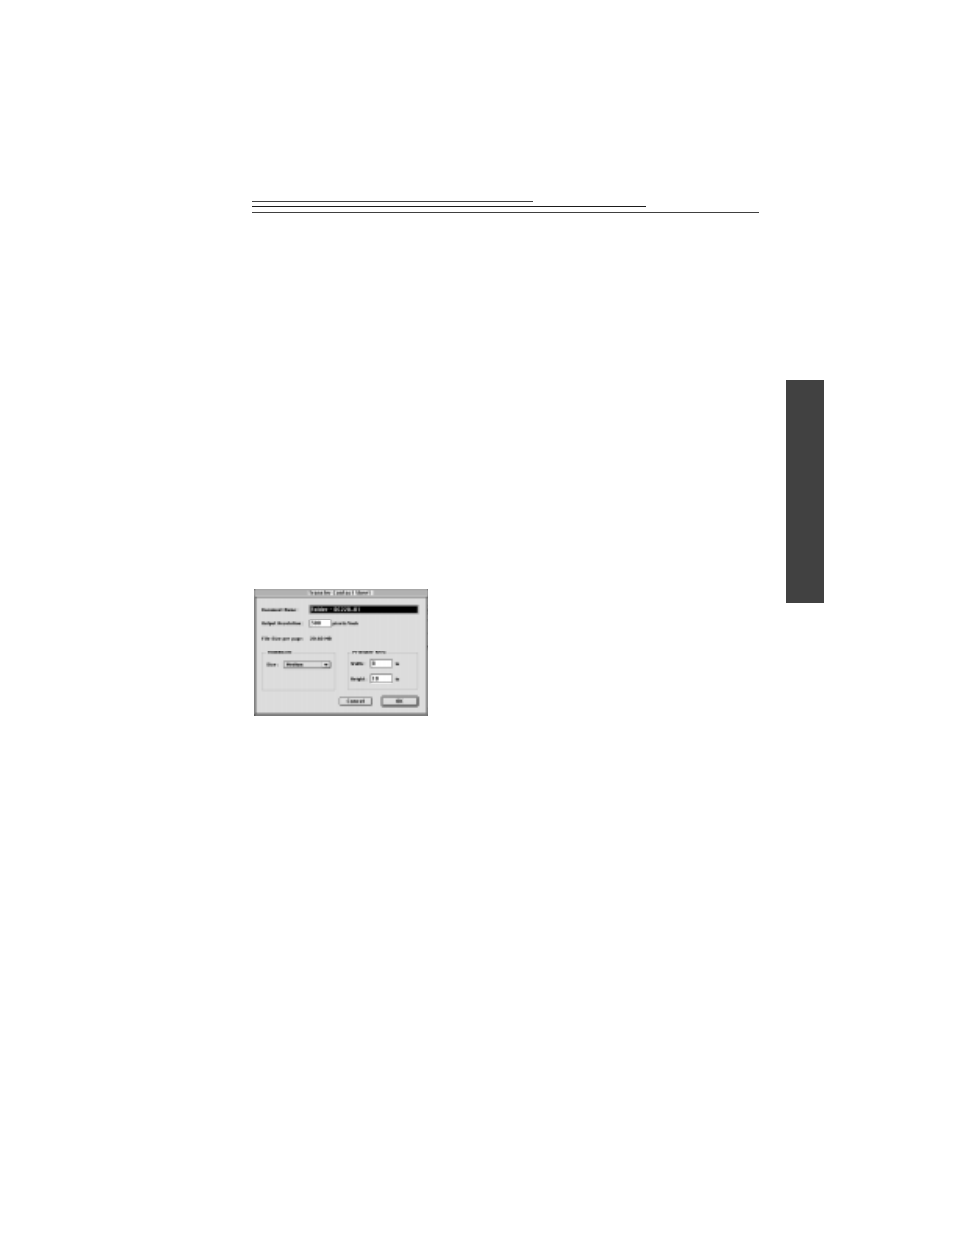
The Transfer Contact Sheet dialog box appears.
5
Click Ok.
A progress indicator appears as the contact sheet is created. The contact
sheet holds as many thumbnails as fit on a single page based on the specified
dimensions. Multiple contact sheets are created if necessary.
6
To close Digital Access software, click Done.
4
In the Transfer Contact Sheet dialog box, do
the following:
✔
In the Document Name text box, type a
filename.
✔
In the Output Resolution text box, type the
output device resolution.
✔
Select the thumbnail slide mount frame size
you want transferred on the contact sheet.
The picture is sized to fit in the frame. A
Small frame is 3/4-inch, a Medium frame is
1.5 inches, and a Large frame is 3 inches.
✔
In the Printable area, type the width and
height of your output media. For more
information, see “Setting preferences” on
page 9-16.