5 mounting on the kramer rk-13 rack adapter – Kramer Electronics RK-13 User Manual
Page 5
Mounting on the Kramer RK-13 Rack Adapter
3
5 Mounting on the Kramer RK-13 Rack Adapter
The underside of the
RK-13 includes a set of screw holes that are suitable for
mounting any combination of units.
To mount the units on the
RK-13, as illustrated in Figure 1, do the following:
1. Place the first unit on the rack (for example, the Kramer
VP-2K).
2. Hold both the
VP-2K and the RK-13 with your hands and turn them upside
down.
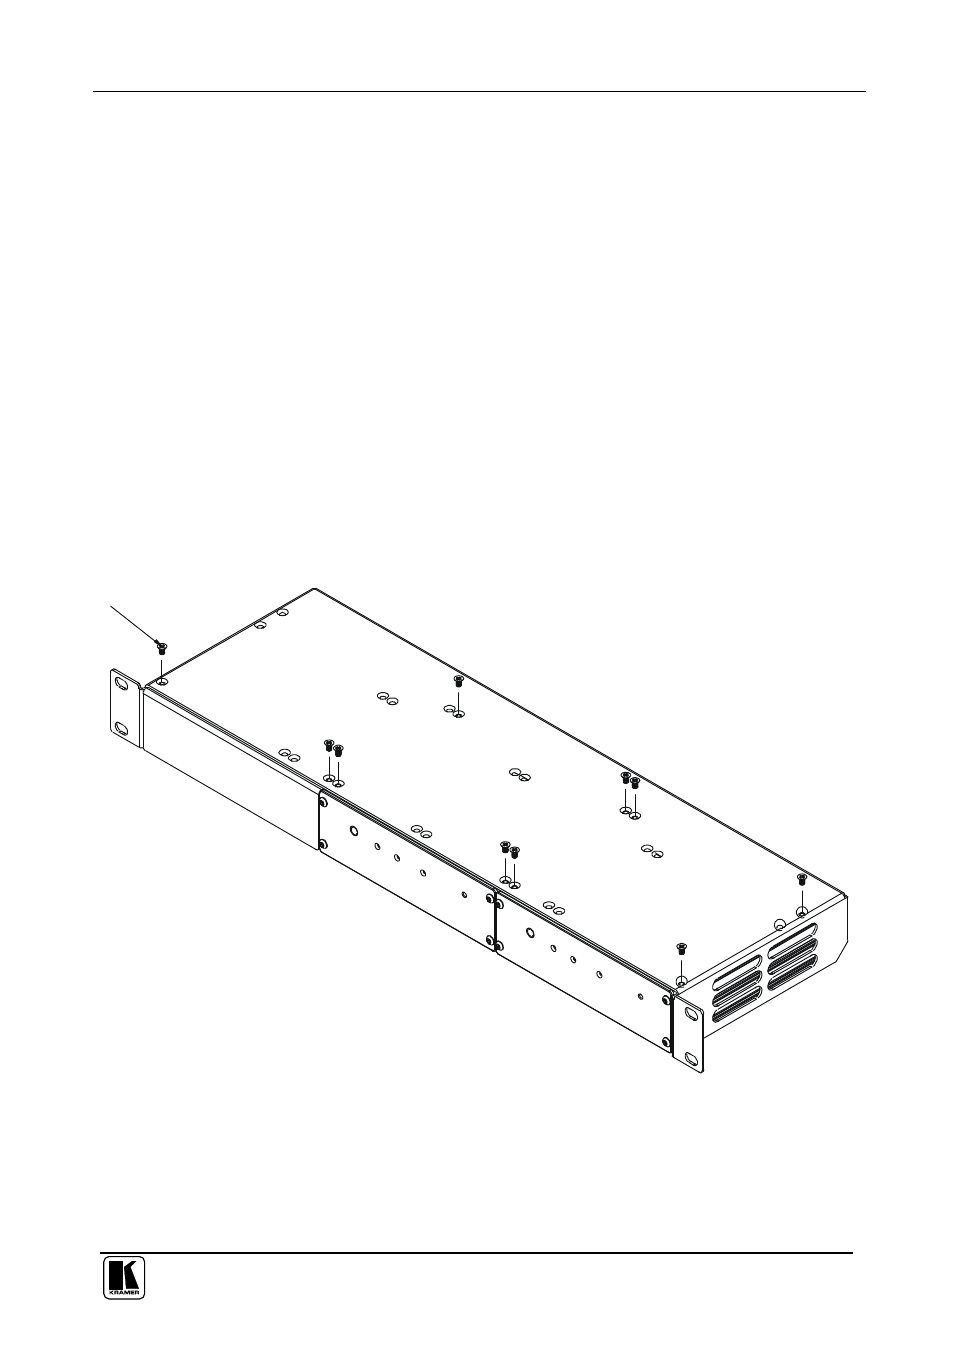
3. Insert four M3x5 screws (supplied with the unit) through the holes on the
RK-13 that fit the holes on the underside of the VP-2K (as illustrated in
Figure 2).
4. Tighten the screws.
5. Rotate the
RK-13 horizontally with the unit connected.
6. Place the next unit next to the unit that is already mounted.
7. Repeat steps 2 to 6 for each other unit.
M3x5 Undercut Screw
Figure 2: RK-13 Rack Adapter – Underside