HES 8000 User Manual
Read me
NOTE: Thank you for purchasing the new HES 8000/8300 series electric strike. Before you begin installation, please take
a few minutes to familiarize yourself with this product to understand how it functions and what makes it different from
a standard electric strike.
®
READ ME
8000/8300 SERIES ELECTRIC STRIKE
A NEW KIND OF ELECTRIC STRIKE
A standard electric strike requires a cutout on the side of the door frame to allow the extended latchbolt to exit the frame.
In contrast, the 8000/8300 is designed to utilize special internal ramps to eject the latchbolt from an unmodified frame. For the
8000/8300 to operate correctly, it is important for you to first understand the relationship between the unit’s internal ramps and
the position of the latchbolt.
WHY ANGLES ARE IMPORTANT
The 8000/8300 ramps are designed with critical angles that minimize both latchbolt
wear and the force required for exit. For optimum performance, the latchbolt should
be positioned at a 40 to 45 degree angle in relation to the ramps of the 8000/8300. An
angle more than 45 degrees will steepen the ramp and impact the performance of
the 8000/8300 (Image 5).
We understand that correctly measuring this angle in the field may be difficult. The
next section is designed to help you understand some simple techniques to evalu -
ate the condition and relationships between the door, the latchbolt, the frame and
the 8000/8300.
®
HES, Inc.
Phoenix, AZ
800-626-7590
www.hesinnovations.com
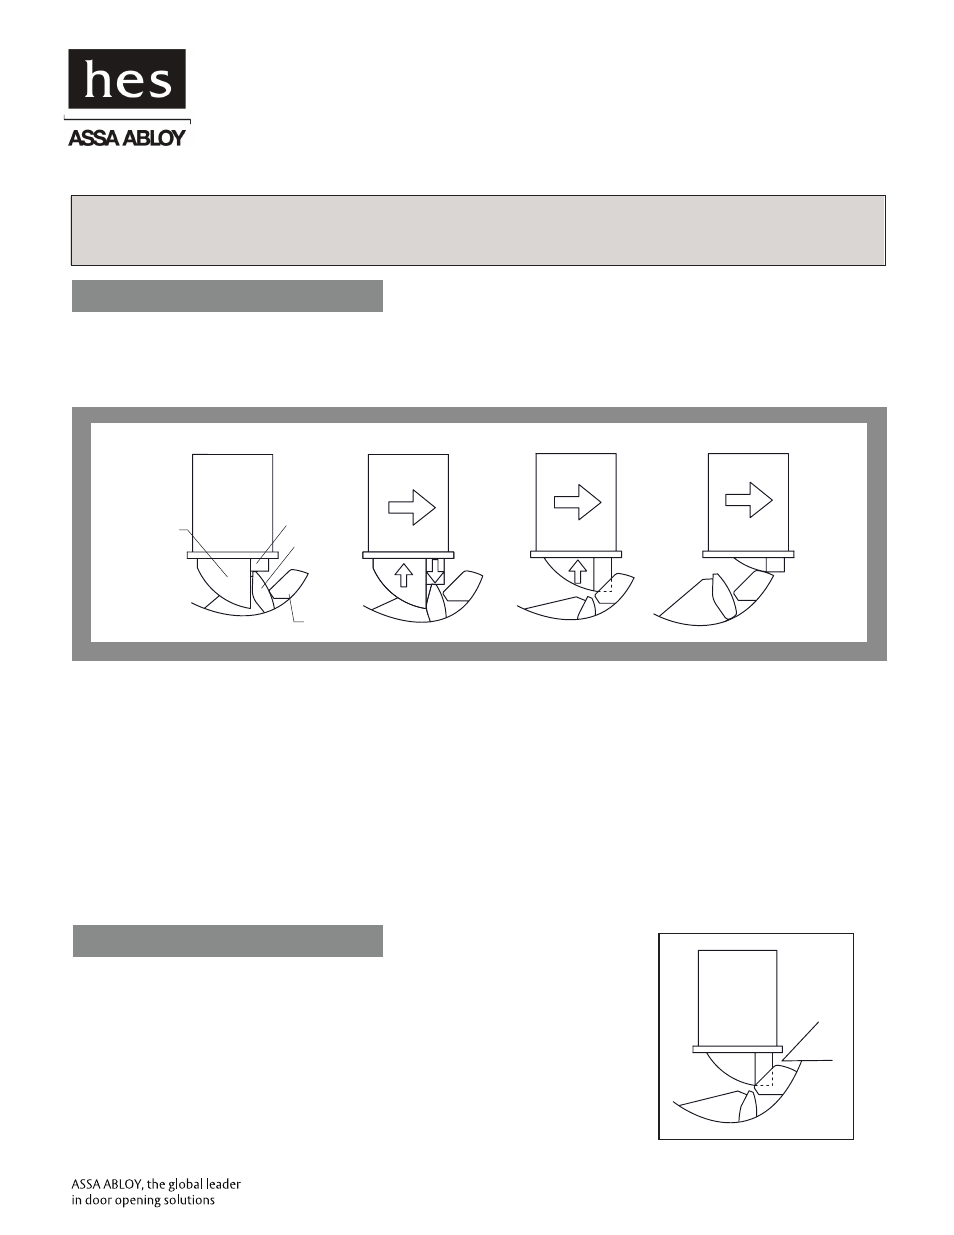
Latchbolt
DeadLatch
Keeper
Ramp
Image # 1
Image # 2
Image # 3
Image # 4
1. Initially, the 8000/8300 operates very much like a standard electric strike. With the door in the closed position, the latchbolt
held secure by the 8000/8300’s keeper (Image 1).
2. When energized, the keeper releases the latchbolt and as the door moves forward the deadlatch begins to
drop (Image 2).
3. As the door continues to move forward the deadlatch and latchbolt will become fully released. The latchbolt will then
pass from the keeper and begin to slide up the internal ramps (Image 3). Note: It is important that the deadlatch pass
between the two internal ramps without contacting either ramp. The ramp adjustment is explained in detail
within installation instructions.
4. As the door continues to open, the latchbolt and deadlatch will continue to slide up the internal ramps and out of the
door frame to release the door. (Image 4)
Image # 5
45
o