Comfort-Aire CD-121J User Manual
Page 12
Owner’s Manual
Room Air Conditioner with R-410A
Heat Controller, Inc.
11
11
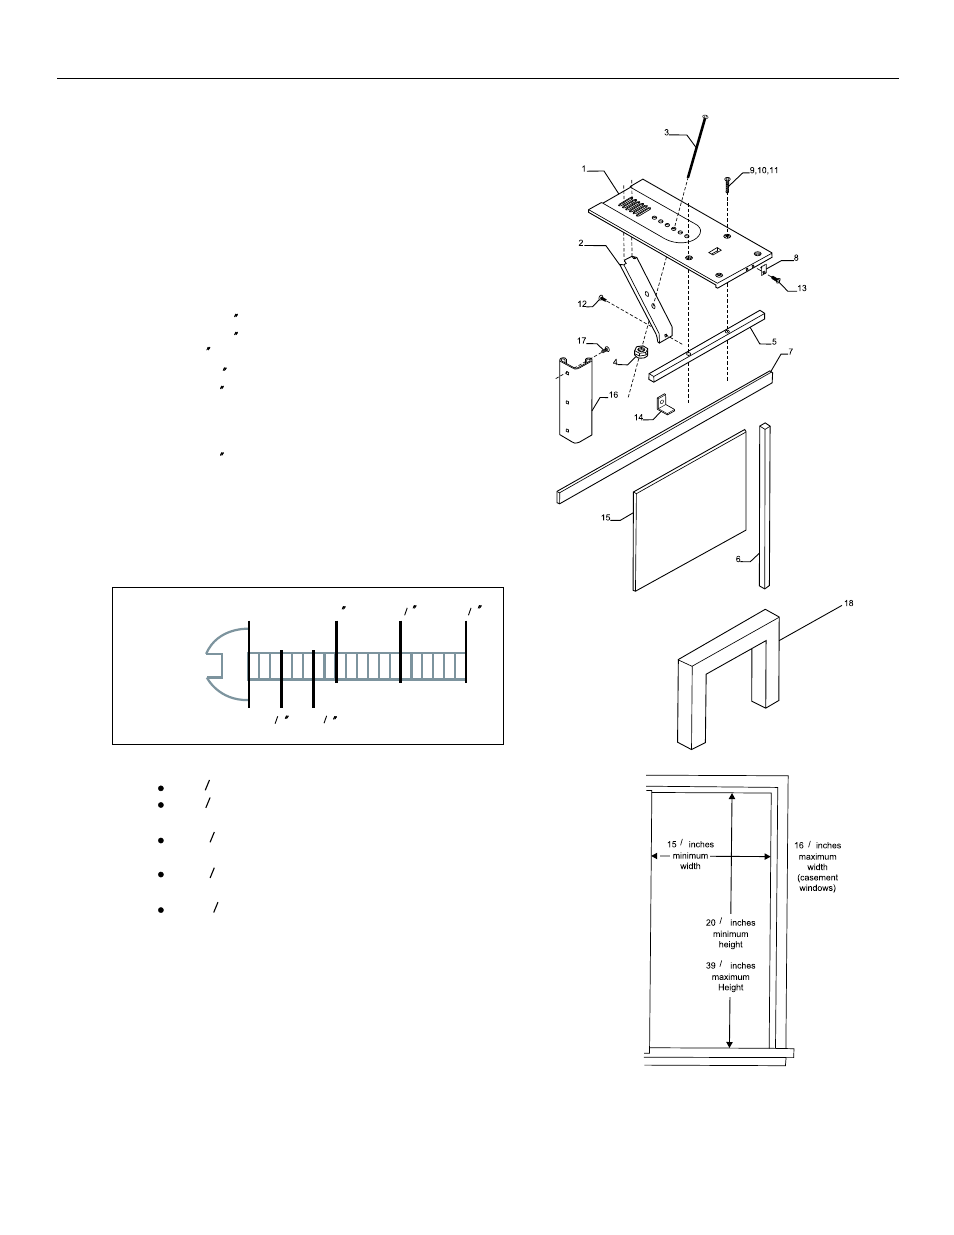
1. Make sure you have all the necessary parts.
Installation kit contents:
1.
Platform(1)
2.
Support brace(1)
3.
Adjustment bolt(1)
4.
Hex flange nut - 1 / 4 (1)
5.
Track seal(1)
6.
Side channel seal(1)
7.
Foam seal strip/Sash seal
8.
Safety bracket(1)
9-11.Screw-2-1/2 (2), or
Screw-1-3/4 (2), or
Screw-1 (2)
12. Screw-3/4 (6)
13. Screw-3/4 self-threading(7)
14. Window locking bracket(1)
15. Plastic window panel(1)
16. Side channel(2)
17. Screw-3/8 (6)
18. Panel frame/seal assembly(1)
NOTE: Use scale below to measure length
of your screws. The scale will come in handy
when separating screws for installation.
Identify Screws
By Length
(25mm)
1
(44mm)
1 3 4
(63mm)
2 1 2
3 8
(10mm)
3 4
(19mm)
2. Choose a proper sized window, as shown right.
NOTE:
15-1 2 inches minimum width
16-1 4 inches maximum width(for casement
windows)
21-1 4 inches minimum height (with window
panel retainer)
20-5 16 inches minimum height (window panel
retainer removed)
39-7 16 inches maximum height
Height measurement must be of a clear opening
above mounting platform. In some cases, due to a variety
of stop and track arrangements, the above dimensions
may vary slightly. If necessary, installation can be made
by alternating window jambs.(See Alternate Window Jamb
Applications.) (continued)
1
2
1
4
5
16
7
16
9.
10.
11.
1/4” (1)