Technical information upgrades, Limited warranty, General safety – Quick Cable Hex Crimp Jr. User Manual
Page 2: Maintenance, Replacement parts, Pur 71, Pur 71 ratchet option
Technical Information Upgrades
Copyright © Quick Cable Corporation. Quick, Quick Cable, HexCrimp, Bench Crimp, QuickCutter and the
Quick Cable logo are trademarks of Quick Cable Corporation. All rights reserved.
X1189B
We are continually upgrading our tool line. For all current information
visit our website: http://www.quickcable.com
Limited Warranty
Quick Cable Corporation manufactures the highest quality tools to exacting
engineering standards. Quick Cable will replace any Quick
®
Crimper and
HexCrimp Jr.
®
Crimper found to be defective and returned within two years of
date of purchase. Quick Cable will replace any Cub Crimper found to be de-
fective and returned within one year from date of purchase. Quick Cable will
replace any Brute
™
Hammer Crimp found to be defective & returned within six
(6) months from the date of purchase. Quick Cable will replace any cutter
found to be defective & returned within six months from date of purchase.
This warranty replaces all other warranties. Replacement of defective products
is your exclusive remedy. Quick Cable is not responsible for injury, property
damage, or the consequential damages arising either directly or indirectly from
the use of our products, even though that injury, property damage or other
consequential damages may have been directly or indirectly caused by an
actual defect in materials or workmanship.
We like to know how our products have performed for you. We welcome your
comments and suggestions regarding our products, their installation or per-
formance. Contact us at: Quick Cable Corporation - 3700 Quick Drive
Franksville, WI 53126-0509
Maintenance
Quick Cable crimpers are factory lubricated with low friction, high temperature,
synthetic lubricant. Additional lubrication may be required for very high usage tools.
Simply add two or three drops of #30 weight oil to each pivot point. Circulate the oil
by opening and closing the tool several times.
Replacement Parts
Dies, springs, snap rings and hardened hex pins are all available, just ask your distributor.
OIL
Fig. 3 - Slide heat shrink on
first
Fig. 1 - Die setting chart
Fig. 4 - Position connector in
dies
Fig. 5 - Crimp lug
Crimp
Fig. 6 - Shrink on tubing
General Safety
1. Batteries produce hydrogen gas which could explode if there is a spark near the battery.
Never work leaning over a battery. Do not have a flame near a battery. Do not smoke.
Wear eye protection.
2. Batteries contain sulfuric acid which is corrosive
and lead which is poisonous. Many battery
connectors are made of lead or have a lead coating.
Wash your hands thoroughly after installation. Do
not allow children to play with batteries, battery
cables or connectors.
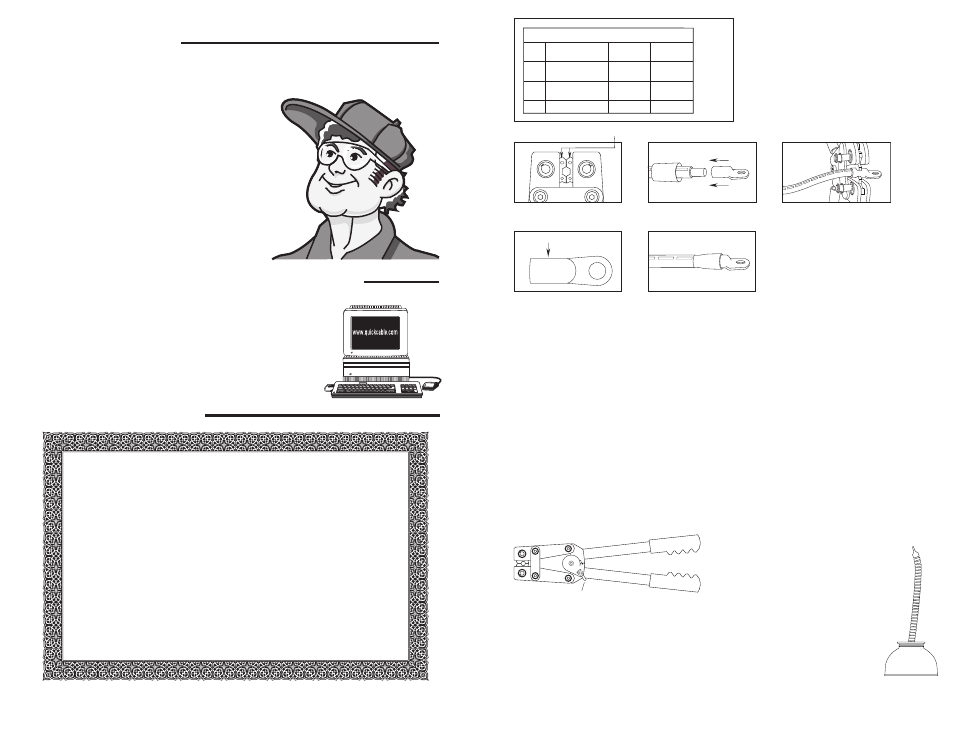
1. Using the chart on the tool, determine the proper die setting for the gauge of cable and
style of connector. Fig. 1
2. To select the dies, push the die pivot pins from the spring side and rotate both dies to the
proper setting. Releasing the pivot pins locks the dies in place. Fig. 2
3. Strip cable insulation 3/4" for copper tube lugs so that the bare conductor seats fully in the
connector. If you are using heat shrink tubing, slide it over the cable before applying the
connector. Fig. 3
4. Open tool and position connector in crimp dies. Fully close dies for proper crimp. Fig. 4
5. Crimp a minimum of 1/8" in from the barrel end. Fig. 5
6. For best results, protect each termination with Quick Cable heat shrink tubing. Fig. 6
Cable
Gauge
8
6
4
2
1
GREY 25
GREY 25
GREY 25
PINK 30
PINK 30
GREY 16
GREY 16
BROWN 20
WHITE 14
PINK 30
RED 10
RED 10
GREY 16
GREY 25
GREY 25
Cast Copper Battery
Terminals and Lugs
MagnaLugs
100% Copper
Copper
Tube Lugs
CAUTION:
Do not
crimp 1/0
Ga. battery
connectors
with this
tool. See
instruction
sheet for
safety
information
Crimp Die Settings
Fig. 2 - Push pin, rotate dies
Die settings
PUR 71
PUR 71
Ratchet Option
The ratchet mechanism is designed to ensure the best possible crimped connection. The
ratchet mechanism requires the operator to complete the full crimp before it will release. If
required, the ratchet mechanism can be disengaged by moving the release pawl (see picture)
towards the handle.
Pawl release