Full Throttle Skidoo 007-1024 User Manual
Page 2
C) Assemble the machined stainless steel pivot shaft and adapter plate on the OEM throttle flipper throttle.
1) Reassemble the OEM throttle flipper on the throttle block housing, in reverse order of how it was removed (you’ll need to rotate the flipper 180
degrees from the fully closed position in order to get the top throttle flipper pivot to enter the hole in the throttle block).
2) Starting from the inside of the throttle block, insert the machined stainless-steel pivot shaft into the stainless-steel washer (both are included in this
upgrade kit), then through the pivot hole in the throttle block housing, then through the newly-drilled hole in the OEM throttle flipper, and then through
the stainless-steel adapter plate included in the main GOLDFINGER package. The adapter plate has a bent-up tab which should fit in the space
between the throttle flipper and the throttle housing.
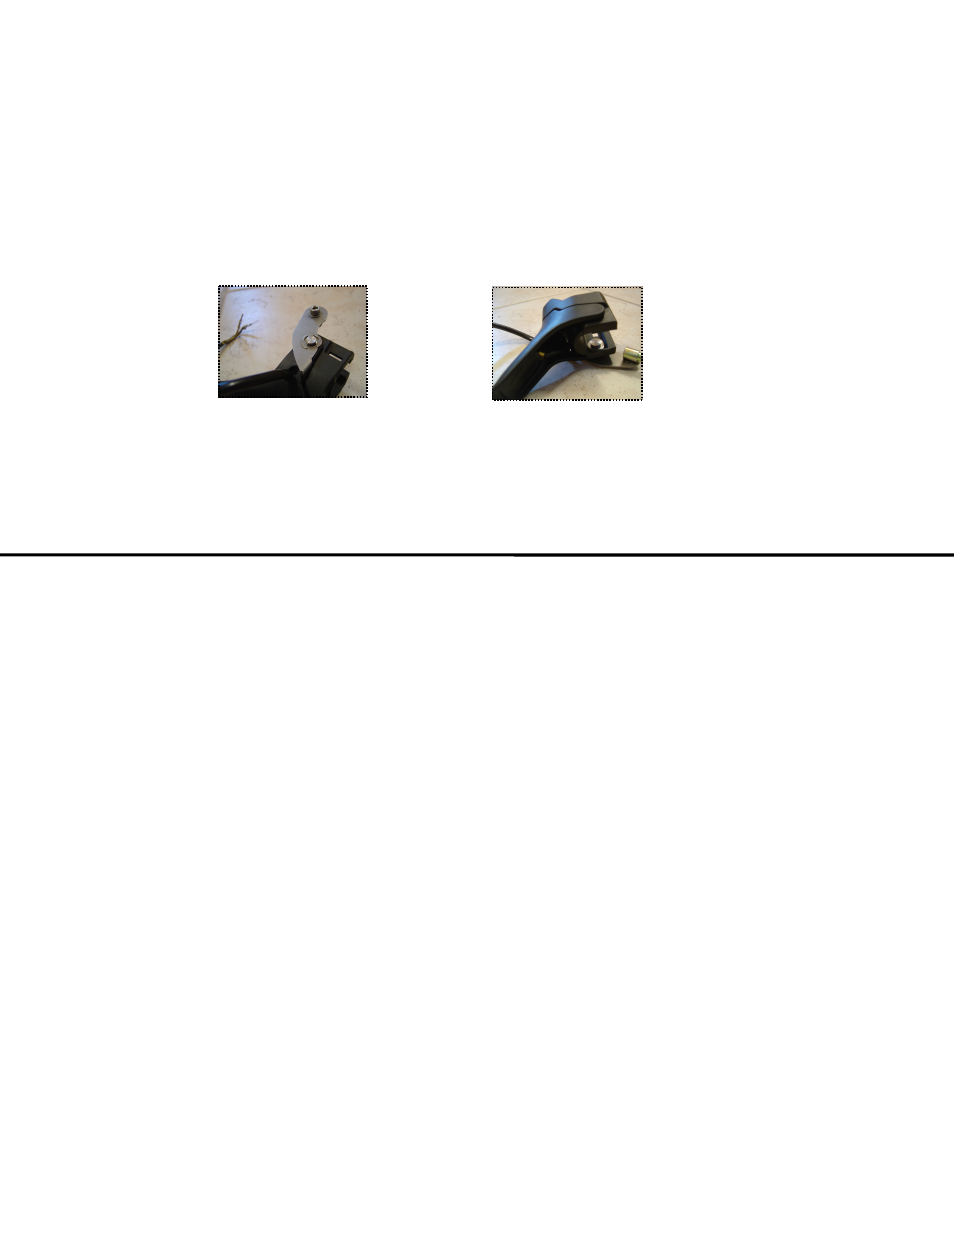
3) Snap the E-clip retainer into the groove on the stainless-steel pivot pin (see photo G).
4) Compare completed assembly to summary in Photo H.
5) Replace the completed throttle block assembly back onto the handlebar by snapping it into place.
6) Reinstall the rectangular throttle block backing piece by sliding it in (from left to right) until the release tab snaps into place. Tighten the allen set
screw.
7) Replace the OEM carburetor throttle cable end into slot in the OEM throttle flipper.
8) Reconnect the OEM thumb warmer wire to the handlebar wiring harness.
Starting from inside of
throttle block, pivot pin
goes into:
1. Stainless washer
2. Throttle block housing
3. OEM Throttle flipper
4. Stainless-steel adapter plate
5. E-clip retainer
H
G
Attach E-clip retainer
to pivot pin
D) Return to the main GOLDFINGER instructions to continue the installation of your GOLDFINGER left-
side throttle.
Resume with Step C: “Routing of Cable From Left Throttle to Right-Side Cable Attachment”