Iii. assembly, Attaching or removing bit, Attaching or removing bat- tery pack – Panasonic EY7960 User Manual
Page 7: Support handle
- 7 -
III. ASSEMBLY
Attaching or Removing Bit
NOTE:
When attaching or removing a bit,
disconnect battery pack from tool or
place the switch in the center position
(switch lock).
This tool is equipped with a keyless
drill chuck.
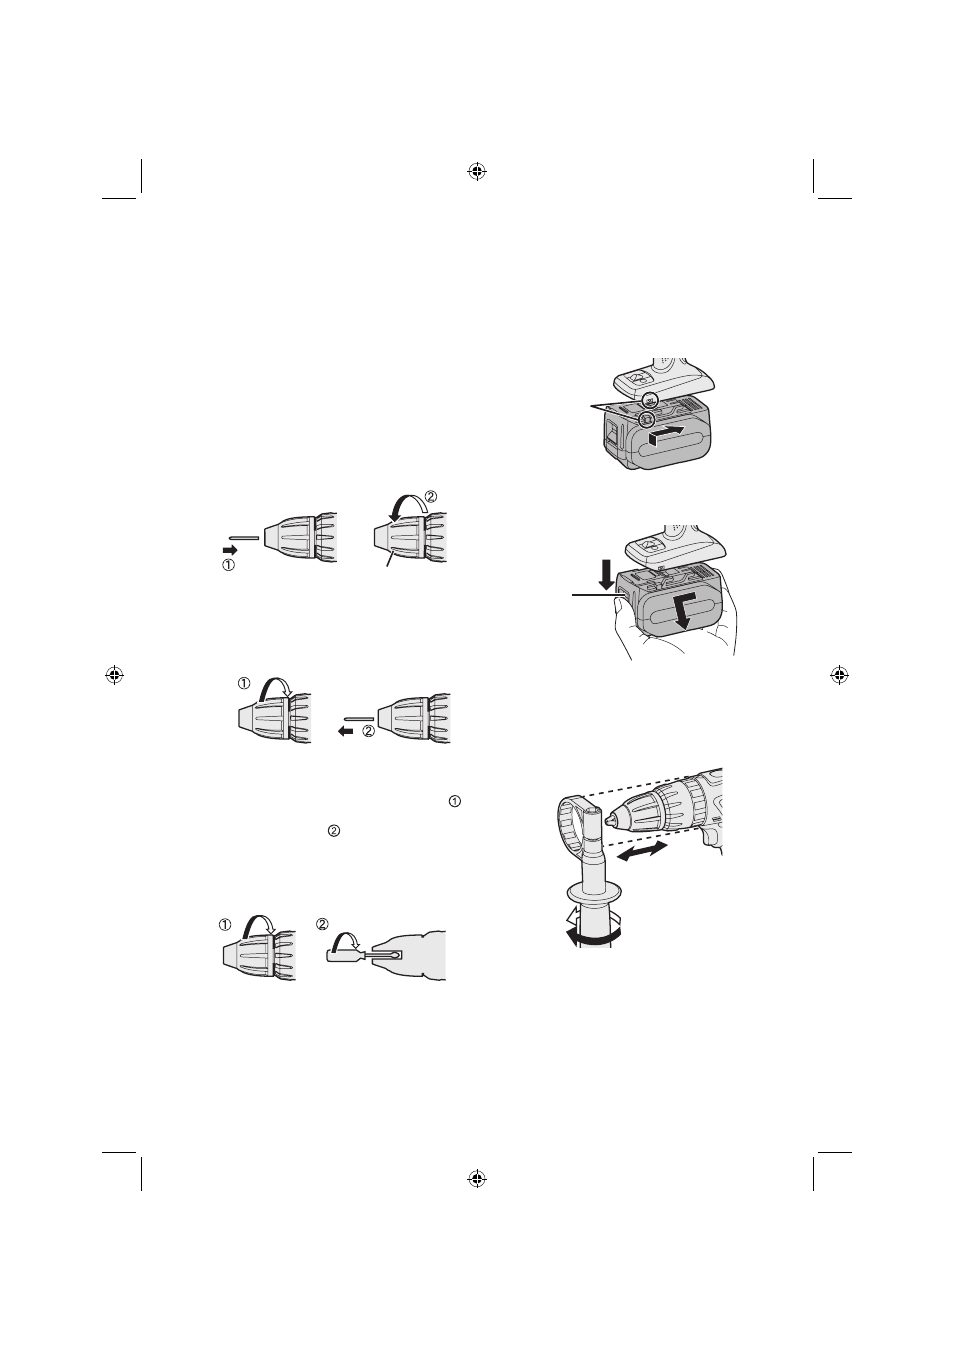
1. Attachment
Insert the bit and turn the lock collar
clockwise (looking from the front) to
tighten firmly until it stops clicking.
Lock collar
2. Removal
Turn the lock collar
counterclockwise (looking from the
front), then remove the bit.
NOTE:
If excessive play occurs in the chuck,
secure the drill in place and
open the chuck jaws by turning the
lock collar and tighten the screw
(left-handed screw) with a
screwdriver by turning it
counterclockwise (viewed from the
front).
Attaching or Removing Bat-
tery Pack
1. To connect the battery pack:
Line up the alignment marks and
attach the battery pack.
• Slide the battery pack until it locks
into position.
2. To remove the battery pack:
Push on the button from the front to
release the battery pack.
Support handle
Place the support handle at your
favorite position and tighten the
handle securely.
Remove the handle when placing the
tool in the storage case.
Button
Alignment marks
Tighten
Loosen