Step 2: deciding on the installation location, Step 3: installing the base bracket on the wall – Sony KDL-46VL160 User Manual
Page 2
− −
Additional Information for Using Sony Wall-Mount Bracket (SU-WL500)
Step 1: Checking the parts required for the installation
Open the Wall-Mount Bracket package and check the contents for all required parts along with the
Instructions.
Step 2: Deciding on the installation location
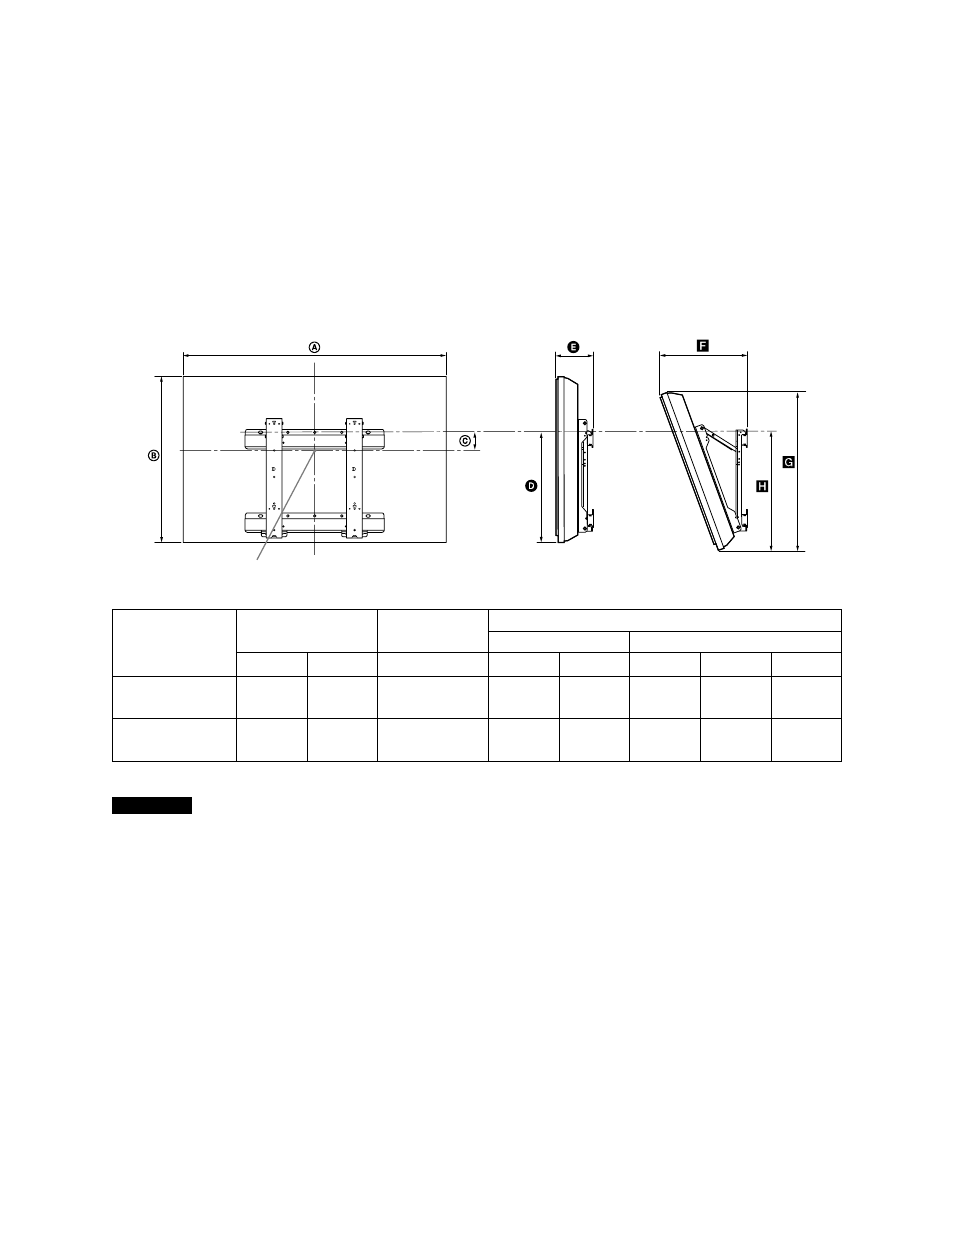
Decide where you want to install your TV. Refer to the TV installation dimensions table.
Refer to the Instructions for SU-WL500.
Dimension Table
Screen center point
Unit: inches (mm)
Model Name
Display
dimensions
Screen center
dimensions
Length for each mounting angle
Angle (0°)
Angle (20°)
KDL-40Z4100
KDL-40VL160
37 1/4”
(944)
24”
(608)
4 5/8”
(116)
17 5/8”
(446)
5 1/4”
(132)
12 1/4”
(311)
22 3/4”
(576)
18 5/8”
(472)
KDL-46Z4100
KDL-46VL160
42 1/2”
(1,079)
27 1/8”
(686)
3 1/8”
(77)
17 5/8”
(446)
5 1/4”
(134)
13 3/8”
(339)
25 5/8”
(650)
18 5/8”
(472)
Figures in the above table may differ slightly depending on the installation.
CAUTION
The wall that the TV will be installed on should be capable of supporting a weight of at least four times that of the TV.
Refer to your TV’s operating instructions for its weight.
Step 3: Installing the Base Bracket on the wall
Refer to the Instructions for SU-WL500.