Installing the unit, Installing the unit step 2 – Sony VPL-HW55ES User Manual
Page 10
US
10
1
Position the unit so that the lens is
parallel to the screen.
2
After connecting the AC cord to the
projector, plug the AC cord into a wall
outlet.
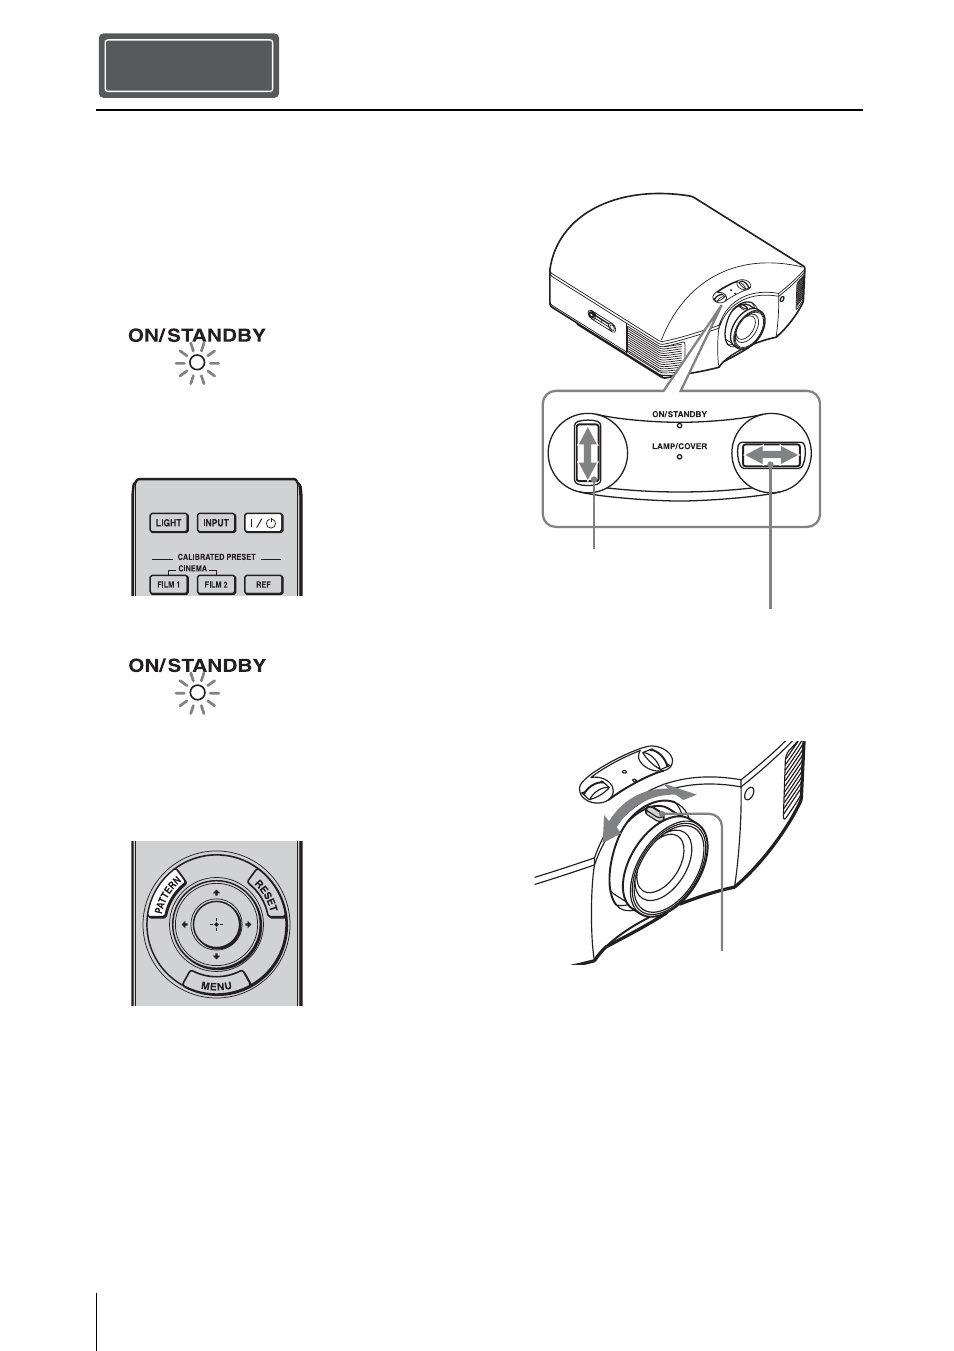
3
Press the ?/1 (ON/STANDBY)
switch to turn on the projector.
4
Press the PATTERN button to display
a test signal for performing
adjustments.
a Move both lens shift dials to
adjust the picture position.
b Adjust the picture size using the
zoom lever.
Installing the Unit
Step 2
Lights in red.
Top of the unit
Flashes in green for a
while (tens of seconds)
and then lights in green.
Top of the unit
To adjust the vertical
position
To adjust the horizontal
position
Zoom lever
See also other documents in the category Sony Home Theater Systems:
- HT-SL40 (44 pages)
- HT-SF800M (2 pages)
- DHC-FL7D (76 pages)
- DAV-S880 (84 pages)
- DHC-FL5D (76 pages)
- DHC-FL5D (224 pages)
- HT-SL40 (216 pages)
- HT-SL40 (2 pages)
- DAV-S550 (84 pages)
- DAV-LF1 (1 page)
- DAV-LF1 (116 pages)
- DAV-LF1 (488 pages)
- DAV-LF1 (2 pages)
- DAV-FC8 (92 pages)
- DAV-HDZ273 (92 pages)
- DAV-FR8 (1 page)
- HCD-FR8 (108 pages)
- DAV-FR8 (1 page)
- DAV-FR8 (2 pages)
- IZ1000W (88 pages)
- IPELATM PCS-HG90 (2 pages)
- BLU-RAY DISC BDV-T37 (80 pages)
- HT-DDW990 (80 pages)
- HT-DDW990 (2 pages)
- HT-SS100 (2 pages)
- 4-130-029-13(1) (64 pages)
- HDX267W (104 pages)
- RHT-G2000 (12 pages)
- HCD-HDX265 (1 page)
- DAV-DZ660 (116 pages)
- HT-1750DP (48 pages)
- HT-SF1200 (68 pages)
- HT-CT350 (180 pages)
- HT-CT350 (180 pages)
- HT-DDW890 (80 pages)
- HT-DDW790 (64 pages)
- DX255 (100 pages)
- 4-178-247-11(1) (76 pages)
- NHS-130C (3 pages)
- DAV-SR4W (108 pages)
- HT-SF1300 (72 pages)
- HCD-HDX267W (104 pages)
- DAV-DZ170 (76 pages)
- DAV-DZ171 (76 pages)
- DAV-DZ170 (2 pages)