Operation – Karcher BD 80-120 W Bp Pack User Manual
Page 15
-
4
The BAT package model contains built-in
batteries.
Î
Tilt up the battery cover.
Î
Insert the batteries in the battery com-
partment.
Î
Grease the battery poles using pole
grease.
Î
Connect poles with the enclosed con-
necting cables.
ṇ
Warning
Pay attention to correct poles.
Î
Connect the connection cable to the
free battery poles (+) and (-).
Î
Close the battery cover.
ṇ
Warning
Charge the battery before commissioning
the machine.
The load status of the battery is displayed
with leds on the battery control display.
Deep battery discharge is indicated as fol-
lows:
– The leds on the left side of the display
are blinking on the battery control dis-
play.
– The empty battery indicator lamp turns
on.
– A warning beeps if a drive switch is
pressed.
Protection against deep discharge:
Î
Switch the suction turbine and the side
brushes off.
Î
Drive the machine directly to the charg-
ing station; avoid any steep gradients in
the process.
ƽ
Danger
Danger of explosion. Wet batteries can
only be charged with opened battery cover.
ƽ
Danger
Risk of injury on account of electric shock.
Ensure proper mains connection voltage
and the socket fuse.
Use the charger only in dry rooms with suf-
ficient ventilation!
Note
Average charging time is approx. 10 -15
hours.
The recommended chargers (matching the
batteries used) are regulated electronically
and will automatically switch off the charg-
ing process.
All functions of the machine are automati-
cally interrupted during the charging proc-
ess.
Î
Tilt up the battery cover.
Î
Remove battery plug and join it to the
charging cable.
Î
Connect the charger to the mains and
turn it on.
Î
Add distilled water one hour before the
charging process comes to an end; fol-
low the correct acid level. There are
corresponding indicators on the battery.
ƽ
Danger
Danger of causticization!
– Adding water to the battery in its dis-
charged state can cause the acid to
leak.
– Use safety glasses while handling bat-
tery acid and follow the safety instruc-
tions to avoid personal injury or damage
to clothes.
– Should the acid spray on to the skin or
clothes, rinse immediately with lots of
water.
Caution
Risk of damage!
– Use only distilled or desalinated water
(EN 50272-T3) for filling the battery.
– Do not add any substances (so-called
performance improving agents), else
warranty claims will not be entertained.
ṇ
Warning
Only use maintenance-free batteries while
replacing batteries in package appliances.
It is necessary to have a power supply ca-
ble/ adapter 6.649-582 for the charger.
Batteries and chargers are available in spe-
cialised stores.
Î
Tilt up the battery cover.
Î
Clamp off the minus pole of the battery.
Î
Clamp off the remaining cables from the
battery.
Î
Remove the batteries.
Î
Dispose of the used batteries according
to the local provisions.
ƽ
Danger
Risk of injury. Press emergency-stop
switch to immediately switch off all func-
tions of the machine.
Î
Insert batteries and connect (see "Be-
fore Start-up").
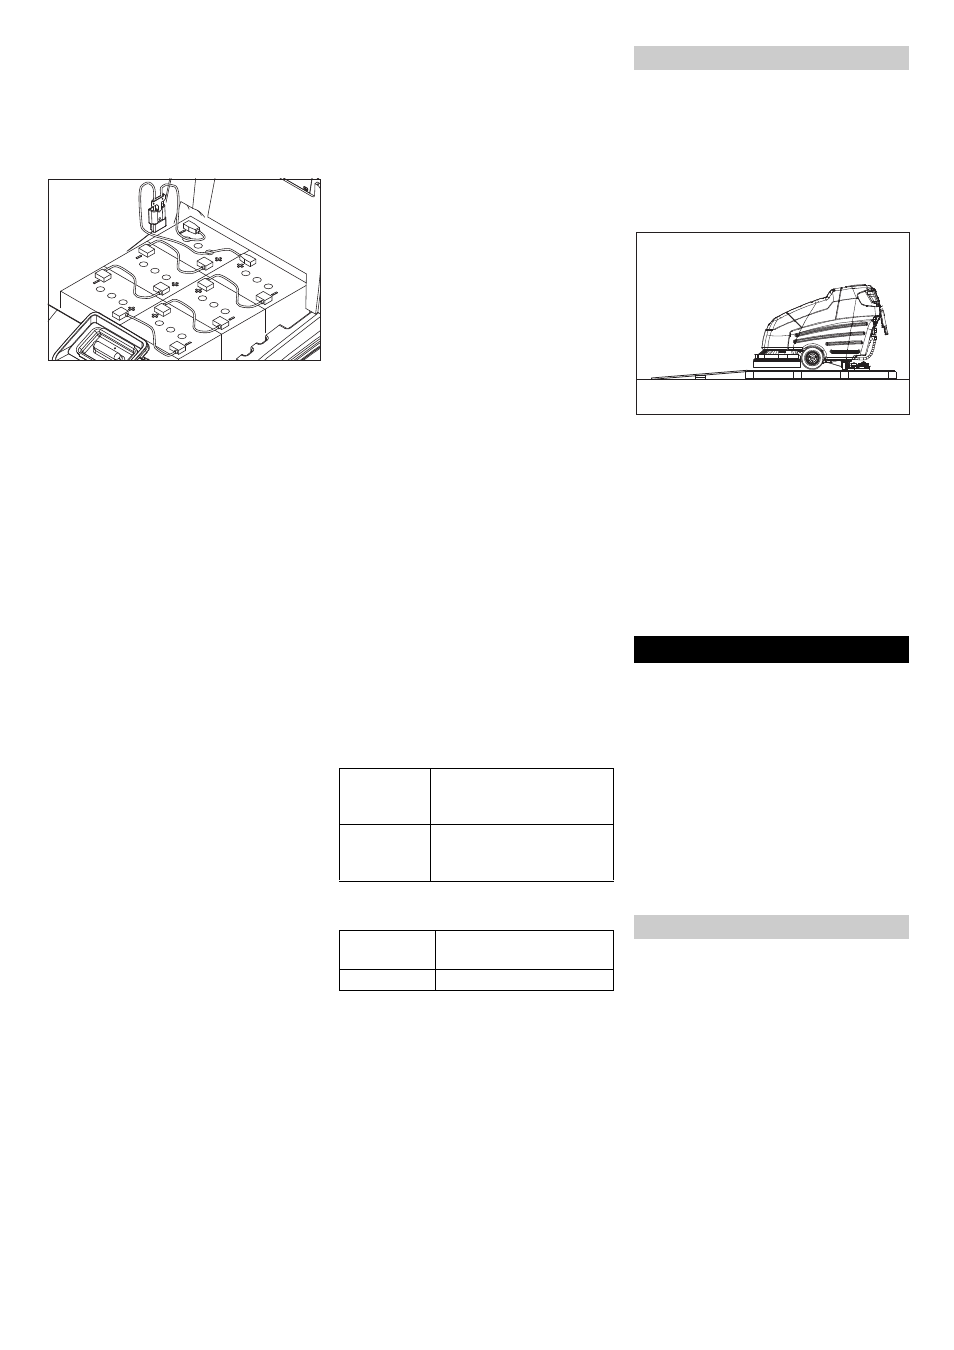
Î
Place long lateral boards of the packag-
ing as a ramp next to the pallet.
Î
Fix the ramp on the pallet with nails.
Î
Place short boards as a support under-
neath the ramp.
Î
Remove the wooden bars in front of the
wheels.
Î
Remove fastening bracket at the axle.
Î
Set main switch to “1”.
Î
Lift the cleaning head.
Î
Press the driving lever and slowly move
the machine down from the ramp.
Î
Set main switch to “0”.
Note
Press the emergency-stop button to imme-
diately deactivate all functions and turn the
key switch to the "0" position.
ƽ
Danger
Risk of injury. Press on the foot pedal only
with one foot. The other foot must firmly be
placed on the floor. Press emergency-stop
switch to immediately switch off all func-
tions of the machine.
Î
Carry out maintenance jobs "daily be-
fore starting work" (see section "Mainte-
nance and Care").
Note
The machine is designed in such a way that
the brush head protrudes on the right. This
helps in working in a proper way even close
to the edges.
The machine has been approved for use on
surfaces with gradients of up to 2%.
Î
Release emergency-stop button by
turning.
Î
Insert key in key switch at the operator
console and turn to "1".
Î
First select the driving speed at the ro-
tary knob.
Î
Hold the device firmly at both the sliding
handles and press one driving switch -
the device will move.
Î
Release the driving switch to stop it.
Insert batteries and connect
Battery load indicator
Charging battery
Further, in case of maintenance-free
batteries (wet batteries):
Recommended batteries
Manufactur-
er, Kärcher
order no.
Description
DETA
6.654-124.0
Battery, 6 V, 180 Ah, main-
tenance-free, 6 pieces re-
quired
Recommended chargers
Kärcher Or-
der No.
Description
6.654-051.0
230V/36V, 25 A
Removing the batteries
Unloading
Operation
Driving
15
EN