Caution, Checking the conveyor belt chains – A.J. Antunes & Co VCT-1000 9210727 User Manual
Page 8
8
P/N 1010807 Rev.K 07/14
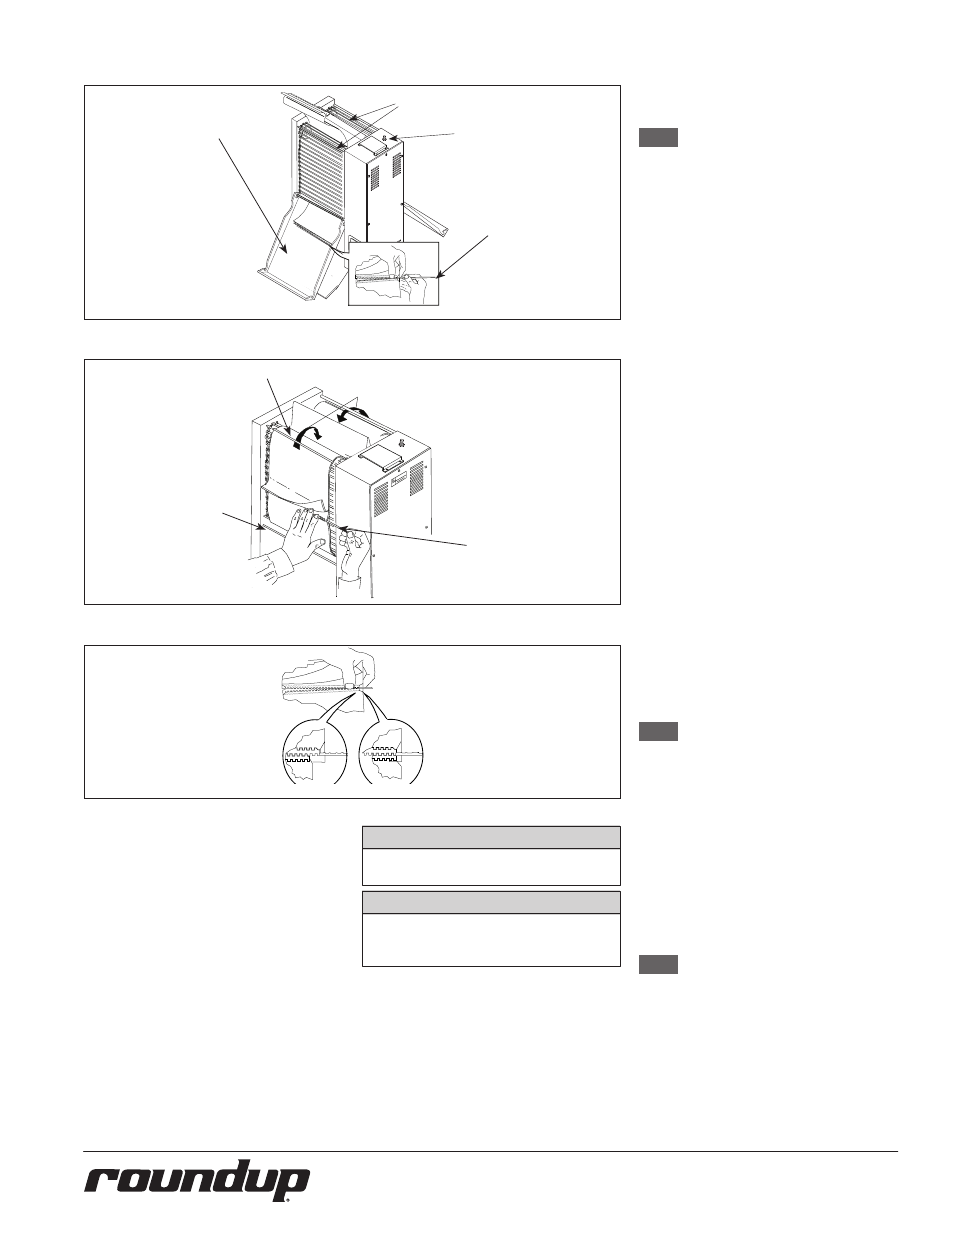
INCORRECT
CORRECT
Figure 10. Installing Belt Wrap
Figure 11. Aligning Belt Teeth
BELT WRAP
PIN
UPPER SUPPORT ROD
LOWER SUPPORT
ROD
Figure 9. Removing Optional Belt Wrap
INTERLOCK
SWITCH
CONVEYOR COVER
ASSY.
BELT WRAP PIN
CONVEYOR BELT CHAINS
CAUTION
Align the ends of the Belt Wrap properly (Fig-
ure 11) or the Belt Wrap may be damaged.
CAUTION
Position the Belt Wrap inside the up-
per and lower yellow support rods
or damage to the unit may occur.
Checking the Conveyor Belt
Chains
NOTE:
The Bun Thickness Compression
Knobs (Figure 7) must be set to “6
& 6” prior to measuring or remov-
ing or reinstalling the Conveyor
Belt Chains.
Measuring conveyor belt Chains
1. Turn the unit off, unplug the power
cord, and allow the unit to cool.
2. Remove the Bun Feeder, Butter
Wheel, Pan, and Heat Shield (Figure
1) and set the Bun Thickness Com-
pression Knobs to 6 & 6.
3. Open both Conveyor Covers and pull
the Belt Wrap Pin out of the zipper
(Figure 9).
4. Remove the Belt Wrap.
5. Facing the toaster, locate the
approximate center-point of the
Conveyor Chain.
6. Pull the Conveyor Chain away from
the edge of the toaster (Figure 12).
7. Stand a U.S. Dime on end between
the frame and the chain (Figure 12).
8. If the gap is significantly wider than
the coin, REMOVE links as described
below.
9. Disconnect the Conveyor Belt Chain
by squeezing any two links together
and unhooking both ends one link
(Figure 13). Needle-nose pliers may
be used.
NOTE:
There are two small 1/2” links on
each side of the Conveyor Belt
Chain. The rest are large 3/4”
links.
10. Remove one 1/2” link from the belt.
11. Reassemble the Conveyor Belt Chain
onto the sprockets as described in
Replacing Conveyor Belt Chains.
12. Measure the gap again to ensure it is
not too tight.
13. Check the opposite side of the
toaster using the same steps.
NOTE:
If the Conveyor Belt Chain is too
tight to be reassembled, remove
an additional small 1/2” link
and install a large 3/4” link in its
place. This will shorten the Con-
veyor Belt Chain by 1/4” overall.