Gas connection, Positioning – Indesit IS50D1XXS User Manual
Page 3
GB
3
Gas connection
T he cooker should be connected to the gas-supply
by a corgi registered installer. During installation of
this product it is essential to fit an approved gas tap
to isolate the supply from the appliance for the
convenience of any subsequent removal or
servicing. Connection of the appliance to the gas
mains or liquid gas must be carried out according to
the prescribed regulation in force, and only after it is
ascertained that it is adaptable to the type of gas to
be used. If not, follow the instructions indicated in
the paragraph headed “Adaptation to different gas
types”. On some models the gas supply can be
connected on the left or on the right, as necessary;
to change the
connection, reverse the
position of the hose
holder with that of the
cap and replace the
gasket (supplied with
the appliance). In the
case of connection to
liquid gas, by tank, use
pressure regulators that
conform to the
700 mm
HOT PARTS
c )
c )
c )
c )
c )Any hoods must be installed according to the
requirements in the installation manual for the
hoods themselves.
d )
d )
d )
d )
d )If the cooker is installed beneath a wall cabinet,
the latter must be situated at a minimum of 420
mm above the hob. The minimum distance
between the worktop and kitchen units made of
combustible material is 700 mm (Fig. A).
e )
e )
e )
e )
e )The wall in direct contact with the back panel of
the cooker must be made of non-flammable
materials.
f )
f )
f )
f )
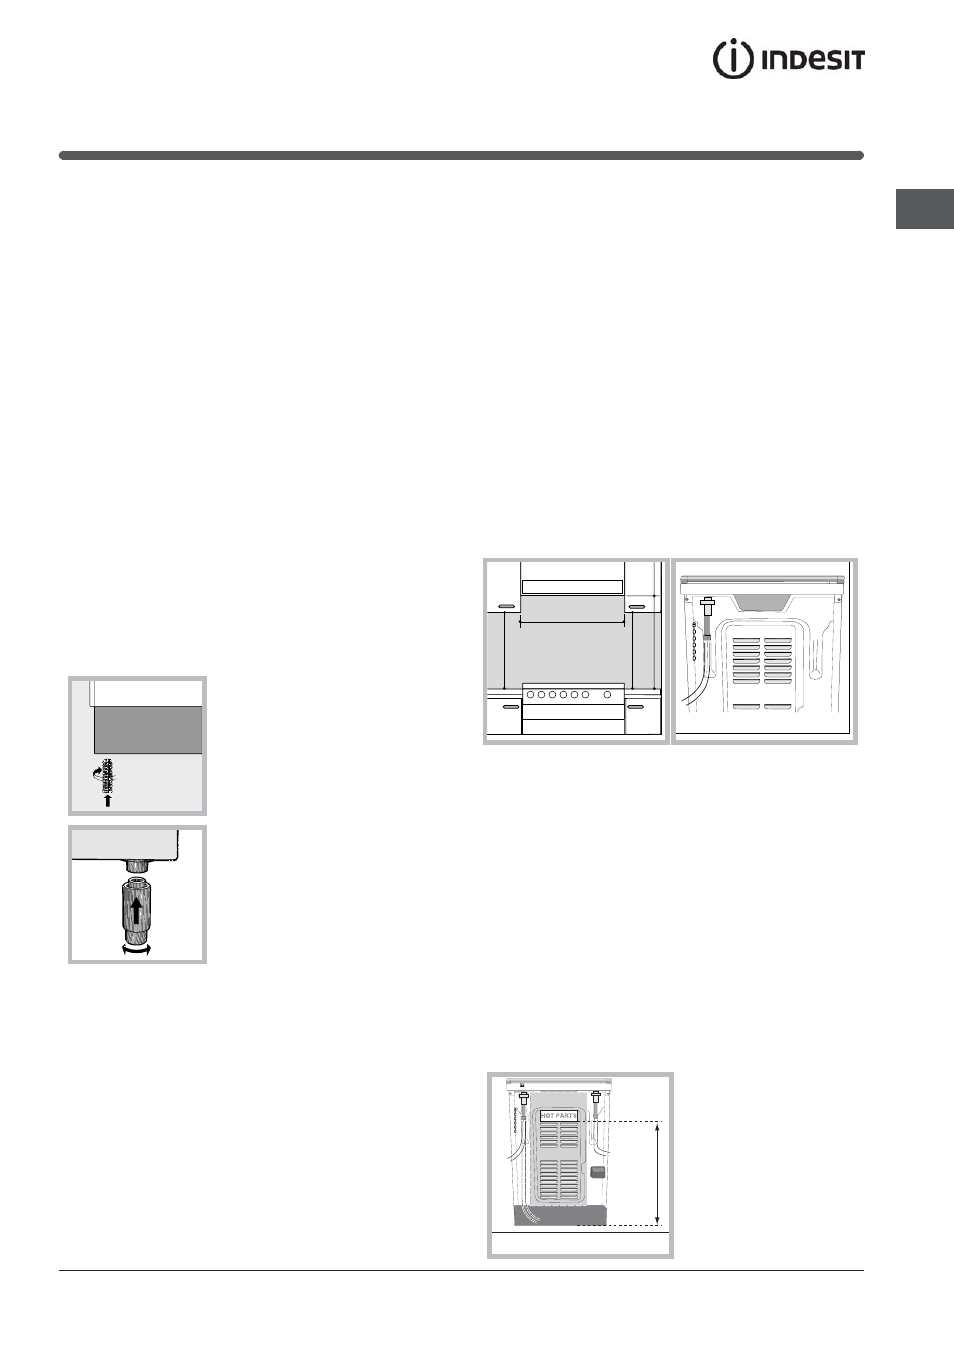
f ) The cooker is fitted with a safety chain that must
be attached to a hook, secured to the wall behind
the appliance.
! Some models can have their gas connection
inverted. It is important to make sure the safety
chain is always situated on the side which
corresponds to the hose holder (Fig. B).
Fig. A
Fig. B
HOOD
420
Min.
min.
650
mm. with hood
min.
700
mm. without hood
mm.
600
Min.
mm.
420
Min.
mm.
The legs* fit into the slots on
the underside of the base of
the cooker.
Installation of the cooker
The appliance can be installed next to furniture units
which are no taller than the top of the cooker hob.
The wall in direct contact with the back panel of the
cooker must be made of non-flammable material.
During operation the back panel of the cooker could
reach a temperature of 50°C above room
temperature. For proper installation of the cooker,
the following precautions must be taken:
a )
a )
a )
a )
a )The appliance can be placed in a kitchen, dining
room or bedsit, but not in a bathroom.
b )
b )
b )
b )
b )All furniture around the appliance must be placed
at least 200 mm from the top of the cooker,
should the surface of the appliance be higher than
the worktop of this furniture. Curtains should not
be placed behind the cooker or less than 200 mm
away from the sides of the appliance.
Positioning
!
! !
!
! This unit may be installed and used only in
permanently ventilated rooms according to the
British Standards Codes Of Practice: B.S. 6172/B.S.
5440, Par. 2 and B.S. 6891 Current Editions. The
following requirements must be observed:
a )
a )
a )
a )
a ) The cooker should not be installed in a bed sitting
room with a volume of less than 20m
3
. If it is
installed in a room of volume less than 5m
3
an air
vent of effective area of 110cm
2
is required, if it is
installed in a room of volume between 5m
3
and
10m
3
a supplementary airvent area of 50cm2 is
required, if the volume exceeds 11m
3
no airvent is
required. However, if the room has a door or a
window which opens directly to the outside no air
vent is required even when the volume is between
5m
3
and 11m
3
.
b )
b )
b )
b )
b )During prolonged use of the appliance you may
consider it necessary to open a window to the
outside to improve ventilation.
c )
c )
c )
c )
c ) If there are other fuel burning appliances in the
same room, B.S.5440 Part 2 Current Edition,
should, be consulted to determine the requisite air
vent requirements.
Levelling
If it is necessary to level the
appliance, screw the
adjustable feet into the places
provided on each corner of the
base of the cooker (
see
figure).