Avanti D110-1 User Manual
Page 6
6
Wall Mounting Instructions
** It is recommended to complete the following procedure with at least 2 people **
Tools Required
Tools and parts
required for Plaster
and or Wood
Installation
Drill & Drill Bit
1
Phillips Head Screw Driver
1
Wood screws 2” long
4
Wall Mounting Kit Includes the following:
Description
Wall Hanging Bracket
2
Wall Hanging Hook
2
Plastic Spacers
2
Exhaust Pipe
4 (Pieces)
a) Determine the position where you will be installing the mounting bracket.
(This dryer is not designed to sit directly on top of your washing machine).
(A minimum of 2 inches in required between the top of the dryer and the ceiling to allow easy
installation and adequate space for exhaust).
(If mounting above a washing machine, allow sufficient spacing to open the lid of the washer or
breathing room in the case of a front loading washer).
b)
c)
Affix the wall mounting bracket (included)
securely to the wall (directly to the stud).
(If a stud is not available, use a wooden slat
between the studs to mount the bracket)
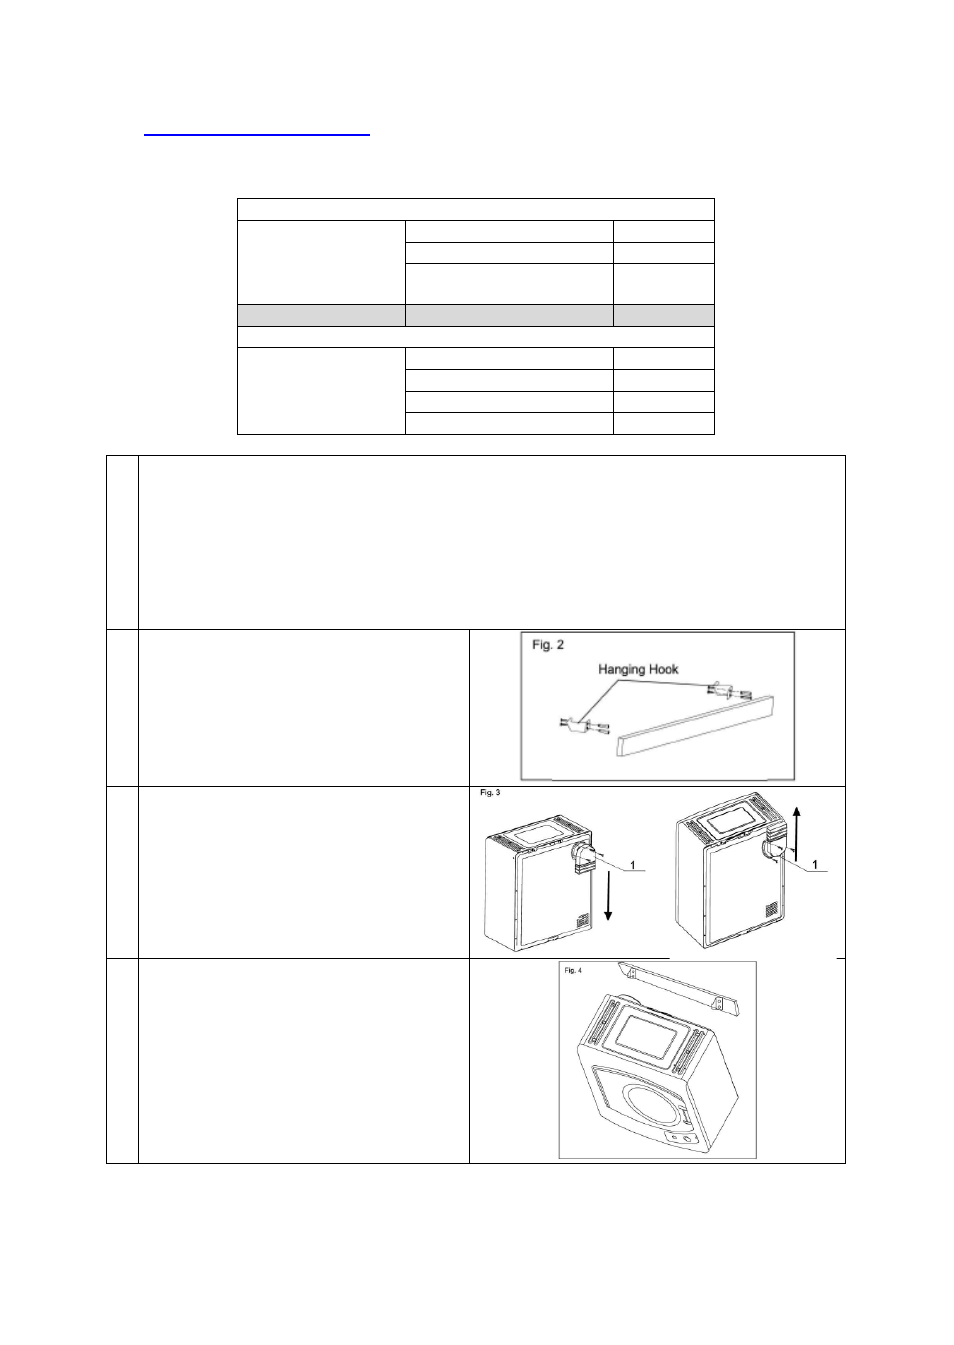
Install the Wall Hanging Hooks as shown in
illustration (Fig. 2).
d) Install the exhaust pipe as shown in
illustration (Fig. 3). (Installation hardware
included)
• For a downward exhaust join the
sections (1) pointing downward.
• For an upward exhaust join the sections
(1) pointing upward.
e) Mount the dryer on the wall bracket as
shown in illustration (Fig. 4).
** It is recommended that this step be done
by two (2) or more persons **