Samlex America ADJ-28 User Manual
Page 6
6 | SAMLEX AMERICA INC.
Section 3 |
installation
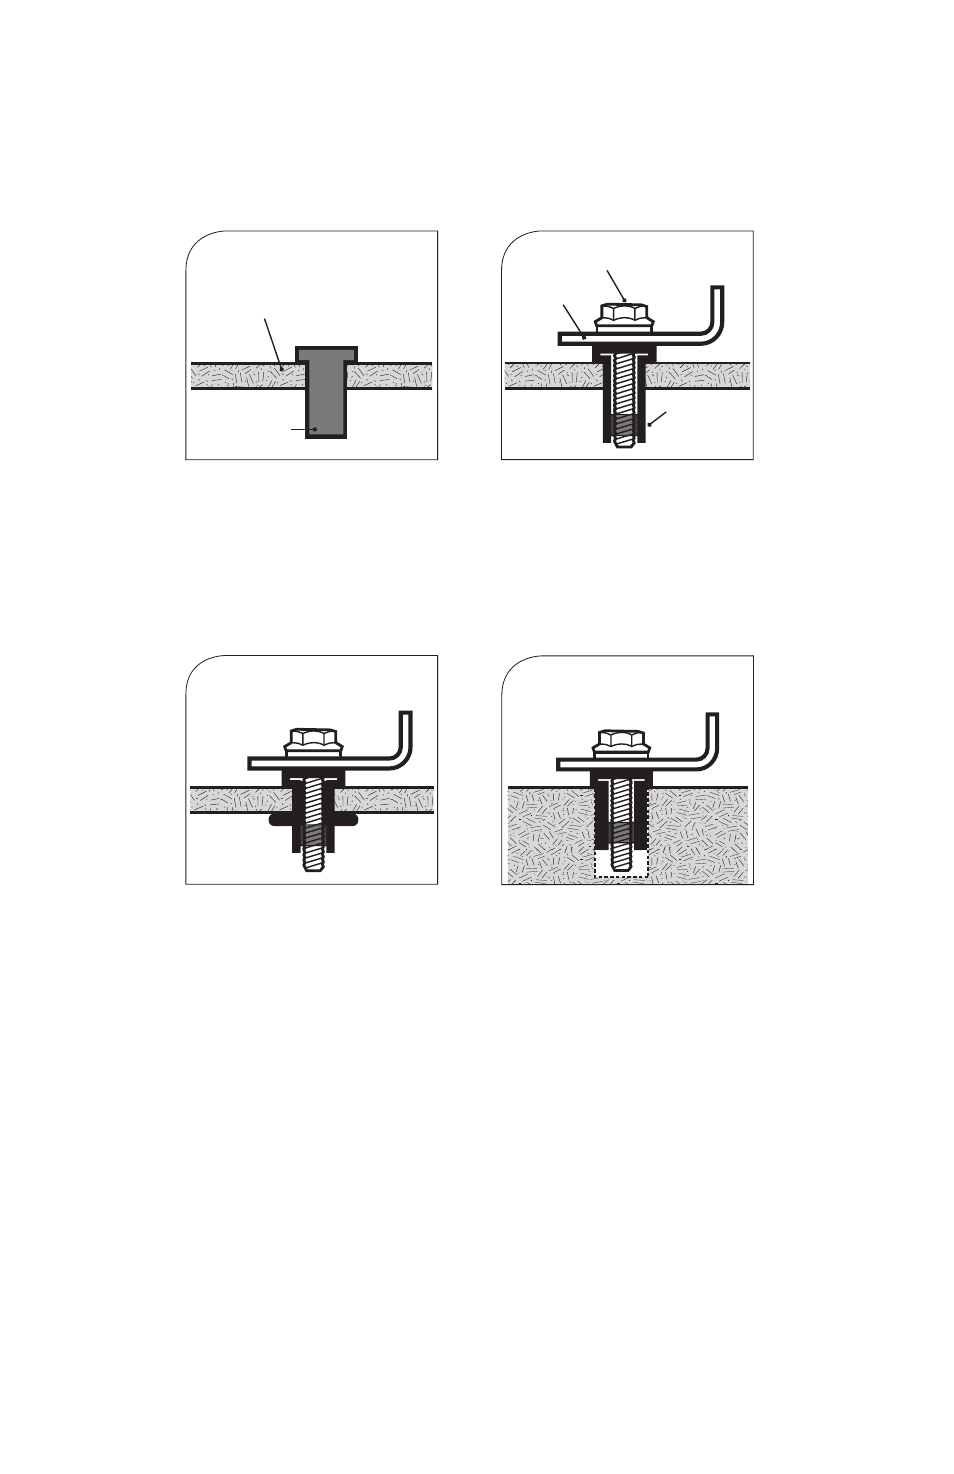
Typical Installation Of A Well-Nut
Installation Procedure
Determine the position of the solar panel on the RV roof or fl at surface. While position-
ing panels, avoid shading of the solar panel by neighboring obstacles such as vents, air-
conditioners, TV antennas etc. As far as possible, position the panels to minimize wiring
distance between the solar panel and the charge controller. Place the panel at least 8-10
inches away from the RV roof edges and leave suffi cient space to walk around the panel
and access the mounting hardware.
Make sure the thickness of the roof at the installation location is at least ½” thick and
the material is strong enough to provide mechanical support to the solar panel and
Fig. 3. Well-Nut is inserted
into a pre-drilled hole with
its fl ange against the outer
surface. There is no need for
access to the
inner side.
RV Roofing
Material
Well Nut
1/4”-20 x 1
1/4
”
Serrated
Flange Bolt
Mounting
Rail
Captive
Brass Nut
Fig. 4. The 28" mounting
rail is placed against the
fl ange of the Well-Nut and
is secured by the 1/4"-20 x
1
1/4
" serrated fl ange bolt
engaging the captive brass
nut.
Fig. 5. As the bolt is
tightened, the neoprene
body of the Well-Nut is
compressed and expanded,
forcing it tightly into the
bolt's threads and against
the inner surface of the
thin RV roof material.
Fig. 6. Installed in a blind
hole in a solid material,
the body of the Well-Nut
expands tightly against
the walls of the hole,
effecting a secure,
dependable fastening.