Countertop/desktop installation – Audiovox VE 700 User Manual
Page 10
- 10 -
adhesive wire-mounting clip provided.
NOTE: Use caution to avoid damaging the LCD screen and the main unit when converting
this unit from an under-counter unit to a countertop unit. Leave the protective plastic on
the screen until this procedure is completed.
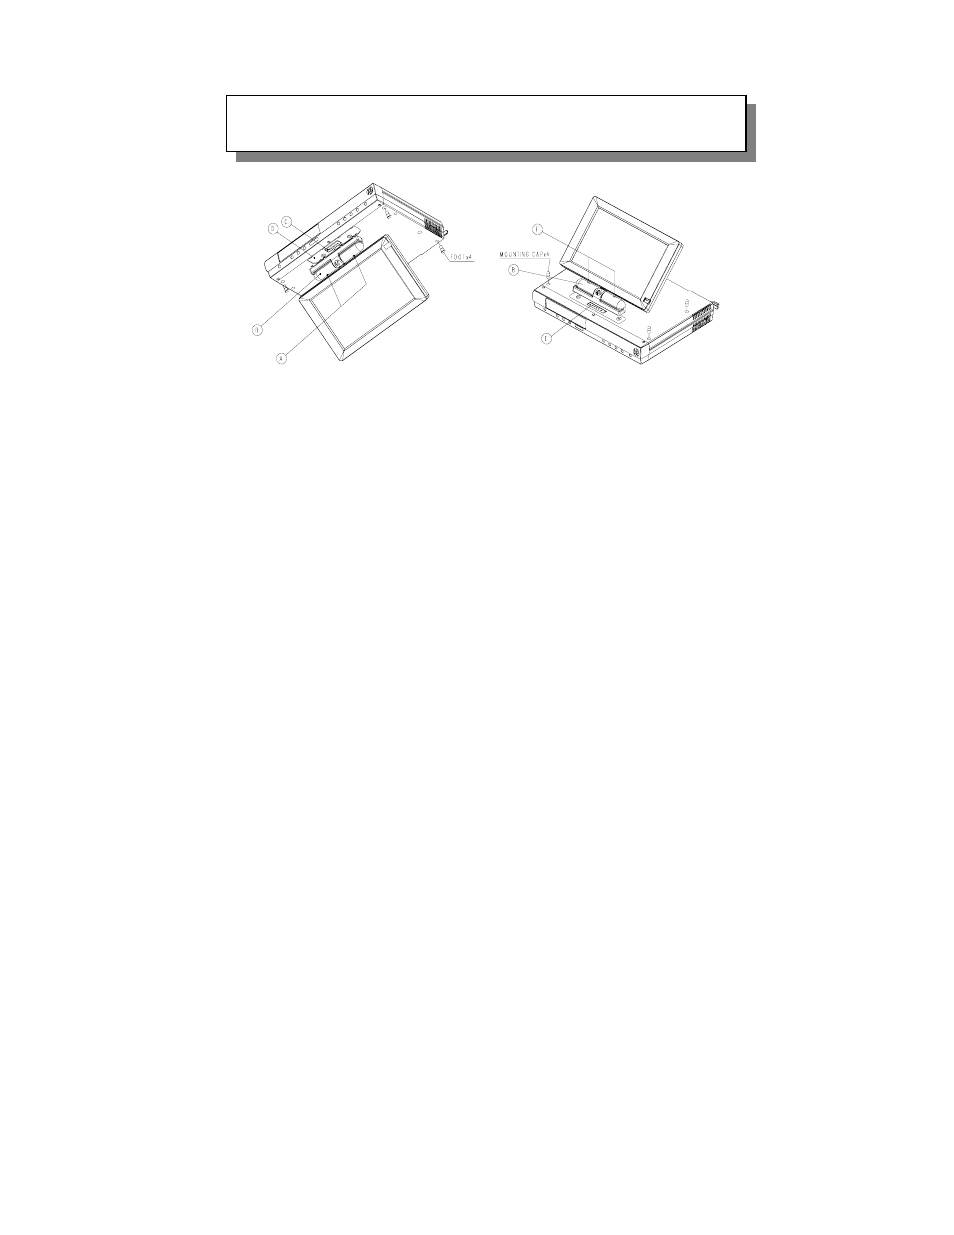
1)
Place the unit (with the screen facing up) on a soft padded surface.
2)
Pivot the screen so that it is perpendicular to the front of the unit. This will ease removal of
the screen.
3) Using a small (#1) Philips screwdriver remove the screws from the areas marked A.
Remove bezel B (and screen) from the unit by squeezing the back lower area of the bezel.
Note: A small flat blade screwdriver may be inserted into the slots at the base of B. After B
is removed, carefully unplug the connector from the base of the unit. (Be careful with the
LCD screen to avoid damage)
4)
Turn the unit back over and remove the cover from E using a small flat blade screwdriver
and use it to cover D (the area where the screen was removed).
5)
Connect the plug of the LCD monitor into connector E. Snap B into the top of the unit
being careful to not damage the wires. Replace the screws in F. (Note: Do not over-
tighten.)
6)
Insert the rubber pieces (Foot, Mounting Cap - please refer to the illustration above) into the
unit.
COUNTERTOP/DESKTOP INSTALLATION