Ariens 985115 User Manual
Page 18
GB - 18
IMPORTANT: Tighten and loosen the bolts in a cross
sequence as shown in Figure 16.
4. Tighten all PTO brake bolts until the springs are
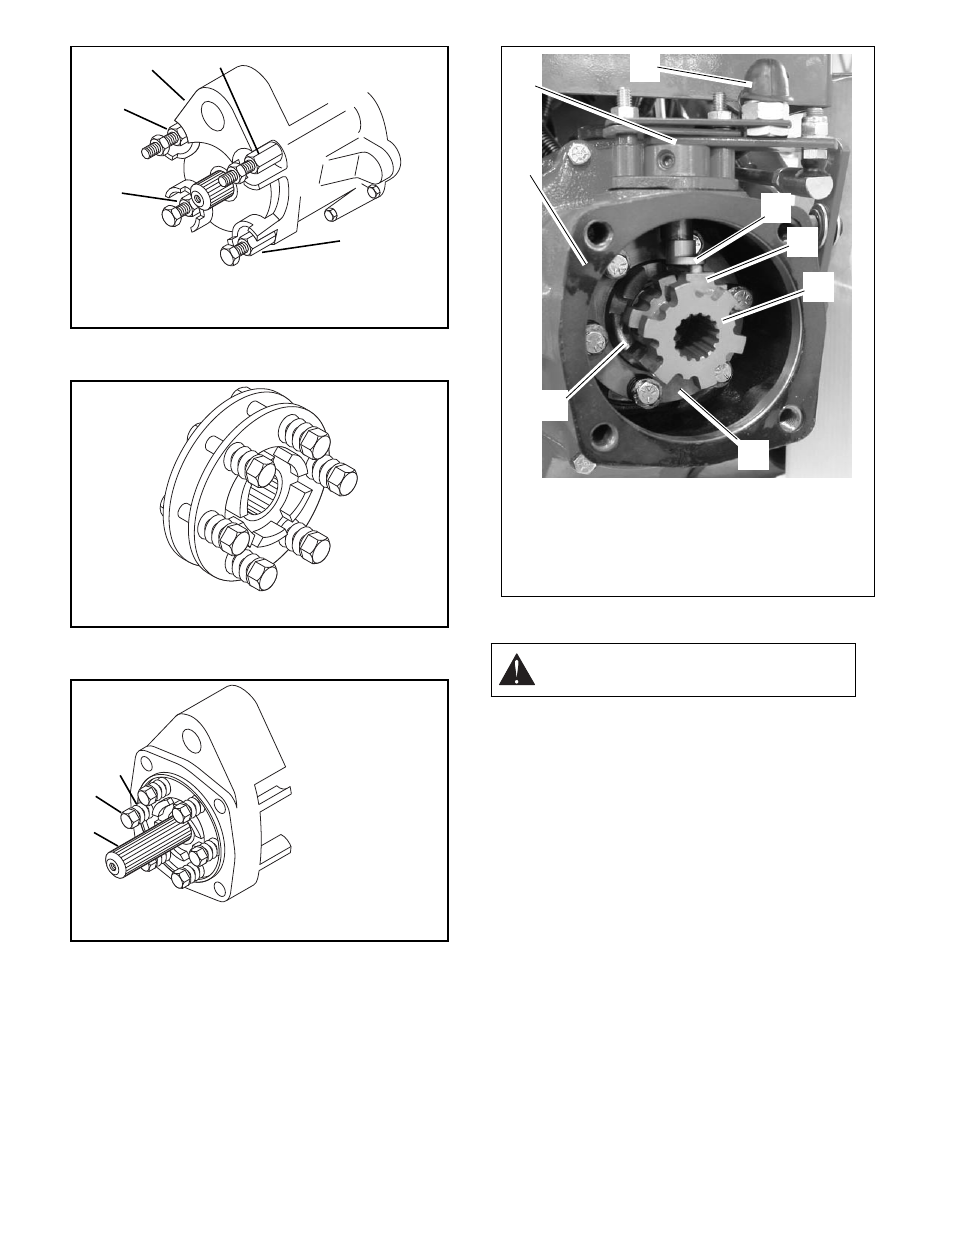
solid. Back all bolts up 1/2 turn (Figure 17).
NOTE: Make sure the trunnion block is on the shipper
shaft and held in place by the dog. The dog should rest
on the spiral teeth of the clutch dog plate. Install the gas-
ket (Figure 18).
Align the splines on the quick hitch shaft with those in the
dog. Slide the quick hitch casting and PTO brake
assembly back into the place on the front of the
transmission. Install the quick hitch studs and tighten.
SLIP CLUTCH
To adjust the slip clutch:
1. Remove the attachment and lower the rear of the
tractor to the ground.
2. Carefully clean the front of the transmission.
3. Remove the quick hitch studs from the
transmission.
4. Remove the quick hitch PTO assembly and PTO
brake assembly.
NOTE: The attachment gasket must be replaced if
damaged.
5. Remove the dog and trunnion block (Figure 18).
6. Disconnect the wiring harness from the PTO brake
interlock switch.
7. Remove the shifter parts.
8. Slide the shipper shaft assembly through the top of
the advance casting.
9. Slide the clutch assembly and pinion shaft out of
the transmission (Figure 18).
10. Remove the retaining ring and slide the clutch
assembly off of the pinion shaft.
Figure 15
1. Quick Hitch Adapter
2. Quick Hitch Stud
1
2
2
2
2
1
2
3
4
5
6
Figure 16
Figure 17
1
3
2
1. PTO Brake Bolts
2. Springs
3. PTO shaft
WARNING: Stop the engine before
adjusting the slip clutch.
Figure 18
1. Shifter Parts
2. Wiring Harness
3. Shipper Shaft
4. Trunnion Block
5. Dog
6. PTO Slip Clutch
Assembly
7. Clutch Dog Plate
8. Gasket
1
2
3
4
5
6
7
8