Operation, Warning – Hot Max Torches 135WFG User Manual
Page 14
KDAR Company
13
Operation
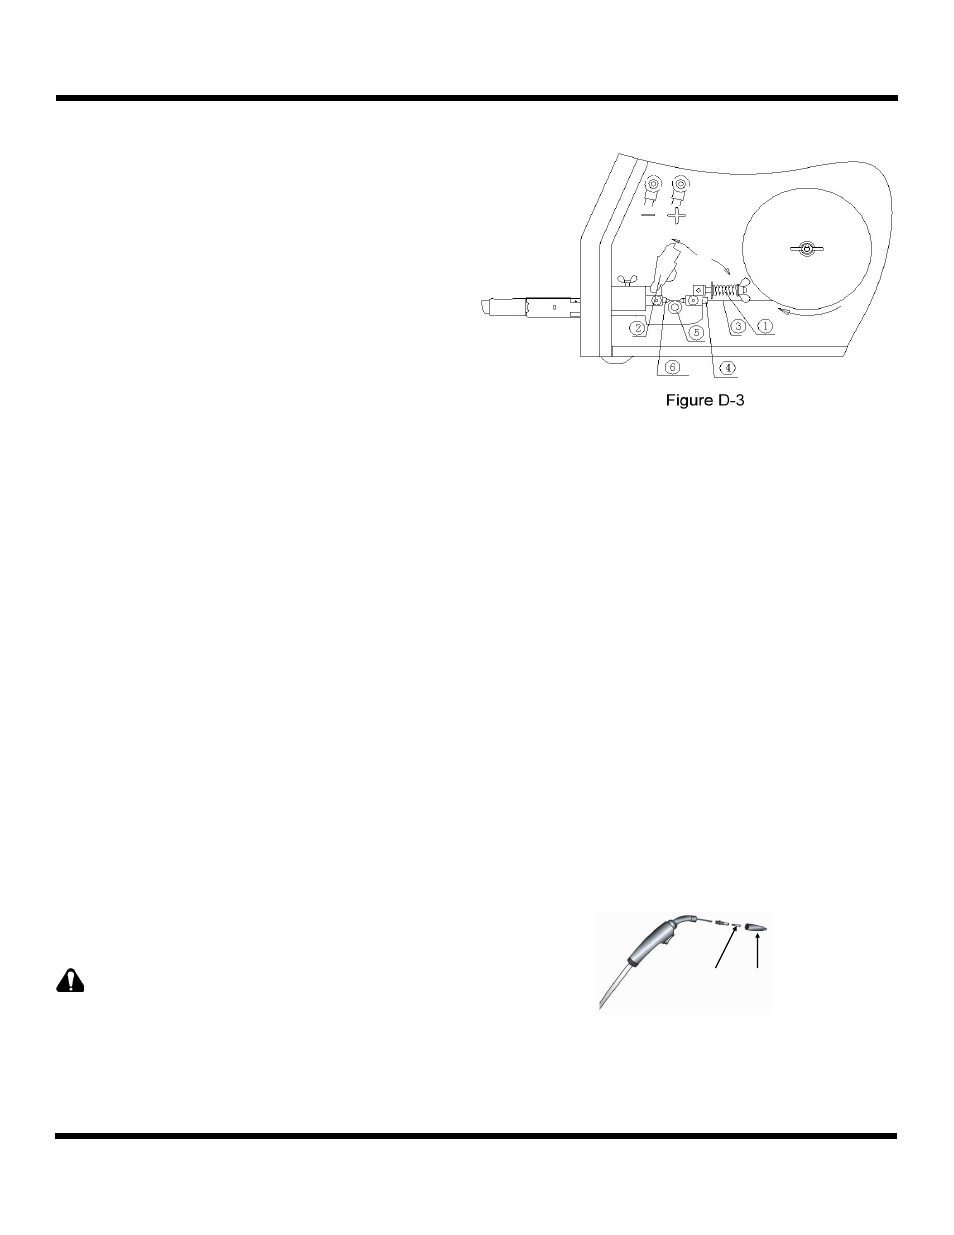
Wire Feeding
1. Release the spring loaded tension arm (1) by flip-
ping it to the right and down.
2. Lift the idle arm (2).
3. Make sure the grove size on the drive roll (5) is in
the feeding position that matches the wire size be-
ing used. Refer to the Suggested Settings for
Welding chart at the back of this manual or on the
inside of the welder compartment door.
4. Detach the end of the wire from the spool and clip
a small amount of wire to get a good straight start.
Note: In order to prevent the spool from un-
winding; it is important to keep tension on the wire
until after the idle arm and tension arm are back in
place.
5. Thread the wire through the inlet tube (4), over the
drive roll (5) and into the outlet guide tube (6).
6. Close the idle arm (2).
7. Move the spring loaded tension arm (1) into posi-
tion.
8. If required, rotate the wire spool counter clockwise
to take up any slack in the wire.
9. If feeding problem occur because the wire is ex-
cessively flattened, turn the wing nut on the spring
loaded tension arm (1) counter clockwise to reduce
the pressure. If the drive roll (5) is slipping while
feeding the wire; turn the wing nut clockwise to
create more tension on the wire.
When feeding the wire, the drive roll, the connector
block and gun contact tip are electrically charged
relative to work and ground and remain charged
for several seconds after the gun trigger is released.
Warning
8
7
Figure 13
10. Remove nozzle (7) and contact tip (8) from
end of gun.
11. Turn on the Hot Max 135WFG.
12. With the gun cable assembly straight; press the
trigger switch. The welding wire will feed
through the cable and gun. Release the trigger
when the wire has fed approximately 2 inches
past the end of the gun.
13. Turn off the Hot Max WFG.
14. Replace the contact tip (8) and nozzle (7)
15. Cut wire off approximately 3/8” from the end
of the contact tip. The Hot Max 135WFG is
ready for welding.