Installation procedure, Maintenance – Haws H1107.8 User Manual
Page 4
08/08
Model H1107.8
Page 4 of 7
INSTALLATION PROCEDURE…
Step 9: Adjust bubbler stream height using a small flathead screwdriver inserted through a
hole in the center of the push button for increased flow turn clockwise and for
decreased flow turn counterclockwise. If flow problems arise, see troubleshooting
guide for additional instructions to correct problem. Bubbler stream may lower during
short break-in period. Set initial stream height a little high to minimize or eliminate the
need for break-in period readjustment.
Step 10:
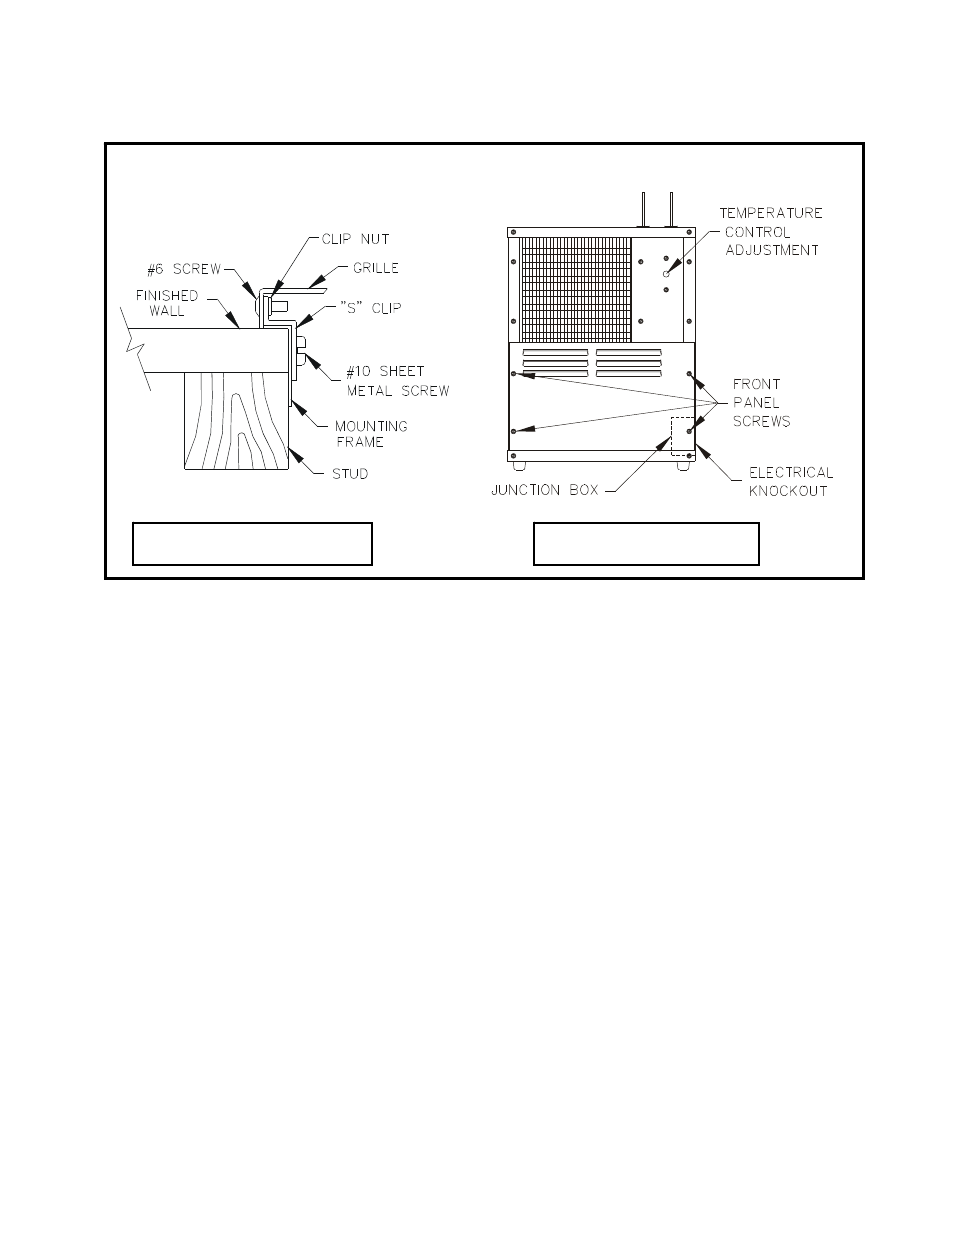
Verify that electrical power is off and power supply voltage, phase and cycle match
specifications printed on chiller label. In accordance with local codes, wire directly to
incoming lines at internal chiller junction box. Verify that all of the inner packing is
removed and hand rotate fan blade to verify free rotation. Replace the chiller front
panel and ten panel screws. Turn power on and verify that the chiller cycles off after
water reaches proper temperature. Finally check for leaks.
Step 11: Install grille and tighten outer side screws. Verify there is chilled water out of bubbler.
MAINTENANCE
Step 1: Periodically clean the strainer located inside the valve body. Refer to 5874 Valve body
for more information.
Step 2: The condenser fins on chiller should be periodically cleaned with a brush, an air hose
or a vacuum cleaner. Care should be taken not to bend or deform the condenser fins.
FIGURE 1
FIGURE 2