Yetter 6200-108 HD Twisted Link Drag Chain Kit User Manual
Page 2
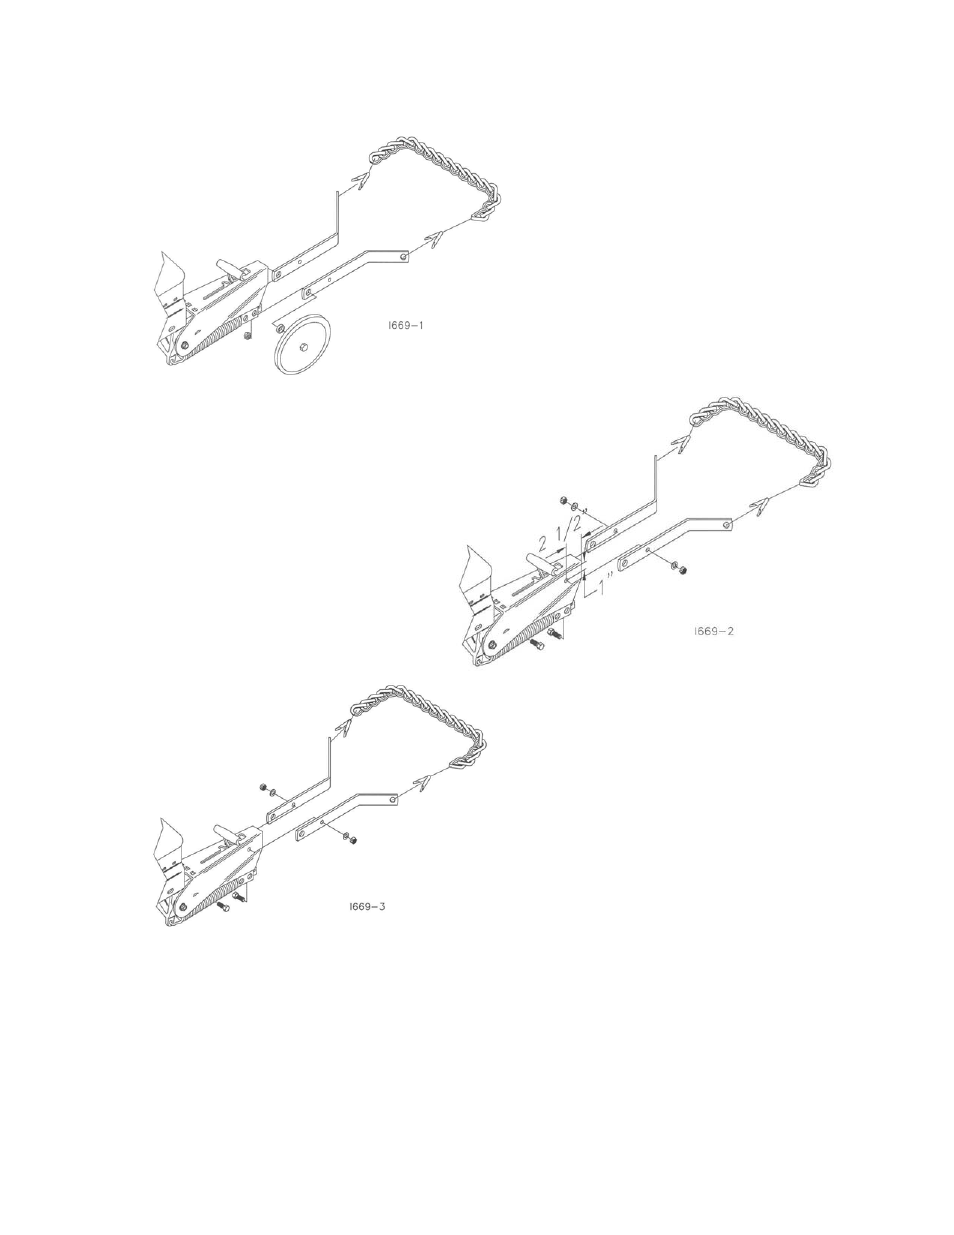
INSTALLATION / ASSEMBLY INSTRUCTIONS
STYLE 1.
Attaching drag
chain kit to closing wheel arm
with bolt on wheels. Discard
two of the flat washers or
spacer if necessary and install
the bracket as shown in
drawing to the left. Note:
Keep the 1 x 12 closing wheels
spaced 1 ¼”-1 ½” apart and
the spike wheels spaced 2” – 2
½” apart. Securely tighten
hardware.
STYLE 2.
Attaching drag chain kit to
closing wheel arm without holes or
bolt on wheels. Drill a 13/32” hole on
each side of arm. Locate hole as
shown in drawing to the right. Using
3/8” x 1” hex bolt, flat washer and
locknut, attach brackets as shown.
Securely tighten hardware.
STYLE 3.
Attaching drag chain
kit to closing wheel arm with
holes provided. Attach brackets
as shown in drawing to the left
using 3/8” x 1” hex bolt, flat
washer and locknut. Securely
tighten hardware.
Adjustments:
Position brackets to carry front of chain about 3” to 4” above
soil. Securely tighten hardware. For best soil leveling, keep front end of the
chain as low as possible while maintaining clearance above the soil for the
bracket ends. Use drag chains when planting in minimum till or in no-till where at
least some of the soil surface is dry.
NOTE: As with any type of furrow closing devise it is advisable to do in field
checks and make adjustments as necessary. There is no substitute for visual
inspection to verify that the seed is being properly placed. Careful attention is
required when using herbicide and/or insecticide, consult your chemical provider
for compatibility.