Warnings – Powerwinch 315 User Manual
Page 6
315
B
OAT
T
RAILER
W
INCH
P
OWERWINCH
4
W
IRING THE
U
NIT
WARNINGS
A
LWAYS
disconnect the battery before working on electrical equipment.
A
LWAYS
use the recommended wire size and rated circuit breakers. Failure
to use the furnished and recommended sizes can cause a fire hazard and
void warranty.
When routing the wiring, avoid sources of heat.
When routing the wiring, avoid sharp edges that can cut or fray the wire
insulation.
The following instructions are for permanently wiring the winch. Two additional wiring
kits are available and sold separately: A universal bumper wiring kit (p/n P7702101AJ)
and a quick connect wiring harness (p/n P7866000AJ) for temporary connections. If
installing one of the kits, follow the directions with the kit.
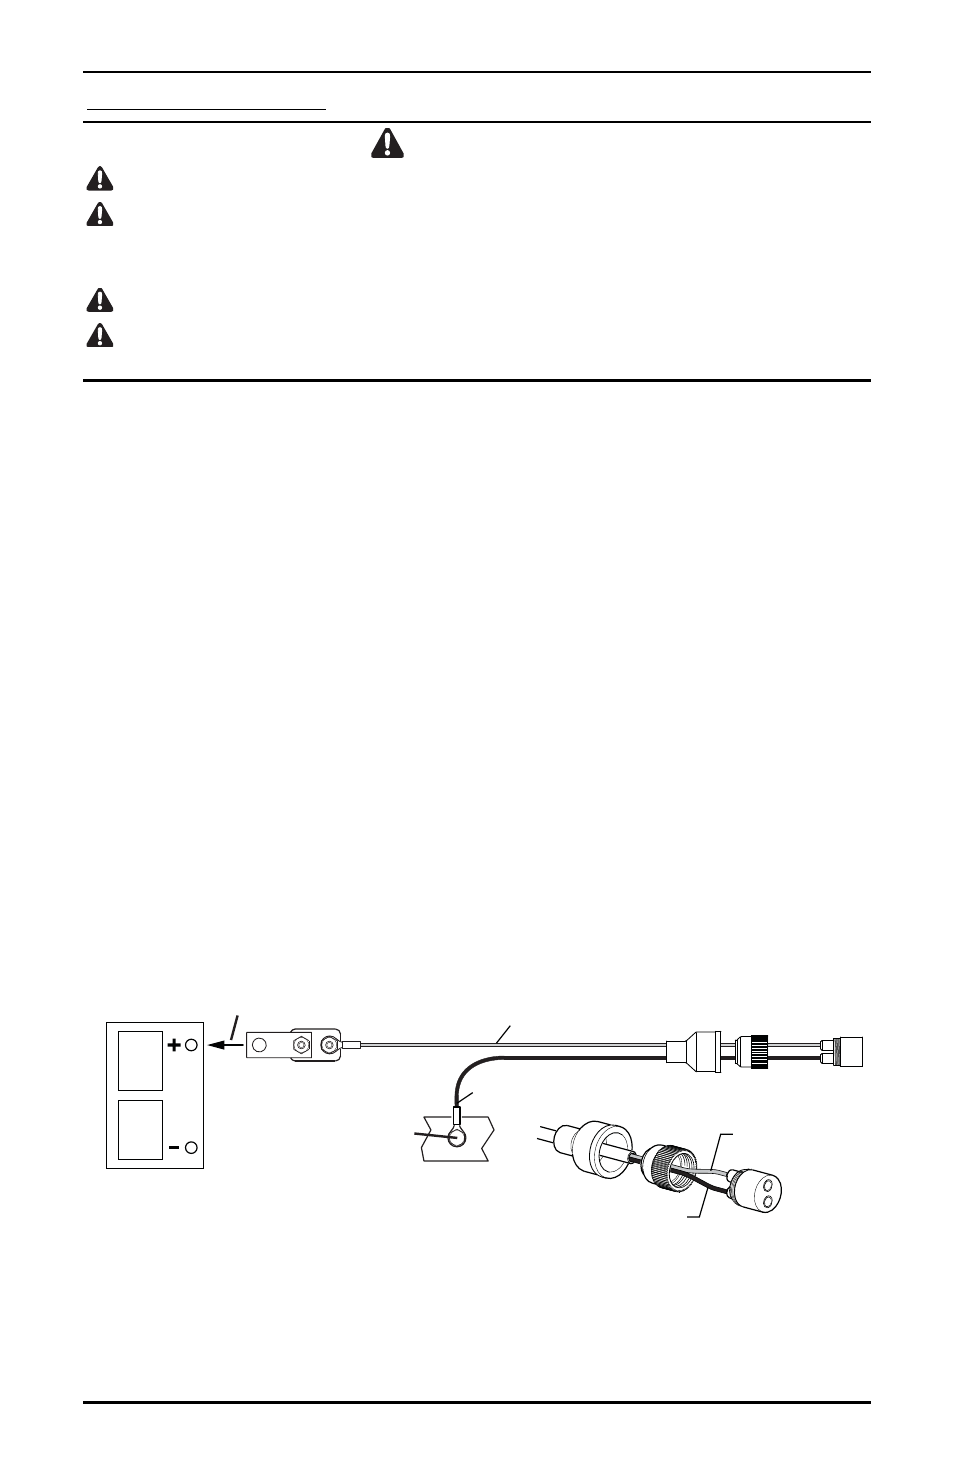
1.
Slip the boot and cover over the end of the wire cable.
2.
Strip approximately 3/8” of insulation from the red and black wires.
3.
Attach the wires to the plug. The red wire goes to the gold terminal, the black wire
goes to the silver terminal.
4.
Screw the cover onto the plug and slip the boot over the cover.
5.
Attach the circuit breaker to the battery's
POSITIVE
(+) post or positive (+) terminal of
the starter solenoid.
6. Attach the ground wire (black) to the vehicle frame. Clean the metal frame with a
wire brush or equivalent then attach the ground lug using a 5/16" bolt and lock nut
(bolt and nut not furnished).
7. Route the wire under the vehicle and along the frame. Avoid sharp edges and
moving parts. Secure the wire to the frame approximately every 18" using nylon
ties or equivalent.
Attach Ground
to Vehicle Frame
30 amp
Circuit Breaker
Connect To
Positive (+)
Post of Vehicle Battery
12V Vehicle Battery
pw315002
Power Plug
to Winch
Red Wire
Black Wire
Secure Harness to Frame
Approximately Every 18”
Red Wire
Gold Terminal
Black Wire
Silver Terminal
Plug
Plug
Cover
Boot