MBRP S5322 User Manual
Page 2
S5322 © 12/12
PAGE 2 OF 2
Removal of Stock System
1. Apply a penetrating lubricant liberally to all exhaust fasteners, hangers and rubber
insulators.
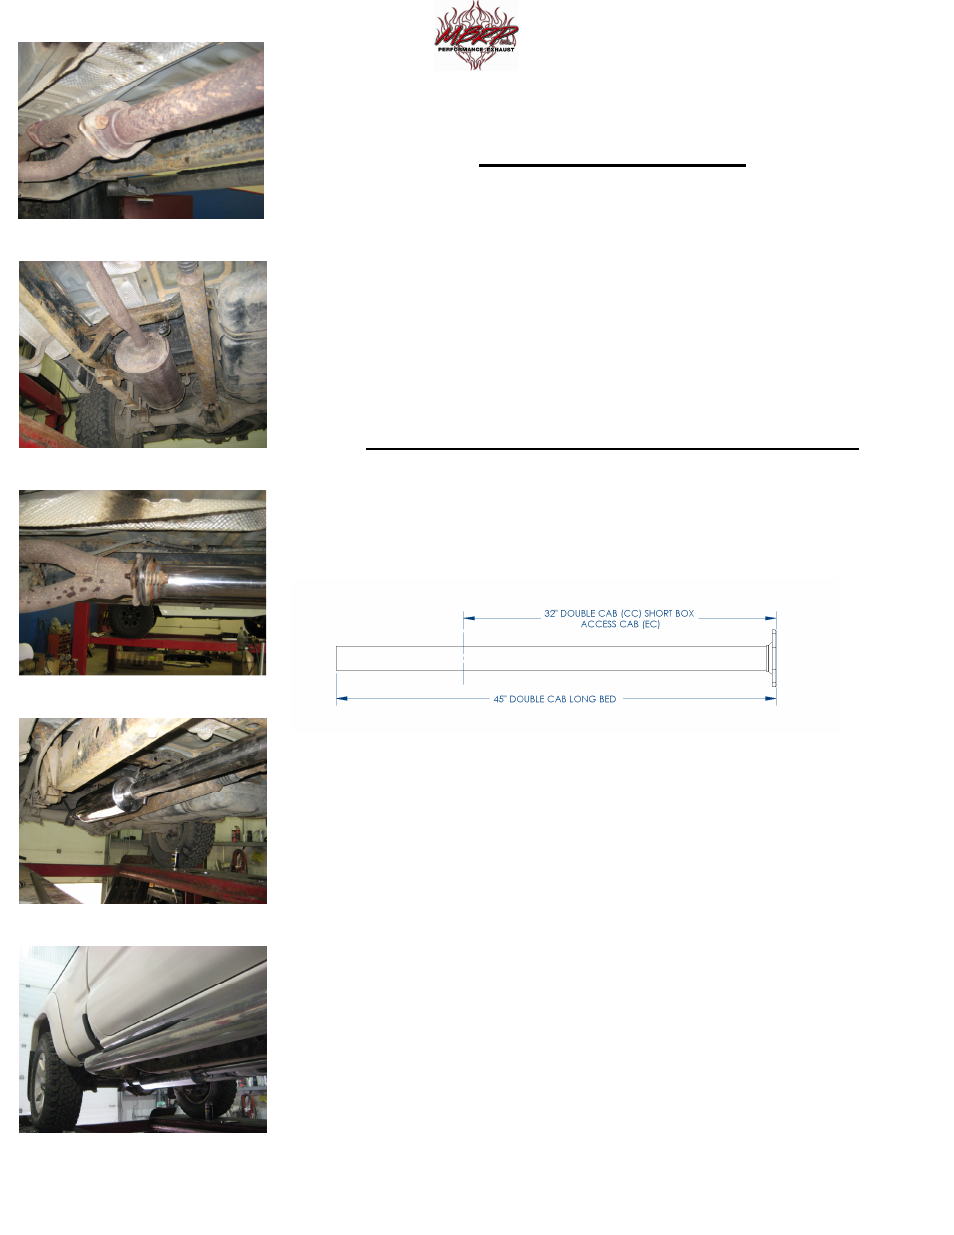
2. Remove the bolts and springs holding the front flange together and disconnect
exhaust system. Do not discard this hardware as it is used for the installation. Refer
to Figure 1.
3. Remove the hangers from the rubber insulators and remove the exhaust from the
vehicle. If a hoist or hydraulic lift is not being used the tail pipe may need to be cut to
clear the rear axle. Refer to Figure 2.
Installation of MBRP Inc. Performance Exhaust:
1. Slide two of the 5/8” Flatwashers over the bolts previously removed from the
flange and then slide the springs over the bolts. Now loosely attach the Extension
Pipe to the flange using the fasteners. Refer to Figure 3.
Note: The Extension Pipe will need to be trimmed on some models. Refer to the
illustration below.
2. Install the Muffler onto Extension Pipe using one of the 2 ½” Clamps. Then
install the hanger into the factory rubber insulator, do not tighten the clamp at this
time. Refer to Figure 4.
3. Slide a 2 ½” Clamp over the outlet side of the Muffler. Position the
Turn Down Assembly using the existing rubber insulators and loosely attach it to the
Muffler.
4. Align the exhaust as required. Starting at the front of the exhaust,
tighten all clamps and connections. Check along the whole length of the exhaust
system to ensure that there is adequate clearance from fuel and brake lines or any
wiring. If any interference is detected relocate or adjust.
Congratulations! You are ready to begin experiencing the improved power, sound
and driving excitement of your MBRP Inc. performance exhaust system. We know
you will enjoy your purchase.
Figure 1
Figure 2
Figure 3
Figure 4