Smokers – MBRP S8208 User Manual
Page 2
S8208 © 11/09
PAGE 2 OF 4
Removal of Stock System:
1.
Apply a penetrating lubricant liberally to all exhaust fasteners, hangers and rubber insulators.
2.
Loosen the nut on the band clamp located behind the catalytic converter using a 15mm wrench or socket.
3.
If a hoist is being used for the installation, the original exhaust system can be removed in one piece by removing
the passenger side shock. If a hoist is not being used the tail pipe must be cut behind the muffler to be removed.
4.
Remove the muffler and tail pipe from the OEM rubber hangers and separate the stock exhaust at the slip joint
located behind the catalytic converter and remove the muffler and tail pipe from the truck. Re-install the
passenger side shock.
5.
Remove the catalytic converter by removing the two nuts holding the inlet flange together using a 15mm wrench
or socket.
6.
Remove the down pipe from the turbo by removing the band clamp using an 11mm socket. Retain the band
clamp for the installation of the new down pipe. Cut the down pipe in front of the transmission cross member
to remove. (Note: The stock down pipe can be removed in one piece by removing the transmission cross
member. It is recommended that this only be done by qualified, trained professionals using tools and equipment
designed to safely carry out this procedure.)
Installation of MBRP Inc.
“Smokers
“Smokers
“Smokers
“Smokers
TM
TM
TM
TM
””””
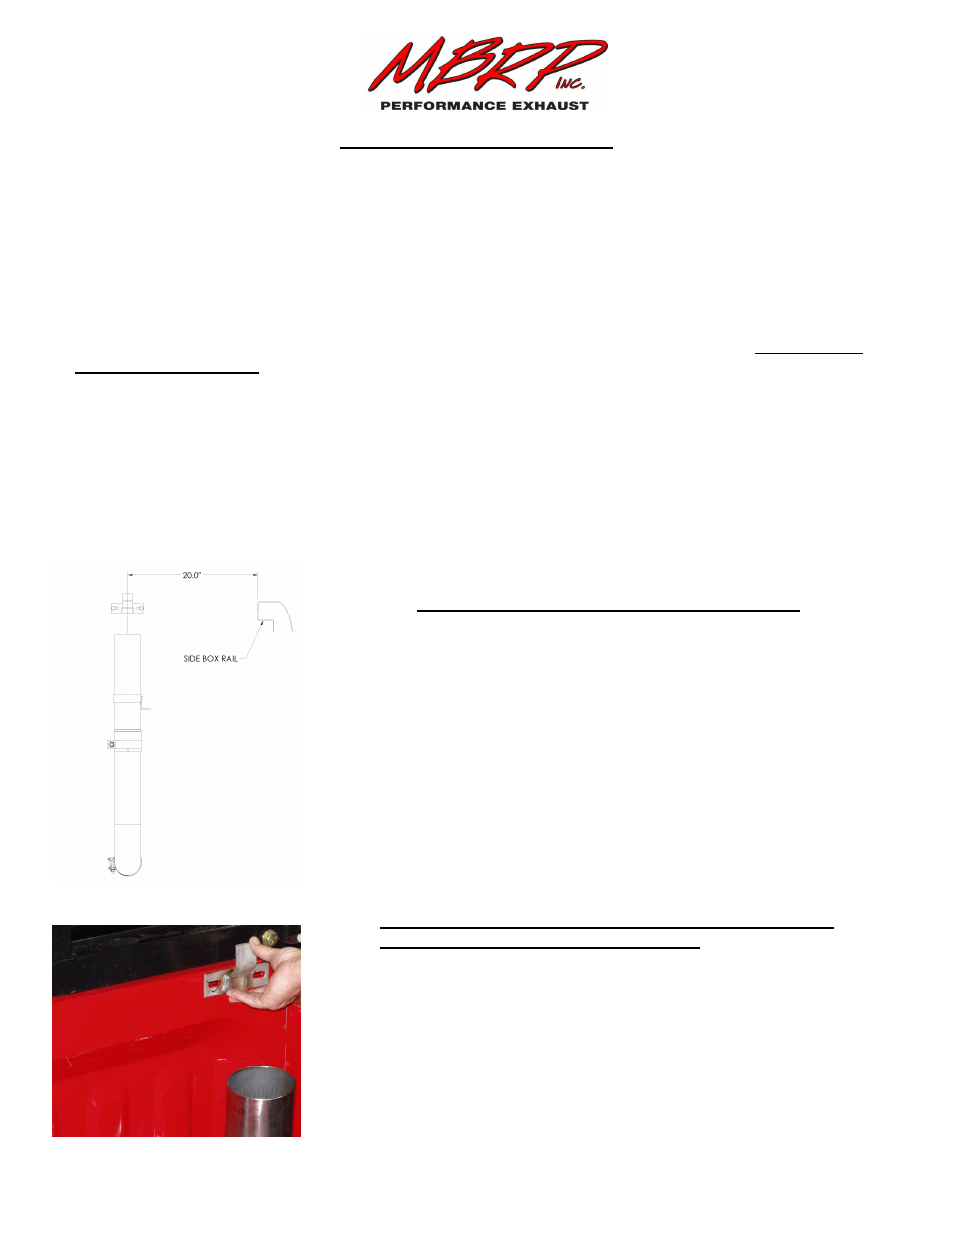
1. Measure across 20” from the inside surface of the passenger side
bed rail. Mark this location along the bed rail. This will be the
approximate centerline of the Stack once installed.
Refer to Figure 1.
2. Slide the Band Clamp (from Stack kit – purchased separately)
over the Stack. Wedge the Stack Mounting Bracket between the
Band Clamp and Stack and adjust to the bed rail height and
tighten the Band Clamp slightly. Make sure the Stack is vertical
and the Stack Mounting Kit is flush against the bed rail and
centered on the measurement made in Step 1. Trace a circle
around the base of the Stack and center punch the hole’s center.
Verify that the center punch hole is in line with your 42”
Extension Pipe and adjust accordingly. This will be the center
line of your Stack.
3. Align the Stack centered on the mark you made in Step 2. Mark
the bolt hole location of the Stack Mounting Bracket onto the front
rail of the bed. Center punch the marks and drill holes to
accommodate the 3/8” Bolt (included with the Mounting
Brackets). Refer to Figure 2.
Figure 1
Figure 2