MBRP S6284409 User Manual
Page 2
S6284 © 11/13
PAGE 2 OF 3
2011-2013 Ford Super Duty 6.7L Powerstroke Diesel
Removal of Stock Down Pipe:
1. Remove the front passenger-side wheel and then remove the wheel liner
to access the upper half of the stock down pipe.
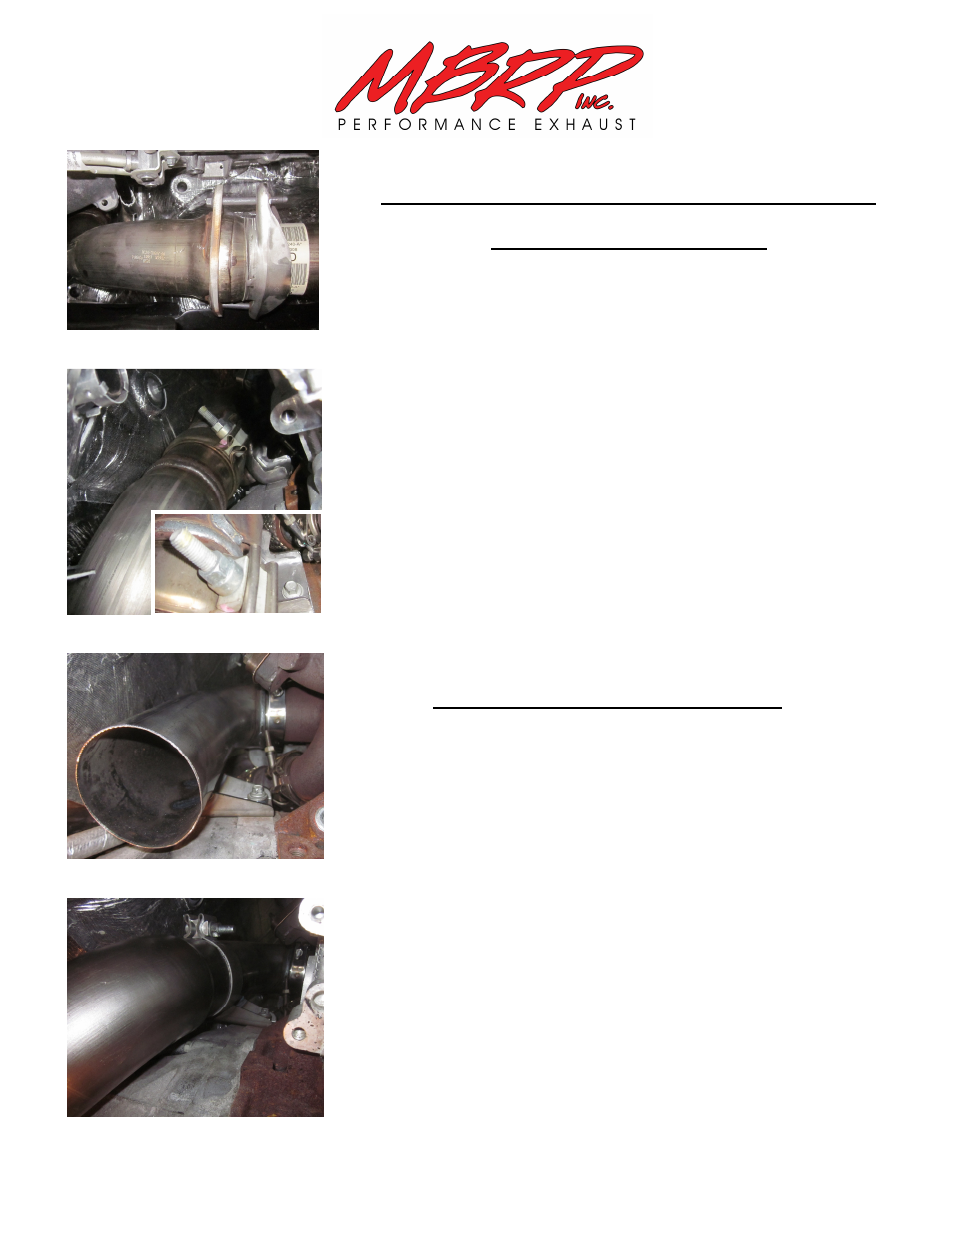
2. Remove the 2 OEM bolts from the ball flange at the outlet of the down
pipe. Use a pry-bar to shift the particulate filter rearward to allow the OEM
down pipe to drop down a few inches. Refer to Figure 1.
3. Loosen the clamp connecting the upper and lower halves of the stock
down pipe. Refer to Figure 2.
4. Use a pry-bar to shift the particulate filter rearward to allow the bottom
end of the OEM down pipe to drop down and be removed.
5. Loosen the OEM V-band Clamp at the turbo outlet. Once loose, the clamp
bolt can be released from the clamp.
6. Remove the bolt securing the bracket at the bottom end of the upper
down pipe section. Refer to Figure 2. Do not discard the bolt.
7. The upper half of the down pipe can now be removed. If it is stuck in place
it may be necessary to use a pry bar and/or an air hammer to loosen it.
Installation of MBRP Inc. Down Pipe:
1. Install the Upper Pipe onto the turbo, reusing the stock V-band clamp. It is
helpful to expand the v-band clamp over the outer edge of the Upper Pipe flange
in order to get it properly in place over the turbo outlet flange and the pipe flange.
Once the Upper Pipe is in position, loosely install the OEM V-band Clamp,
orientating it such that the bolt can be easily tightened.
2. Reinstall the flange bolt through the bracket on the Upper Pipe, then fully
tighten the V-band clamp and the flange bolt to secure the Upper Pipe.
Refer to Figure 3.
3. Install the Lower Pipe by first sliding the supplied Band Clamp over the pipe
and then sliding it onto the Upper Pipe. Do not tighten yet. Refer to Figure 4.
4. Using the supplied Hex Bolts, loosely secure the 2-bolt down pipe flange to the
OEM flange.
5. Ensure that there is enough clearance between the MBRP down pipe assembly
and the firewall, transmission cooler lines, and frame. Adjust if necessary. Once
clearances have been checked, tighten the remaining clamps and flanges.
6. Replace the wheel liner and the front passenger-side wheel.
Figure 1
Figure 2
Figure 3
Figure 4
6.
3.
3.
6.