MBRP S6100SLM User Manual
MBRP For the car
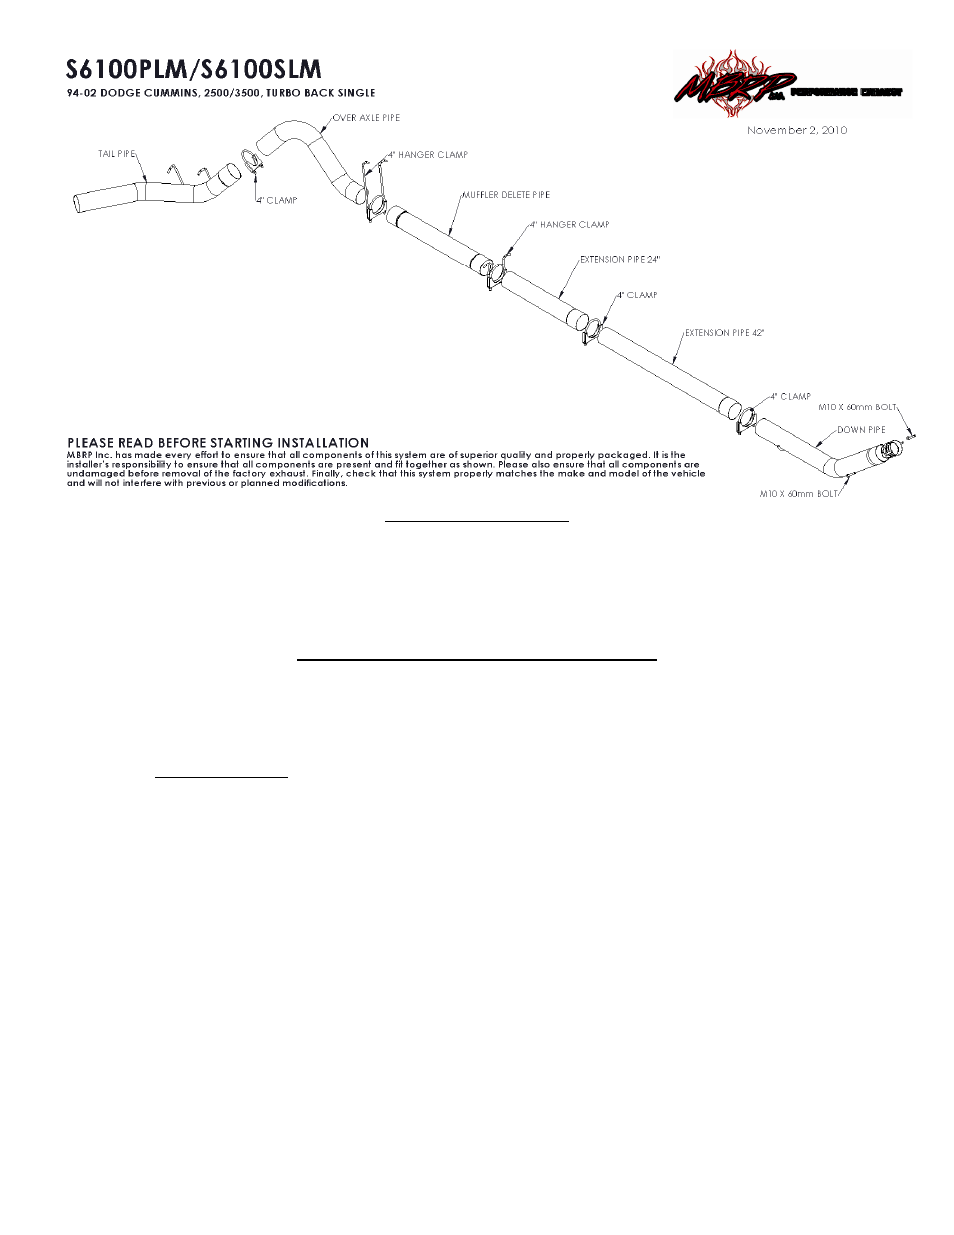
Removal of stock system:
1. Separate the stock exhaust system at the slip joint by the muffler. Remove the exhaust from rubber hangers and remove the
system from under the truck.
2. Using a 15mm socket or wrench, remove the two (2) bolts at the turbo flange and remove the stock down pipe.
Installation of MBRP Inc. Performance Exhaust:
1. Install the Down Pipe in the same position as the stock down pipe placing the hanger into the OEM rubber insulator and
attaching the flared end to the turbo using the supplied hardware. Do not fully tighten until all components are in place.
2. Install the 42” Extension Pipe over the Down Pipe. One of the Extension Pipes may require cutting to accommodate vehicles
other than the Quad Cab long bed. (Installation tip: Temporarily hang the Muffler Delete in place using the two OEM rubber
hangers and measure from the Muffler Delete to the Down Pipe to determine the length required.)
3. Install the Muffler Delete over the Extension Pipe and into the OEM rubber hangers above the inlet.
4. Install the Tail Pipe and Over Axle Pipe from the rear of the truck, over the axle and attach to the outlet of the Muffler Delete.
Now install the hangers into the OEM rubber hangers. (Note: 94-97 12 valve trucks may require rear hanger fabrication.
Option: order a Rear Hanger Assembly HG6100)
5. Install the provided Clamps around the pipes where required. Adjust the Tail Pipe and check along the whole length of the
exhaust system to ensure there is adequate clearance around the fuel and brake lines or any wiring. If any interference is
detected relocate or adjust.
6. Ensure that the exhaust is in place before tightening clamps. Start at the front of the exhaust system and begin tightening all
connections.
Congratulations! You are ready to begin experiencing the improved performance and driving experience of your MBRP Inc.
performance exhaust system. We know you will enjoy your purchase.