Audiovox ACD-32A User Manual
Page 16
SETTINGTHECLOCK
SETTINGTHECLOCK
SETTINGTHECLOCK
SETTINGTHECLOCK
SETTINGTHECLOCK
1. Turn the radio on so that the radio frequency or clock time is shown on the display panel.
2. Press and hold the Time/Frequency Display Selector button
cu
approximately 2 seconds until the
time display begins flashing.
3. While continuing to hold the Time/Frequency Display Selector button, press the Down Seek Tuning
button (
)
bp
to adjust the hours and the “PM” indicator and the Up Seek Tuning button (
)
bo
to adjust the minutes to the correct time.
4. When the correct time is shown on the display panel, release the Time/Frequency Selector button.
128-5272
16 of 20
15
15
15
15
15
OPERATING
INSTRUCTIONS
OPERATING
INSTRUCTIONS
OPERATING
INSTRUCTIONS
OPERATING
INSTRUCTIONS
OPERATING
INSTRUCTIONS
NOTES ON USE OF FRONT PANEL
1. Make sure the front panel is right-side-up when
attaching it to the chassis as it cannot be
attached when up-side down.
2. Do not press very hard on the front panel when
attaching it to the chassis. No more than light
to moderate pressure should be needed.
3. When attaching the front panel, make sure the
right side is correctly engaged before pressing
the left side to lock it into position.
4. When taking the front panel with you, please use
the supplied carrying case to protect the panel
from dirt and damage.
ERROR CODES
ERROR CODES
ERROR CODES
ERROR CODES
ERROR CODES
If a problem should develop while operating the CD player, the following error codes may be displayed
on the display panel:
3. If there is a malfunction of any of the switches
on the unit or of the CD player, pressing the Re-
Set button may clear the system and return to
normal operation.
dn
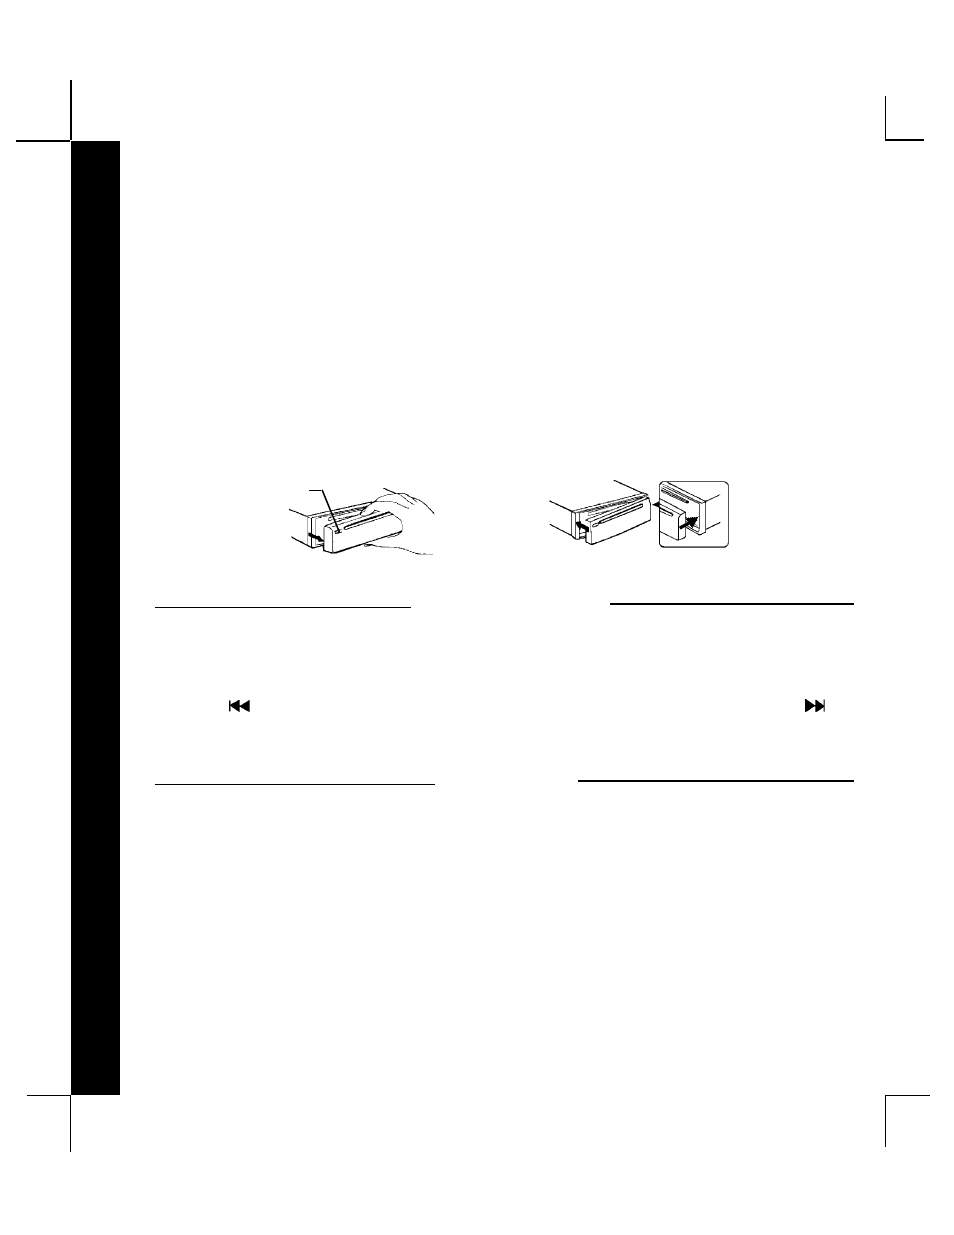
FRONTPANELRELEASEKNOB
This knob is used to release the mechanism that
holds the front panel to the chassis. To detach the
front panel, slide the button to the right so that the
left side of the panel is released. Grasp the
released side and pull it off of the chassis. To re-
attach the panel, position the right side of the panel
in place first and then press the left side of the
panel until the mechanism locks it into place.
DETACHING THE FRONT PANEL
ATTACHING THE FRONT PANEL
Indicates the disc is not loading or ejecting properly. Try re-loading or pressing the Eject
button again. Check the condition of the disc in use or try another disc.
Indicates an interface error between the disc mechanism and radio circuitry. Press the
Re-Set button
dm
and try again.
Indicates an error in the laser reading the disc. Eject the disc, make sure it is clean,
undamaged, and loaded correctly (label side up). Re-load the disc and check for proper
operation or try another disc.
Indicates a system error. Press the Re-Set button
dm
and try again.
Indicates that a computer CD-ROM has been loaded into the unit. Eject the disc and load
an audio CD.
If the suggested measures do not solve the problem, contact an approved warranty station near you for
further assistance.
Engage right
side first
ER 1:
ER 2:
ER 3:
RST:
ROM:
Release Button