Ariens 911099 - LM21SH User Manual
Page 21
GB - 21
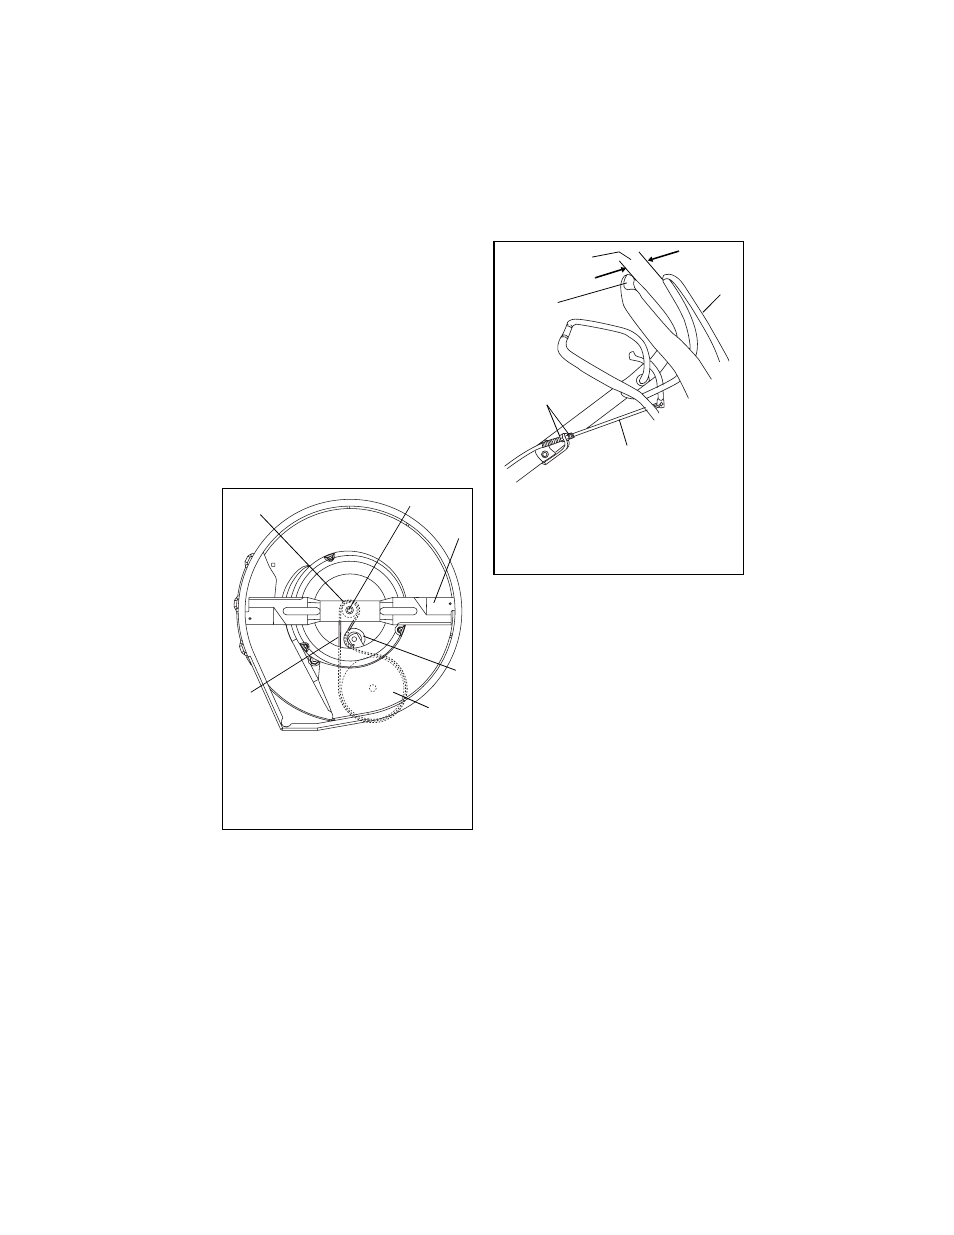
DRIVE BELT REPLACEMENT
To remove drive belt:
1. Disconnect spark plug wire.
2. Set the right rear wheel to its lowest
cutting height, and the left rear wheel to
the third cutting height. This position
provides clearance between friction disc
and drive sheave.
3. Remove belt from the idler, then the
drive sheave, and finally, the engine
pulley (Figure 15).
4. Pull belt through opening under mower
pan and over blade.
5. Make sure the idler pulley turns and the
idler arm moves freely.
6. Reinstall drive belt in reverse order.
IMPORTANT: Be sure the belt seats in
sheave and pulley grooves with the idler
touching the back (flat) side of belt.
7. Adjust rear wheels to the same cutting
height.
WHEEL DRIVE CONTROL
ADJUSTMENT
The wheel drive must start to engage when
wheel drive control is between 2-1/4" and
2-3/4" (5.7 and 7 cm) away from the
handlebar.
To check:
1. With engine off, select a slow speed.
2. Slowly pull unit backwards.
3. Slowly squeeze wheel drive control until
wheels stop.
4. Measure the distance between the
wheel drive control and handlebar at the
handlebar indentation.
To adjust:
1. If the measurement is more than 2-3/4"
(7 cm), loosen the lower cable nut and
then tighten the upper cable nut against
the adjuster bracket.
2. If the measurement is less than 2-1/4"
(5.7 cm), loosen the upper cable nut and
then tighten the lower nut against the
adjuster bracket.
3. Recheck measurement with the slowest
and fastest speeds selected.
4. Repeat adjustment until wheel drive
control is properly adjusted.
IMPORTANT: If there is not enough thread
length for proper adjustment, contact your
Dealer for repairs before operating unit.
Figure 15
1. Blade
2. Idler
3. Drive Sheave
4. Drive Belt
5. Engine Pulley
6. Bolt, Lock
Washer &
Flat Washer
OM1250
1
2
3
4
5
6
Figure 16
2-1/4" to 2-3/4"
(5.7 to 7 cm)
1. Handlebar Indentation
2. Wheel Drive Control
3. Traction Cable
4. Cable Nuts
OM0294