Installation, 1 before the installation, 2 built-in hobs – Electrolux EHS3920HOX User Manual
Page 9: 3 connection cable, 4 installation of more than one hob, 5 assembly, Technical information, 1 cooking zones specification, Installation 9. technical information
8. INSTALLATION
WARNING!
Refer to Safety chapters.
8.1 Before the installation
Before you install the hob, write down the
information bellow from the rating plate.
The rating plate is on the bottom of the
hob.
Model .......................................
PNC .........................................
Serial number ...........................
8.2 Built-in hobs
Only use the built-in hobs after you
assemble the hob into correct built-in units
and work surfaces that align to the
standards.
8.3 Connection cable
• The hob is supplied with a connection
cable.
• To replace the damaged mains cable
use the following (or higher) mains
cable type: H05BB-F Tmax 90°C.
Speak to your local Service Centre.
8.4 Installation of more than one
hob
40-50 mm
55 mm
30 mm
min. 650 mm
490 mm
270 mm
If several 30 cm hobs are to be installed
side by side into the same cut out, an
assembly kit including a support side
bracket and supplementary seals is
available at our Authorised Service
Centres. The relevant installation
instructions are supplied within the kit
package.
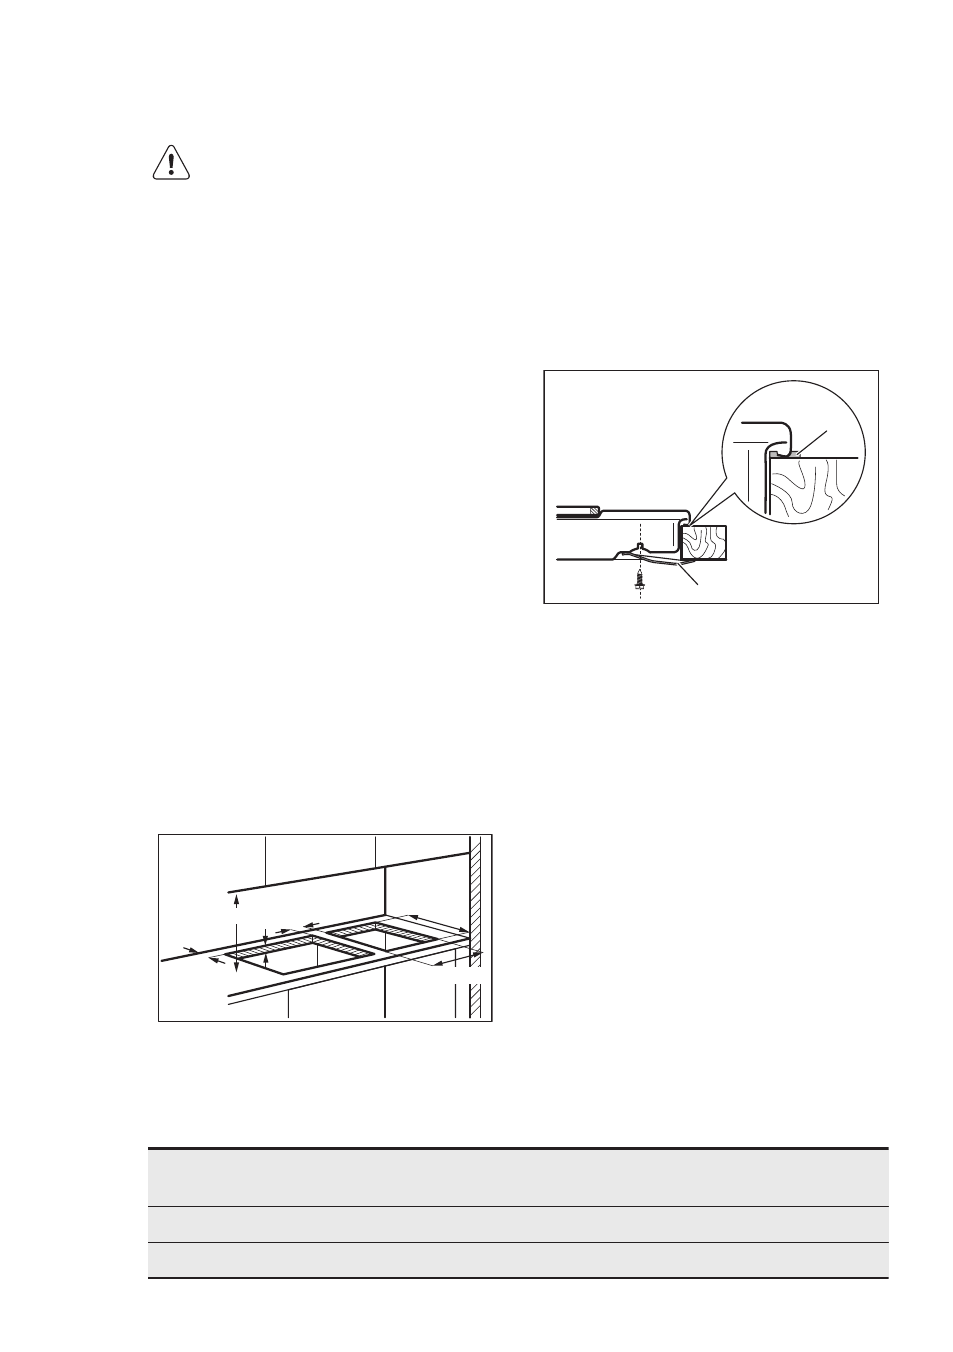
8.5 Assembly
A
B
A) Supplied seal stripe
B) Supplied brackets
Clean the worktop around the cut out
area. Attach the supplied seal stripes to
the worktop along the cut out edges. Do
not extend the stripes. Do not bond ends
of stripes one over another.
9. TECHNICAL INFORMATION
9.1 Cooking zones specification
Cooking zone Nominal Power (Max heat set-
ting) [W]
Cooking zone diameter [mm]
Middle front
1500
145
Middle rear
1500
180
ENGLISH
9