Anetsberger Brothers MX-7E User Manual
Page 13
13
NOTE: The gas line of a new fryer installation
may contain a considerable amount of air which
will hinder immediate lighting. You may have to
press down the control knob for as long as several
minutes until the pilot flame burns steadily.
1. Switch the circuit breaker controlling electric
power to the fryer to ON.
2. Ensure that the fryer’s thermostat knob is set
to OFF.
3. Open the gas supply line inlet valve to the
fryer by aligning the gas valve handle with the
gas line piping.
4. Open the front door and move the right pilot
viewing/lighting port cover aside.
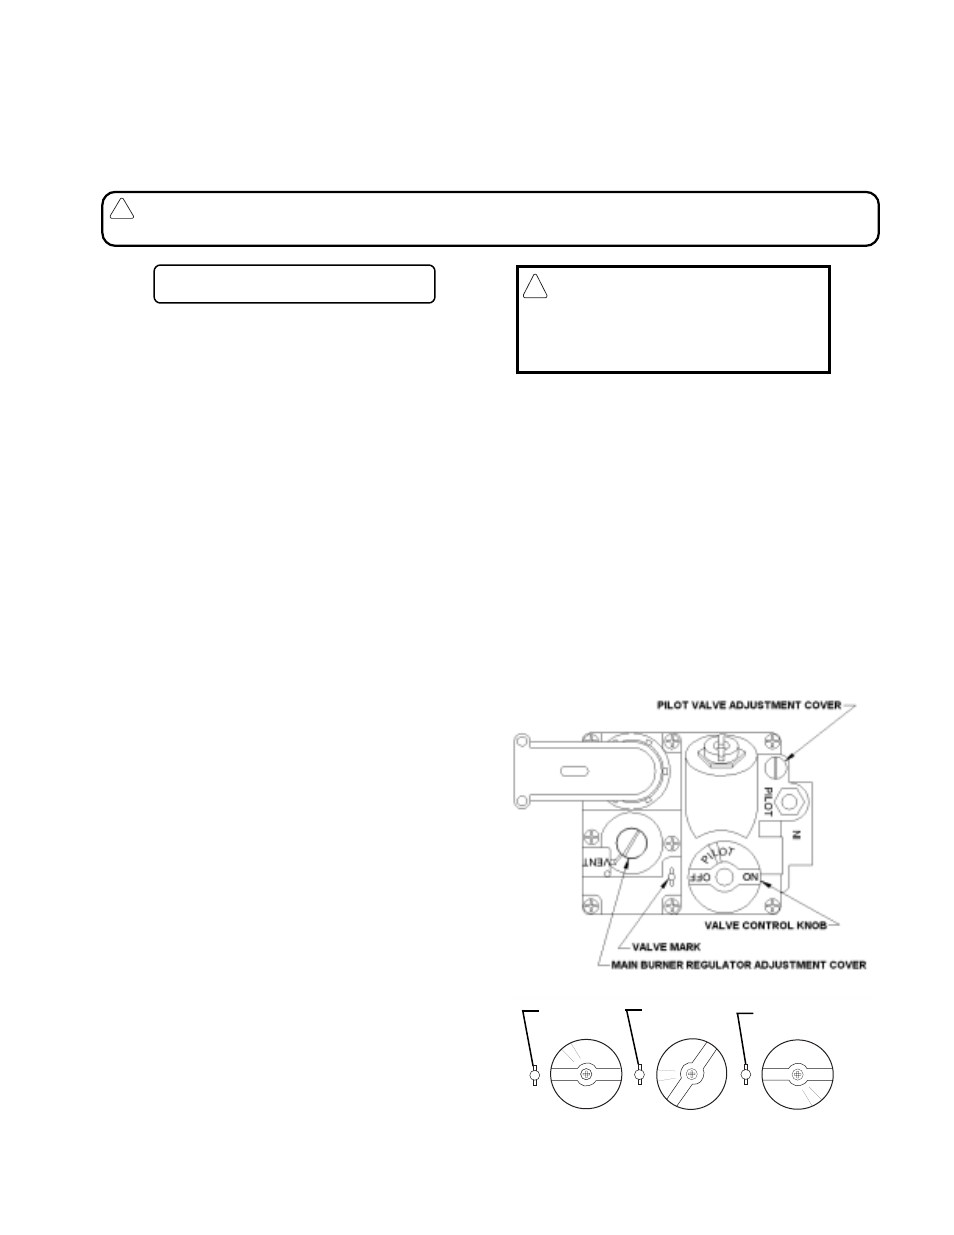
5. Turn the gas control valve knob to align the
PILOT setting with the valve mark. Figure 6
shows the possible control knob positions.
6. Press, and hold down, the gas control knob
to allow pilot gas to flow. Push the spark
igniter pushbutton several times, until the pilot
flame lights. Continue holding down the con-
trol knob for at least 30 seconds until the
pilot flame burns steadily, without going out.
NOTE: A match may also be used to
light the pilot flame.
7. Release the control knob and observe that
the pilot flame remains lighted. Close the
right pilot viewing/lighting port.
8. Light the left pilot flame by opening the left
pilot viewing/lighting port and applying a
match to ignite the pilot flame. Close the
left pilot viewing/lighting port.
FR
FR
FR
FR
FRYER OPERA
YER OPERA
YER OPERA
YER OPERA
YER OPERATING INSTR
TING INSTR
TING INSTR
TING INSTR
TING INSTRUCTIONS
UCTIONS
UCTIONS
UCTIONS
UCTIONS
(Continued)
Figure 6. Gas Control Valve & Knob Positions
OFF
PILOT
ON
Valve
Mark
Valve
Mark
Valve
Mark
OFF
P
I L
OT
ON
OFF
ON
P
I
L
O
T
OFF
P
IL
OT
ON
Normal operation of an
ANETS
ANETS
ANETS
ANETS
ANETS Fryer requires that the kettle is filled with liquid shortening above the
lower indent level, marked on the rear of the kettle, before lighting the fryer’s pilot and turning on the main
burner.
CAUTION: Shortening MUST be in liquid form to avoid scorching or discoloration and possible
damage to the kettle. Damage caused by melting solid shortening will NOT be covered by the warranty.
!
9. Turn the gas control valve knob to align the
ON setting with the valve mark.
10. Close the front door and switch the fryer
POWER switch ON.
NOTE: A fryer equipped with built-in fil-
tering system (Filtronic or Filter Mate)
requires the front door to be closed before
switching the POWER switch to ON.
11. Turn the thermostat knob to the desired
temperature.
!
CAUTION: Ensure that both pilot
viewing/lighting ports are closed, to
prevent excessive heat from damag-
ing the gas controls.
LIGHTING PROCEDURE