Basic operations – American DJ DCD-PRO450 User Manual
Page 10
1. OPENING AND CLOSING THE DISC TRAY AND LOADING DISCS
• Press the OPEN/CLOSE BUTTON (10) to open or close the disc tray. OPEN/
CLOSE BUTTON (10) are provided on both the main unit and control unit or,
press the PLAY/PAUSE BUTTON (29), to automatically close the transport tray
and begin play.
• If the transport tray is not closed after 60 seconds it will automatically close
and enter pause mode..
• The disc trays cannot be opened during playback this is to prevent playback
from accidently being interrupted. The tray can only be opened during pause
or cue modes.
2. LOADING DISCS
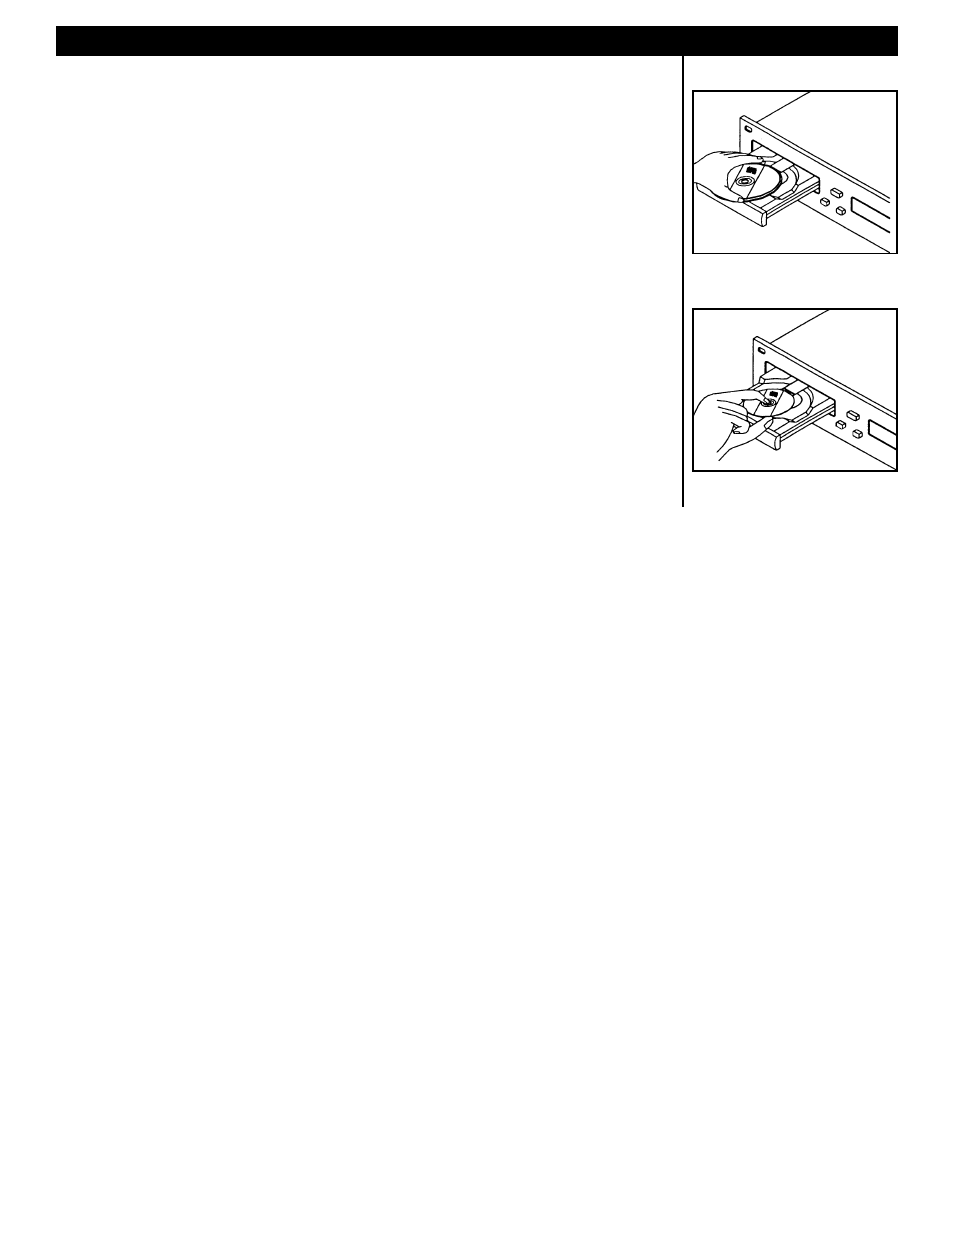
• Hold the disc by the edges and place it in the disc tray. Never touch the signal
surface (the glossy side) of a disc.
• When using 5 inch/12 cm discs, place the disc in the outer tray guides (Fig.7),
and when using 3 inch/8 cm discs, place them securely in the inner guides (Fig.8).
CAUTION:
• DO NOT place any foreign objects in the disc tray, and do not place more than
one disc in the disc tray at a time. Doing so may result in malfunction.
• DO NOT push the disc tray in manually when the power is off, as this may result in
malfunction and damage the player.
3. SELECTING TRACKS
• Tap the TRACK BUTTONS (20 & 21) once to move to one higher or lower
track or hold the TRACK BUTTONS (20 & 21) down to change tracks
continuously at a higher speed.
• When a new track is selected during playback. Playback begins as soon as the search operation is completed.
4. STARTING PLAYBACK
• Press the PLAY/PAUSE BUTTON (29) during the pause or cue to start playback.
• The PLAY INDICATOR (34) will begin to when playback starts.
• The point at which playback starts is automatically stored as a cue point. Pressing the CUE BUTTON (27) will
return to this exact same point, until a new cue point is set.
5. STOPPING PLAYBACK
• There are two ways to stop playback:
1) Press the PLAY/PAUSE BUTTON (29) during playback to pause at that point.
2) Press the CUE BUTTON (27) during playback to return to the position at which playback started.
6. PAUSING - The PAUSE indicator will glow when the unit is in pause mode. Pause mode is stopping the playback
function at any point in a track, and resuming play at that exact same point.
• Press the PLAY/PAUSE BUTTON (29) to switch between play and pause.
7. CUEING - When the unit is in cue mode the CUE INDICATOR (33) in the LCD (13) will glow. The CUE INDICATOR
(33) will flash momentarily when a new cue point has been set. ”Cueing” is the action of preparing for playback. When
the Cue button is pressed, playback returns to the cue point and enters pause mode. When the PLAY/PAUSE BUTTON
(29) is pressed during the cue mode, playback starts.
8. CUE POINT SETTING - A beginning play point. Cue points are set in any of the four user programmable CUE POINT
BUTTONS (6) or in the IN REALTIME CUE BUTTON (26). Be advised that the CUE BUTTON (27) and the in realtime
CUE BUTTON (27) are linked together. Any cue point set in the IN REAL TIME CUE BUTTON (26) will automatically
become the new cue point for the CUE BUTTON (27) and vice versa. To set a cue point:
1) Press the IN REALTIME CUE BUTTON (26) during playback to set the new cue point.
2) You may save 4 CUE points by pressing MEMORY, then set desired Cue, then press any of 4 CUE POINT
BUTTONS (6). You can also set any of the 4 Cue points in realtime by pressing MEMORY during playback
and then pressing any of the CUE POINT BUTTONS (6).
• To return to a CUE POINT press the CUE BUTTON (27). This will return you to point as set in number 1 above.
To return to the cue point set in CUE BUTTONS 6-9 (6), press the CUE BUTTONS 6-9 (6) that stores the cue
point you wish to return to. If the unit is in playback mode the unit will immediately begin playback from that
cue point. If the player is in pause or cue mode the unit will cue to that point. The LCD DISPLAY (13) will display
the cue point selected, CUE POINTS 6-9 (32).
BASIC OPERATIONS
5 in. / 12cm disk
Fig. 7
3 in. / 8cm disk
Fig. 8
American DJ
®
AUDIO • DCD-PRO450™ INSTRUCTIONS MANUAL • PAGE 10