Page 6 of 8, Figure 2: wiring for tel input, Telephone paging amplifier – Avaya 10-Watt User Manual
Page 6: Universal paging access module
TEL
CONT
T
NIGHT
BELL
R
TEL
GND
MUSIC
IN
BGM
IN
PAGING TIME
VOX DELAY
TONE VOL.
MIN MAX
MIN MAX
MIN MAX
Universal Paging Access Module
S5
S5
VOX ENABLE
VOX DISABLE
S3
S4
PREANNOUNCE TONE
S3 S4
CONFIRMATION TONE
48VDC PWR SUPPLY S1,S2
24VDC PWR SUPPLY
S1,S2
ON
OFF
MODE
VOL
BGM
SWITCHES
MODE
(0.1A)
(TRUNK ACCESS ONLY)
POWER SUPPLY
CONTACT CLOSURE A
PAGING OUTPUT
EXT VOX ENABLE
PHONE SYSTEM
-24/48
+24/48
COM
N.O.
PR
PT
-M
+M
R
T
CONTACT CLOSURE B
N.O. COM
PAGE PORT
INPUT
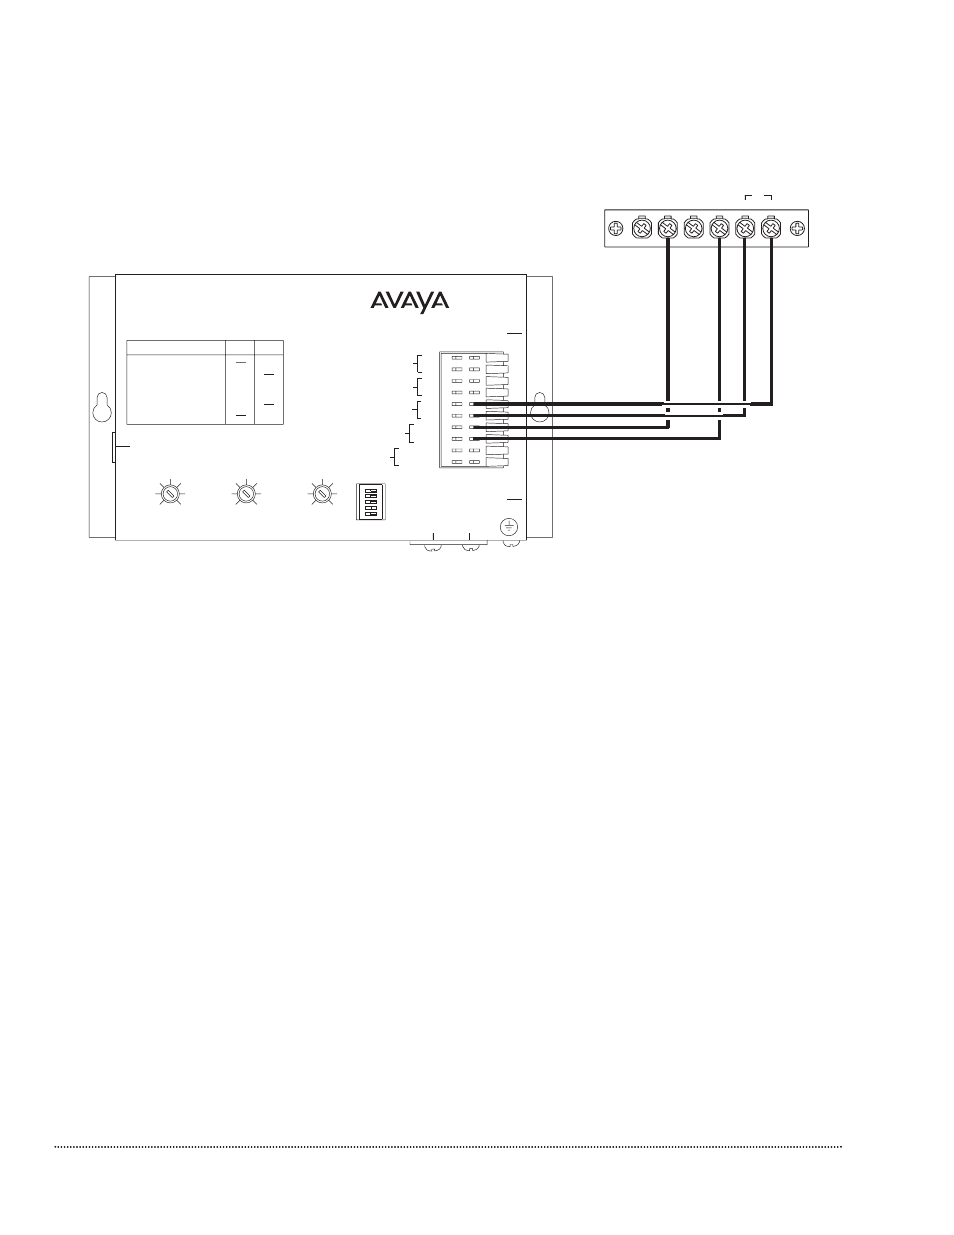
Tel Input to Universal Coupler
After properly connecting your Universal Coupler (909) to your Auxiliary Trunk
port, set your switches as follows: C1/C2 to C2; Rocker Switch 3 closed; and all
others open. Coming out of the J2 Jack of the Coupler, connect the blue/white pair
to the amplifier’s T and R terminals.
Music Input
A pair of terminals are provided for the connection of a background music source.
Use a pair of wires (not included) to make this connection. This is a mono input and
requires that the output of stereo sources be converted to mono by using a Y-
adapter (not included). Use a LUWMT1A (COM Code: 405891680) to balance the
music input, if necessary, to reduce hum/noise from a grounded music source.
Night Bell Connection
An external contact closure activates the night bell function of the amplifier. When
using an external contact closure, connect the closure pair across the Night Bell
terminal and GND. The night ringer follows the cadence of the activating signal.
CAUTION: Do not apply a high voltage (90-105V AC, 20-30Hz) ring signal to the
Night Bell terminals. Use a dry contact closure only.
Figure 2: Wiring for TEL Input
Page 6 of 8
Telephone Paging Amplifier