Dwyer LPCP User Manual
Dwyer instruments, inc, Model lpcp low pressure calibration pump, Bulletin p-lpcp

The Model LPCP Low Pressure Calibration Pump is a low air pressure source
with the ability to easily adjust and stabilize. This hand pump possesses a pressure
range of ± 5.8 psi; uses air as the media, and can adjust the pressure easily with
great stability. The LPCP is made up of quick connectors for fast instrument connect
and disconnect. The pump has a heat-insulator between the cover and pressure
chamber to lessen the heat effect during the micro-pressure calibration. The adjusting
resolution is up to 0.01 Pa (0.0001 mbar). These features make the LPCP ideal for
calibrating pressure transducers, precision pressure gages, and other pressure
instruments.
CONNECTION
Direct connection
If the connector of the unit under test is M20*1.5, please connect it with the hand
pump directly.
Connect by pipe
If the connector of the unit under test is not M20*1.5, please use the other adapter
to connect.
CALIBRATION PROCEDURE
Positive pressure calibration
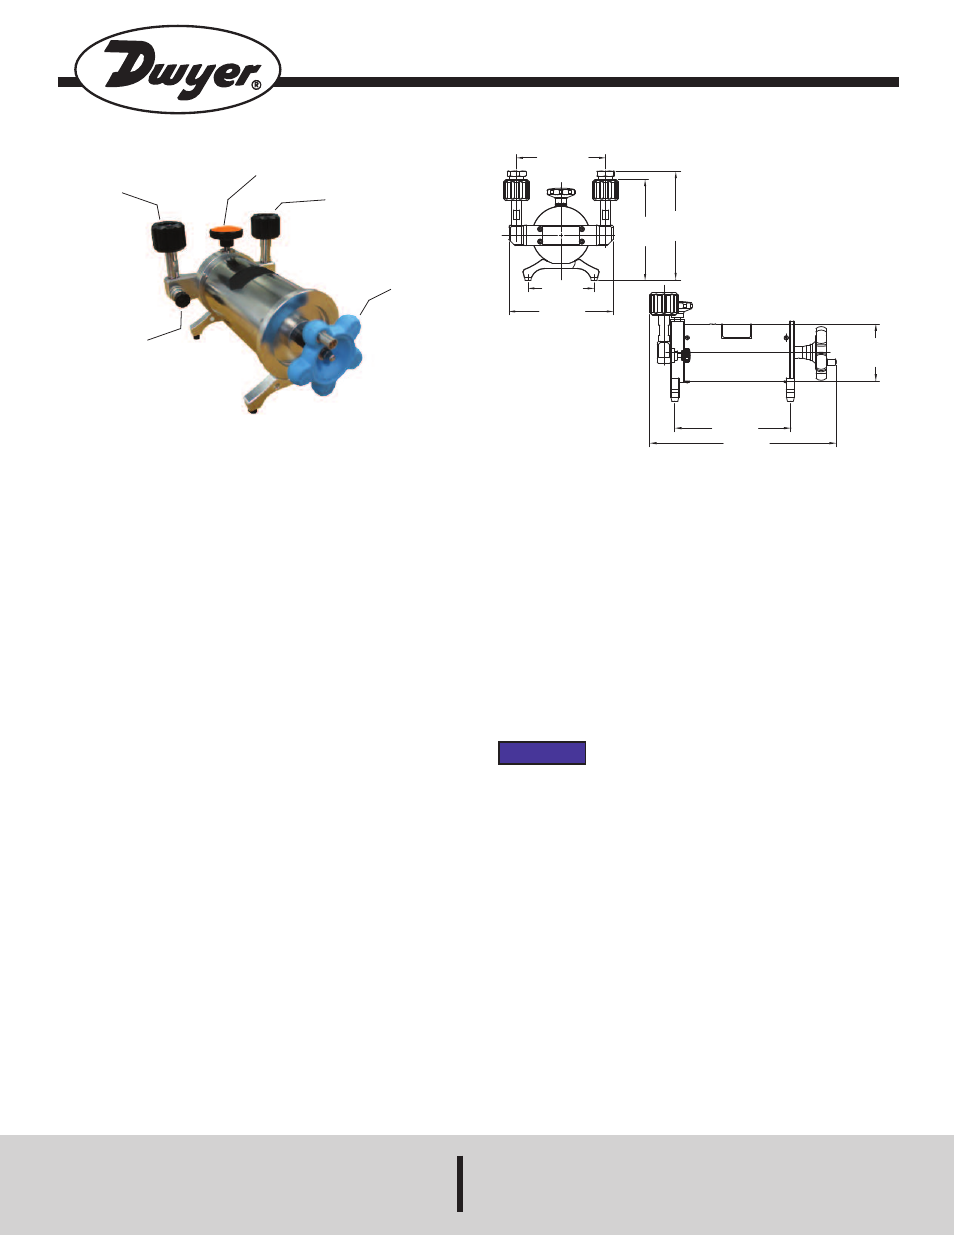
1. First, make sure the vent valve (2) is open. Turn the coarse adjust hand-wheel
(5) counterclockwise to the maximum and connect the reference gage and the
gage under test on the ports (1) and (4) tightly.
2. Close the vent valve (2).
3. Turn the coarse adjust hand-wheel (5) clockwise to apply the pressure. Then
use the fine adjust hand-wheel (3) to get the desired value.
4. Calibrate the next point until all calibration points are verified.
5. The next procedure is reverse calibration: turn the coarse adjust hand-wheel
counterclockwise (5) to decrease the pressure. Turn the fine adjust hand-wheel
(3) to get the desired pressure value. Calibrate the pressure one by one until
all selected points are verified.
Negative (Vacuum) pressure calibration
1. First, make sure the vent valve (2) is open. Turn the coarse adjust hand-wheel
(5) clockwise to the maximum. Connect the reference gage and the gage under
test on the ports (1) and (4) tightly.
2. Turn the hand-wheel (5) counterclockwise to exhaust.
3. Close the vent valve (2). When the pressure approaches the desired vacuum
value, stop. To fine adjust the pressure, use the hand-wheel (3). Calibrate all
selected points one by one.
4. The operation procedure of reverse calibration, use coarse adjust hand-wheel
(5) first, then use the fine adjust hand-wheel (3) to get the desired vacuum
pressure.
Model LPCP Low Pressure Calibration Pump
Specifications - Installation and Operating Instructions
Bulletin P-LPCP
DWYER INSTRUMENTS, INC.
Phone: 219/879-8000
www.dwyer-inst.com
P.O. BOX 373 • MICHIGAN CITY, INDIANA 46361, U.S.A.
Fax: 219/872-9057
e-mail: [email protected]
PRECAUTIONS
1. Please don’t add any oil or water into the pipeline.
2. To avoid damaging the airproof surface, please don’t operate the shut-off valve
aggressively.
3. This product can not directly calibrate pressure meters that are used under acid
or alkali conditions. If necessary, you must make sure the meters are cleansed
by CCl
4
solvent or melted oil spray to avoid any corrosion damage to the test
pump.
MAINTENANCE
Upon final installation of the Model LPCP Low Pressure Calibration Pump, no
routine maintenance is required. A periodic check of system calibration is
recommended. The Model LPCP is not field serviceable and should be returned if
repair is needed (field repair should not be attempted and may void warranty). Be
sure to include a brief description of the problem plus any relevant application
notes. Contact customer service to receive a return goods authorization number
before shipping.
SPECIFICATIONS
Media: Air.
Generated Pressure Range: 5.8 psi (0.4 bar) vacuum to 5.8 psi (0.4 bar) positive
pressure.
Pressure Resolution: 0.01 Pa; 0.0001 mbar.
Material:
Ram/adapters: 316 SS;
Body: Steel/aluminum;
Seals: Buna-N.
Test Gage Connection: M20*1.5; 1/4˝ NPT with included adapters.
Reference Gage Connection: M20*1.5; 1/4˝ NPT with included adapters.
Dimensions:
Height: 5.7˝ (145 mm);
Base: 6.09˝ (155 mm) x 3.73˝ (95 mm).
Weight: 2.21 lb (1.0 kg).
3-47/64
[95.00]
5-29/32
[150.00]
5-45/64
[144.91]
6-13/64
[157.60]
5-1/32
[128.00]
6-3/32
[154.60]
9-51/64
[248.67]
Ø2-63/64
[76.00]
1. QUICK
CONNECTOR
2. VENT VALVE
(RELEASE VALVE)
5. COARSE
ADJUST
HAND-WHEEL
4. QUICK
CONNECTOR
3. FINE ADJUST
HAND-WHEEL
NOTICE
