Step 1 assemble side panels – Catskill Craftsmen 14485 User Manual
Page 5
4
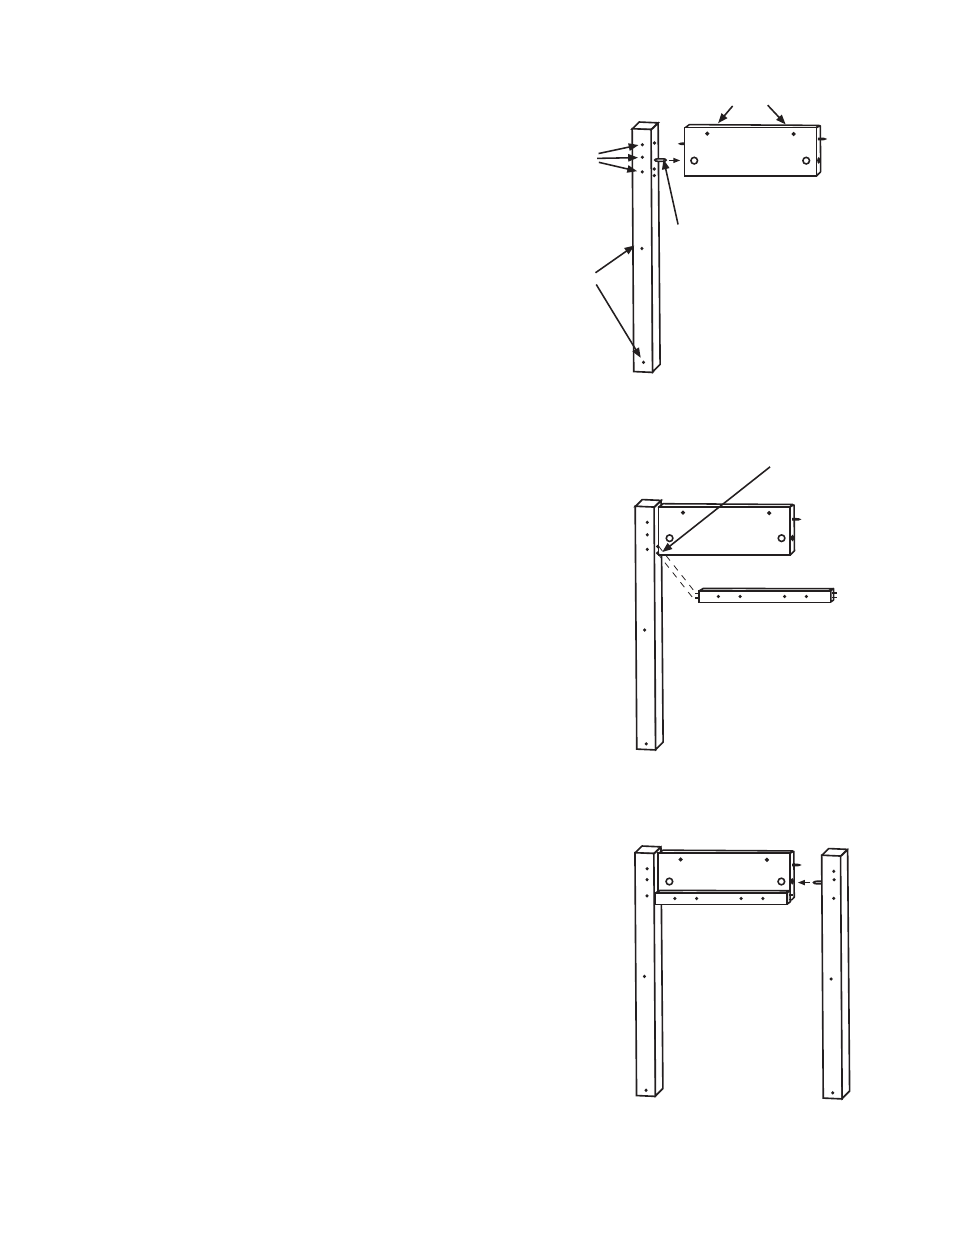
STEP 1
ASSEMBLE SIDE PANELS
A. Each side panel consists of two (2) legs, one (1) top
side brace and one (1) glide support brace. When
assembled, diagonal legs will be the same (i.e. Front
Right/Back Left & Front Left/Back Right). Side panels are
identical when assembled -- the drawer glides will
determine left and right sides.
B. Tap a 3/4” pin in each end of the top side braces. Take
each of the 4 legs and install one (1) bastion post per leg,
on the side of the leg which also has two (2) pin holes for
the glide support sticks. Locate post holes. Tap posts in
with hammer until threads engage wood; turn posts down
until the solid shaft hits the wood (all threads are into
wood), then back post out until the hole in the post is
perpendicular to the long length of the leg (about 1/2
turn).
C. Lay out Front Left leg, one (1) top side brace and back
left leg as in Illustration 1A. Note the two pilot holes for
the L brackets are along the top inside of the top side
brace.
D. Take the top side brace and drop a barrel-shaped
bronze bastion nut into the nut access hole as illustrated.
Threaded end of the nut faces out. Insert front left leg
post into the hole in the end of the brace, through the side
of the barrel nut, until the hole in the post can be seen
through the threaded end of the nut. Insert the set screw
into the nut and tighten down. The tip of the set screw will
seek the center of the bastion post as it is tightened,
leaving a tight joint. If the joint is loose, check to make
sure the set screw is not cross-threaded or that the post
is out too far (not threaded into leg deep enough.) See
Instructions for Bastions illustrations on page 3 for
clarrification of assembly.
E. Insert two 3/4” pins into each end of the glide support
brace. Insert brace pins into the holes on the inside of the
left front leg as illustrated (4 pilot holes out).
F. Attach Back Left leg in same manner.
G. Repeat for other side panel.
Table top “L” Bracket holes
nut access holes
not used
holes for
shelves
TOP SIDE BRACE
Bastion Post
GLIDE SUPPORT BRACE
Glide Support Steel Pin Holes
Illustration 1A
Illustration 1B
Illustration 1C