Step 8 – Catskill Craftsmen 1470 User Manual
Page 10
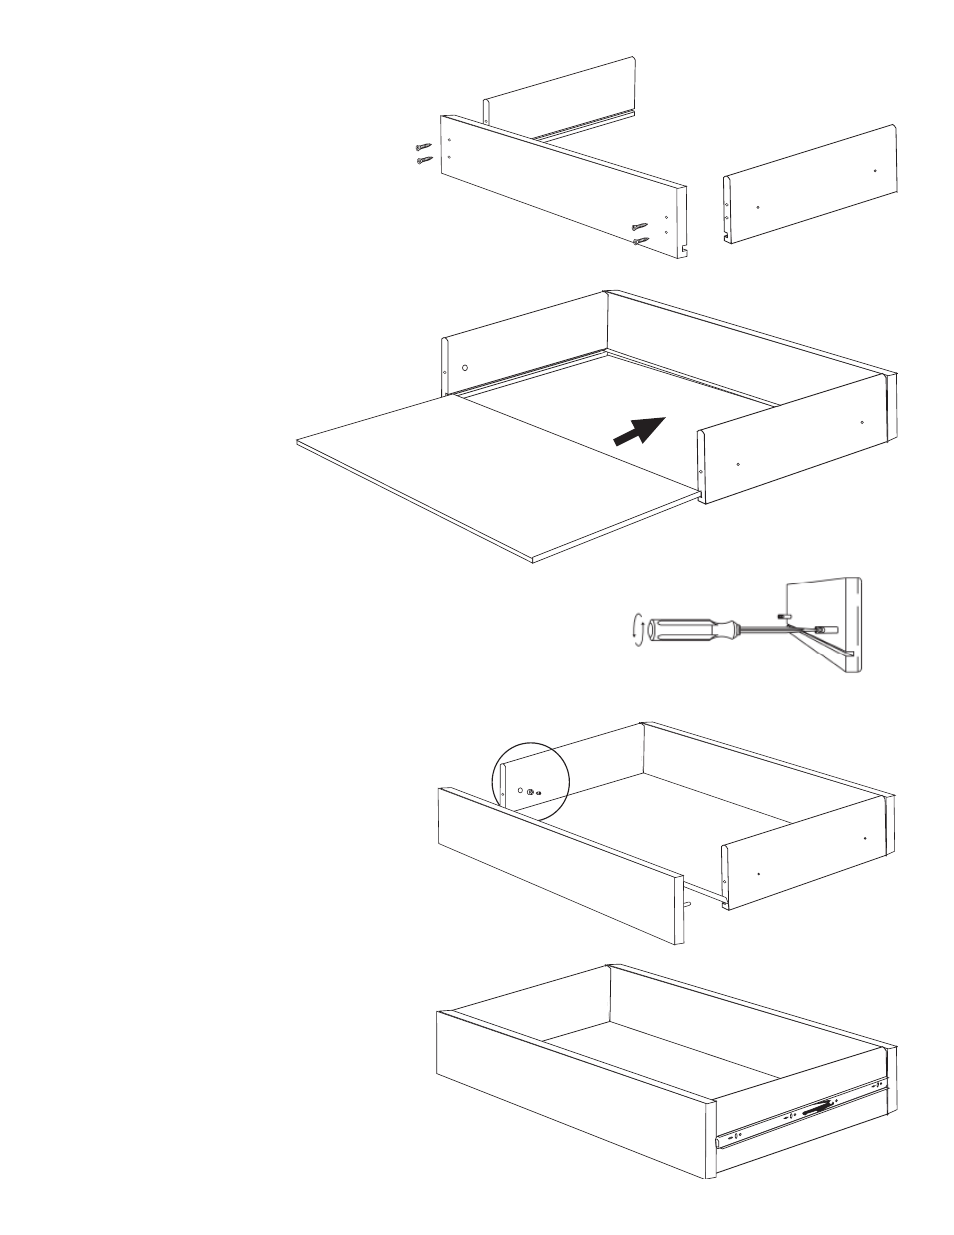
STEP 8
Assemble Drawer
A. Attach the Drawer Back to the
Left and Right Drawer Sides with
four 1 ¼”#8 Screws. Make sure
the slots that run the length of the
Sides are aligned with the slot in the
Drawer Back to accept the Drawer
Bottom.
B. Slide in Drawer Bottom,
best side up.
C. Take two (2) Bastion Posts, align
the threaded ends of the Posts with
the post holes located near
the ends of the inside
Drawer Front. Tighten
Posts down until the solid
shaft of the Post hits the wood.
Back Post out until the hole/
screwdriver slot in the end of the
Post is parallel and in direct line with
the long edges of the Drawer Front.
D. Insert the B-Nuts into the nut
access holes on the inside of the
Drawer Sides with the threaded end
facing out. Take the Drawer Front
and carefully insert the Posts into
the ends of the Brace Sides, through
the sides of the B-Nut until seated.
Push Nut snugly against the wood
in the nut access hole toward the
Drawer Front. Hole should be slightly
off-center toward the Drawer Front.
Insert the Set Screw and tighten
down. The Drawer Sides should be
tight against the Drawer Front.
E. Attach the Drawer Glides (left and
Right) to the Drawer Sides using
two 7/16” #6 Pan Head Screws per
glide. Open end of glide goes toward
the back of the drawer. (DO NOT
INSERT DRAWER INTO CABINET
AT THIS TIME). Glide is almost flush
with the back of the drawer front.
Note: The black plastic tabs will be
up on the left side and down on the
right side.
A
B
C
D
E