Enjoy your mount – Video Mount Products Z-MOUNT User Manual
Page 3
Step 1
Before starting, lay out all parts to your mount and match them to
the parts list provided. Verify that you have all your parts before at-
tempting to assemble the mount. Note: It is highly recommended
that the installation of this mount be done by a professional.
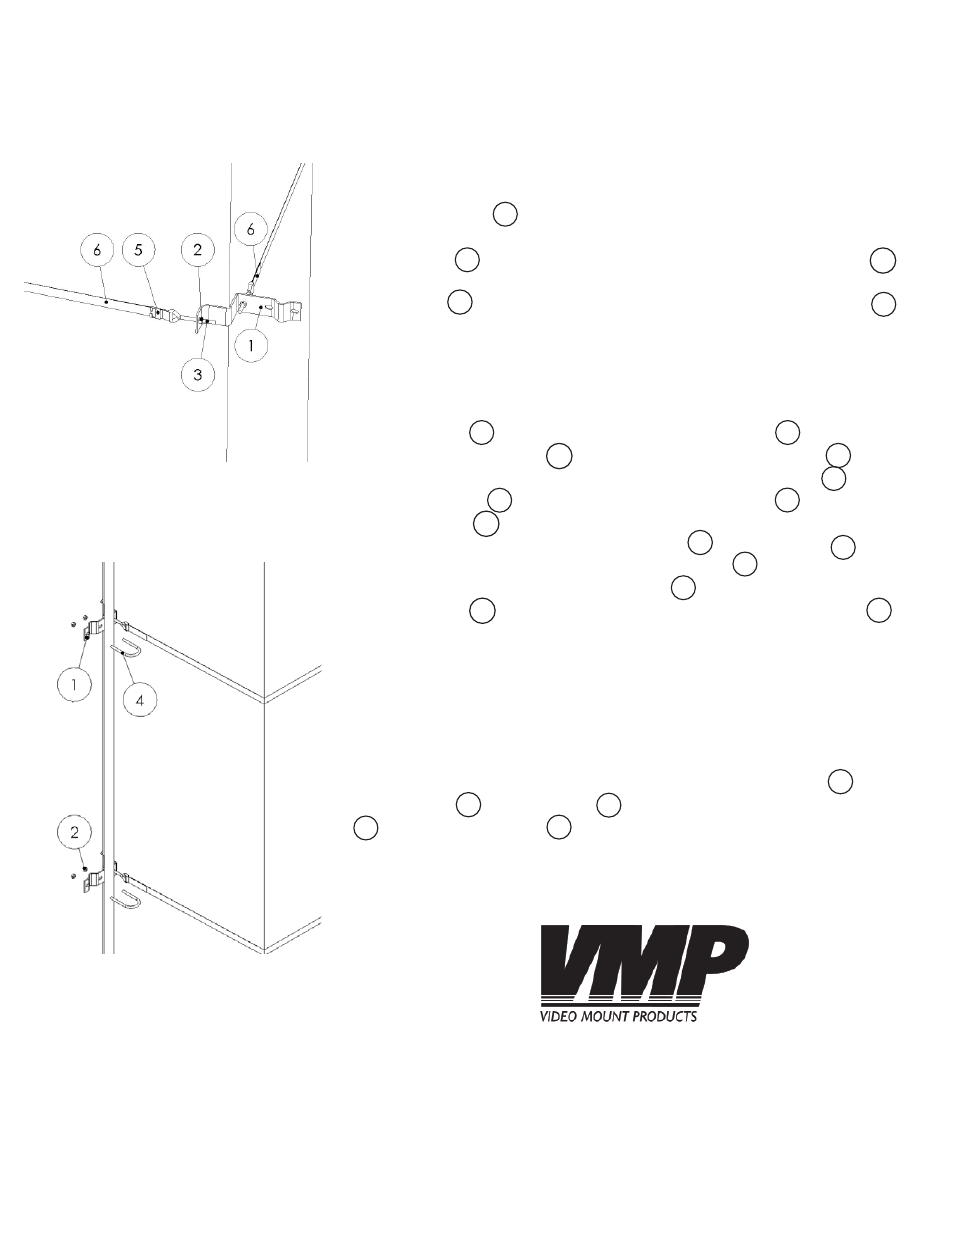
Step 2
Take the support and place the 90 degree angle on the corner
of the rectangular chimney. Take the triangle screw attached the
steel strap and insert it through the hole in the support
close to the chimney on the side which has the “V” nock in it. Use
a hex nut to secure the triangle screw. Wrap the strap
around the chimney. Note: When wrapping the band around the
chimney, make sure the strap is resting on the brick and not on the
mortar seem as this will provide a better mounting surface.
Step 3
Slide the strap through the connect component . Then take
the free triangle screw and insert it through the support in the
other hole which is close to the chimney. Use a hex nut to se-
cure the screw . Wrap the free end of the strap through the
triangle screw and then take the free end of the strap and slide
it back through the connect component . Pull the strap tight
and crimp the ears of the connect component down to hold the
strap in place. Tighten down hex nuts until all slack is removed
from the strap . Repeat steps 2 and 3 for the other support .
Note: Place the other support as far away from the fi rst support as
possible to give the antenna mast more stability. WARNING: Please
verify your mounting surface will support the combined weight of
your mount, mounting hardware and antenna. If in doubt, please
contact a professional installer.
Step 4
Place the antenna mast into the “V” notch in the supports . Use
the “U” bolts and hex nuts to secure the mast to the supports
. Use the cable ties as desired to secure loose wires.
Please verify that all nuts and screws are securely tightened and
the connect component is fi rmly crimped down.
Step 2 and 3: Attaching the
support to the chimney
WARNING: The installer must verify the installation meets all ap-
plicable codes and survival requirements. Video Mount Prod-
ucts will not be held liable for the improper use or installation of
its products.
Enjoy Your Mount!
1
2
2
1
6
1
6
4
7
Step 4: Attaching the antenna
mast to the support
3
1
5
6
2
3
5
6
3
6
6
1
2
5
1