Step 14, Step 15, Key: pmc-s – Video Mount Products PMC-S User Manual
Page 6: Ak-1 step 11, Step 12, Step13, Pm-3
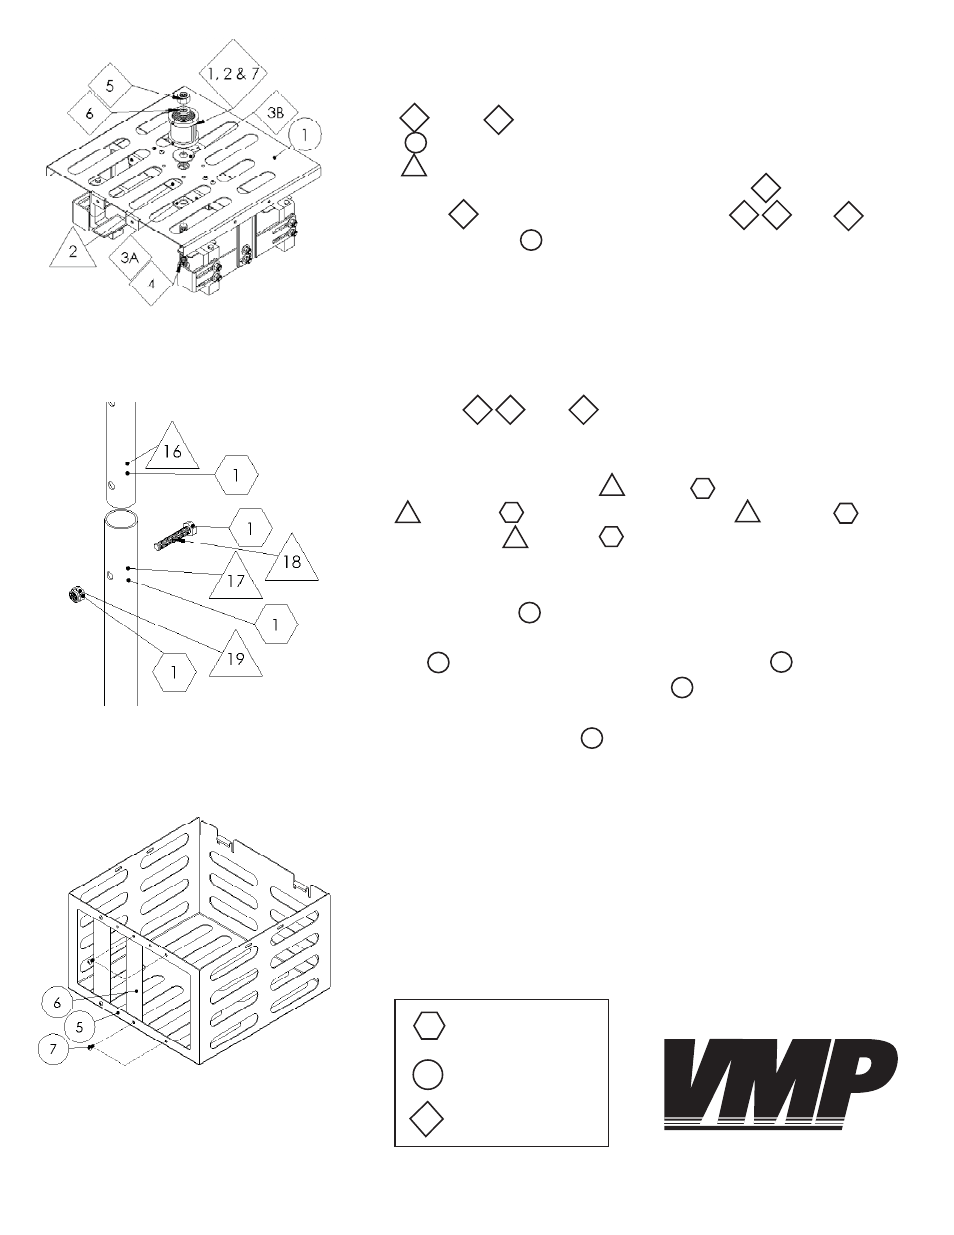
Step 14
Reattach the bottom tube PM-2 or PM-3 to the ceiling plate
PM-2 or PM-3 using the 5/16” screw PM-2 or PM-3
and nylon nut PM-2 or PM-3.
Step 15
If a security bar PMC-S is blocking the lens of your projector pro-
ceed with this step, otherwise skip to Step 16. You can move a security
bar PMC-S along the front of the bottom box PMC-S by fi rst
removing the two M6 security screws PMC-S. Then you can shift
the chosen bar to the center and then reattach the bar using the
same M6 Security Screws PMC-S.
Key:
PMC-S
VIDEO MOUNT PRODUCTS
Step 14 : Attaching the bottom
tube to the ceiling plate
Step 15 : Shifting a security bar
AK-1
Step 11
If you are using the AK-1 with the PM-1, place the AK-1 washers
and AK-1 on top of the center hole in the top plate
PMC-S and underneath the center hole in the master support
PM-2. Insert the 5/8” screw through the washers, master sup-
port, and top plate and using the hex head nut AK-1 and spring
washer AK-1 connect the female couple , , and AK-1
to the top plate PMC-S.
Step 12
Reinsert the projector in the clamps of the PM-1.
Step13
Refer to Step 7 to fi nd out how to attach the 1.5” NPT to the female
couple ( , , and AK-1).
Step 11: Attaching the AK-1 to
the top plate
PM-3
3A
3B
1
2
5
6
1
2
7
1
1
2
7
1
1
1
1
17
16
18
19
6
6
5
7
7