Enjoy your mount – Video Mount Products FP-LDSB User Manual
Page 4
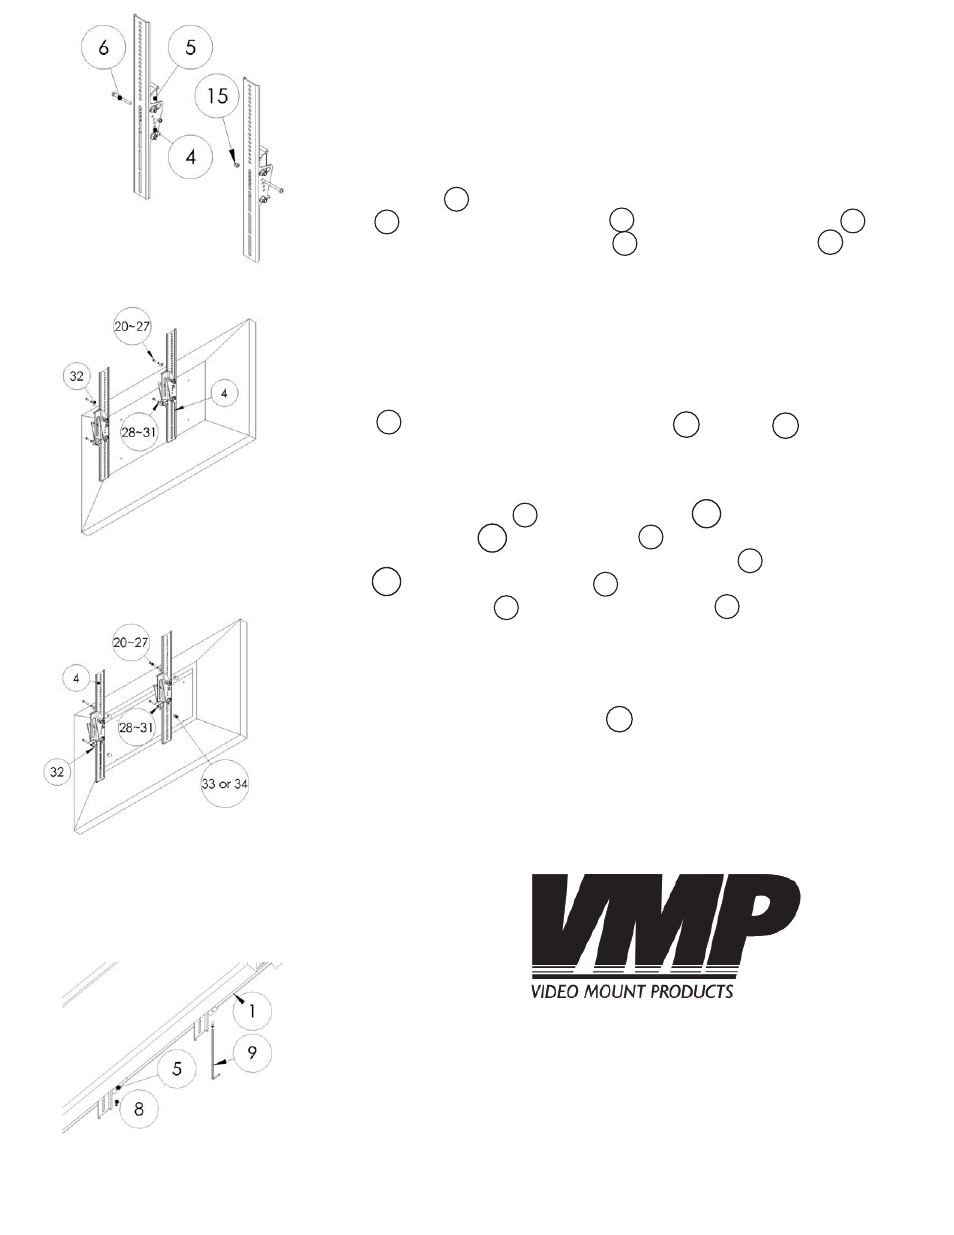
Step 6
If you wish to specify a tilt angle for the tilt brackets then proceed
with the following step. Otherwise proceed to the next step.
The tilt is lockable at 0°, 5°, 10° and 15°. The way you do this is for
0° line up the hole closest to the tilt arc on the screen mounting
bracket with the hole closest to the top square in the tilt plate
. Then insert the M6 screw through both the tilt plate and
the screen mounting bracket and use the nylon nut to lock
the tilt in place. For 5 degrees do the same, but with the next set of
holes down and so on for 10 and 15 degrees.
Step 7
Determine the correct screw size and if you need to use washers, lock
washers, or spacers. Note: Spacers are used for TVs with recessed
hole patterns. Secure the TV to the screen mounting bracket
using the appropriate hardware ( through ). Note: The
brackets have to be level with each other to work properly.
Step 8
Hook the tilt plate onto the wall plates . Note: Make sure that
the wall plate that the tilt plate is hooked onto is secured into
the mounting surface. To secure the tilt plate to the wall plate
, tighten security screws in the threaded hole in the bottom
of the tilt plate using the long allen key . This will also secure
your horizontal positioning for the fl at panel.
Step 9
To adjust the tension in the tilt mechanism to the desired level,
tighten/loosen the nylon nuts on the tilt arc.
Please verify that all nuts and screws are securely tightened.
Step 7B: Attaching the
mounting brackets to the
monitor (spacers used due to
recessed hole patterns)
Step 8: Securing the mounting
brackets to the wall plate
WARNING: The installer of these products must verify that the
mount surface, ceiling or wall, will safely support the com-
bined weight of all attached equipment and hardware. Vid-
eo Mount Products will not be held liable for the improper use
or installation of its products
Enjoy Your Mount!
Step 6: Locking the tilt in place
15
9
34
20
5
6
8
4
4
4
Step 7A: Attaching the mount-
ing brackets to the monitor
(spacers not needed)
5
1
1
5
5
5
1
5
11