Mounting the fan, Determine your mounting application, Gable vent installation – U.S. Sunlight 1015APV Purpose Ventilator User Manual
Page 2: Sizing requirements, Important tip, Before you begin
Mounting the Fan
Sizing Requirements
See sizing chart on the box or www.ussunlight.com to assure that you select the correct number of
fans for your situation. Some attics have walled off or chambered areas that will require additional
fans to properly vent the space.
If you have any questions or concerns please feel free to call our customer service specialists at 877-50-USSUN.
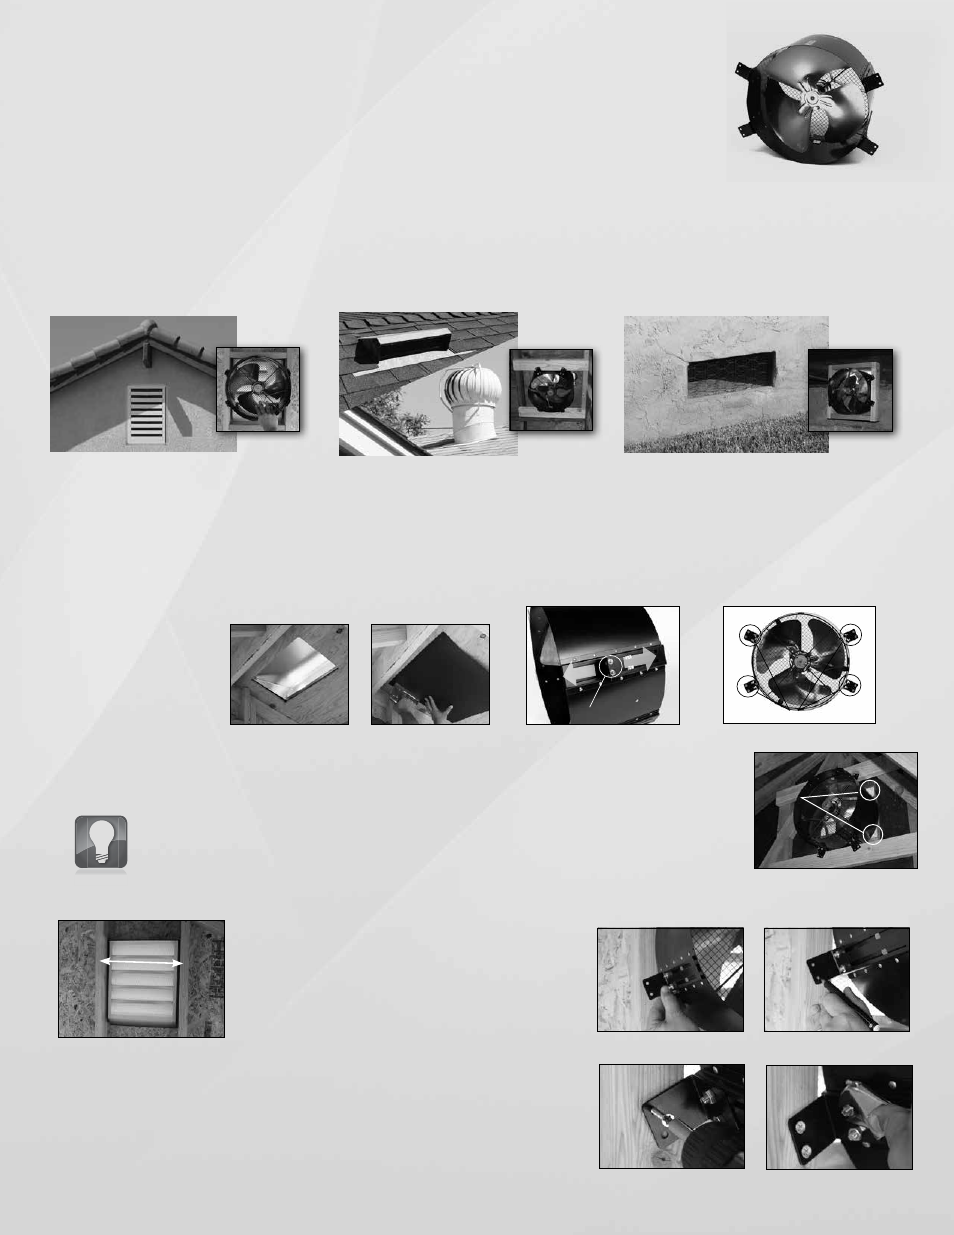
Determine your mounting application
One of the great features about the All Purpose Ventilator is the many mounting options.
Gable Vent
Static or Turbine Vent
Crawlspace Vent
If you have a tile roof and do not want
to cut into the tiles, use the gable vent
for mounting the fan.
Rather than removing the static or
turbine vent, simply use the same
opening.
If your crawlspace has too much moisture,
increase the airflow and reduce moisture
by installing near a vent opening.
Important Tip:
To maximize the solar fan’s effectiveness you should remove or block any rooftop
static vents or ridge vents. Make sure you have proper intake ventilation at the
eave or fascia. Use a ratio of 1 sq. ft. of intake ventilation for every 600 sq. ft. of attic
space. To maximize airflow to the attic close off any unused static vents. Use tar
paper and staples as shown.
Before you begin:
Loosen (but do not remove) the 8 nuts (fig1) on the 4 mounting brackets
(fig 2)
so they can slide freely. And remember: Always note the
orientation of the fan’s air flow relative to the vent opening.
fig 2
fig 1
4 mounting brackets
Loosen
Gable Vent Installation
For installation in a gable vent you typically have 2 options:
Step 1.
Position the fan over the louvers and slide the mounting
brackets into position against the vent frame. (fig. 3)
Step 2.
Mark the position of the holes in the brackets and pre-drill
if necessary. (fig. 4)
fig. 3
fig. 4
16”
on center
Option 1 - vent is located between standard 16” on center framing members
Important tip for both gable fan installations:
To maximize efficiency of the fan, seal off the gable vent area around the fan to avoid recirculating outside air
around the fan and back outside.
seal off with tar
paper or duct
tape
Step 3.
Use included screws “G” to fasten the brackets to the vent frame. There are 8 positions two on
each bracket. (fig. 5)
Step 4.
Once brackets have been fastened, slide the fan assembly into position, pressing it firmly
against the vent louvers and tighten the 8 nuts. (fig. 6)
fig. 5
fig. 6