Tomlinson 512 SERIES POPCORN POPPER Popping Kettle replacement Instructions User Manual
Page 2
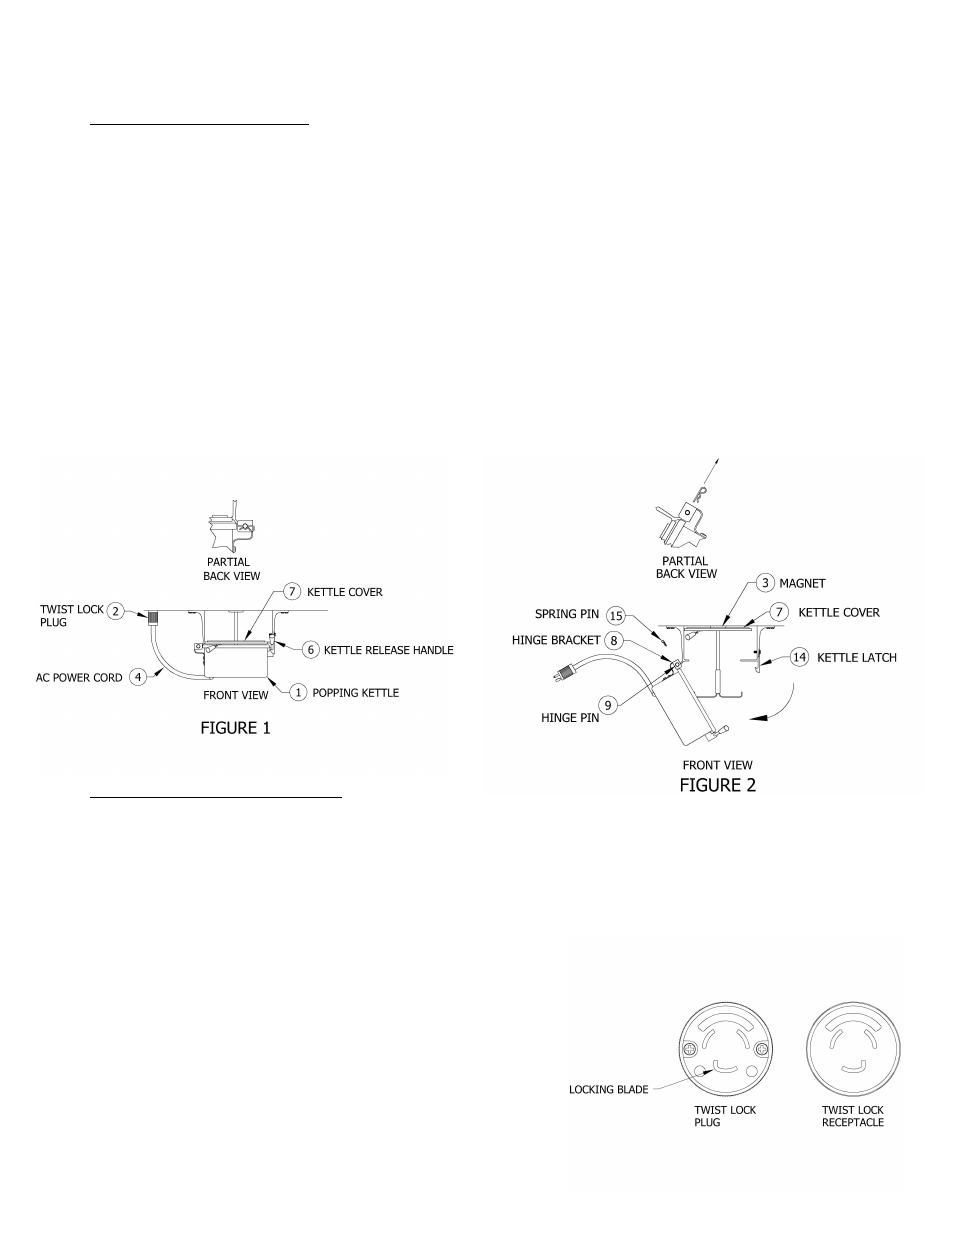
Removing the Popping Kettle
1. Orient the popcorn popper so that the front of the unit faces you. Open the popper’s two upper doors followed
by the lower door. If the kettle cover (7) is down, raise it against the magnet (3) before continuing this
procedure.
2. Disconnect the twist lock plug (2) from the receptacle on the popper ceiling by rotating the plug clockwise
then gently pulling downward.
3.
Verify that the kettle (1) is completely cool and in the popping position (Figure 1). Rotate the kettle release
handle (6) to the left to release the popping kettle (1) from the kettle latch (14) and slowly guide the kettle
(1) downward to the popcorn dump position (Figure 2).
4. Remove the spring pin (15) from the hinge pin (9).
5. Support the bottom of the popping kettle (1) with one hand and remove the hinge pin (9). Remove the
popping kettle (1) from the popper.
Installing the New Popping Kettle
6.
Align the two holes on the popping kettle’s hinge with the holes on the hinge bracket (8). Replace the hinge
pin (9) and the spring pin (15) to secure the popping kettle (1) in its popcorn dump position (Figure 2).
7. Guide the popping kettle (1) upward until the kettle release handle (6) engages the kettle latch (14) to
secure the kettle in its popping position (Figure 1).
8. Align the twist lock plug’s locking blade with the receptacle.
Reconnect the twist lock plug (2) by gently pushing the plug
into the receptacle on the popper ceiling and rotating the plug
counterclockwise.
9.
Close the popper’s lower door followed by the two upper doors.
Reconnect popper to power source. Turn on the kettle warm
switch (12), heat switch (11), and turn switch (10) to verify
that the popper is operating properly.
2