English, Lavatory installation, Unit start up – Pfister VSP-S10W User Manual
Page 2
ENGLISH
ENGLISH
LAVATORY INSTALLATION
2
1 BEFORE PROCEEDING
WARNING: Read all the instructions completely before proceeding. Price
Pfister recommends calling a qualified plumber if you are uncertain about installing
this product!
This product should be installed in accordance with all local and state plumbing and
building codes. Vitreous china is heavy and fragile. Use extreme care with all
parts!
2 SHUT OFF WATER SUPPLY
Locate water supply inlets and shut off the water supply valves. These are usually found
behind the toilet or near the water meter. If you are replacing an existing toilet, remove
the old toilet from the floor and clean the finished floor surface thoroughly.
Drill a clearance hole inside the perimeter line. Cut out the opening by carefully following
the pencil line (5A) traced from the lavatory.
7 UNIT START UP
Turn water supply, and check for leaks at all visible connections and verify that no water
is seeping from the base of Toilet as the Tank and Bowl fill with water. If leak is suspected,
shut off supply valve immediately until source of leak is located and secured.
Thank you for purchasing this Price Pfister product. All Price Pfister products are carefully engineered, and factory tested to pro-
vide long trouble-free use under normal conditions. This product is easy to install using basic tools and our easy to follow illustrated
instructions. If you have any questions regarding this product, call 1-800-Pfaucet (1-800-732-8238).
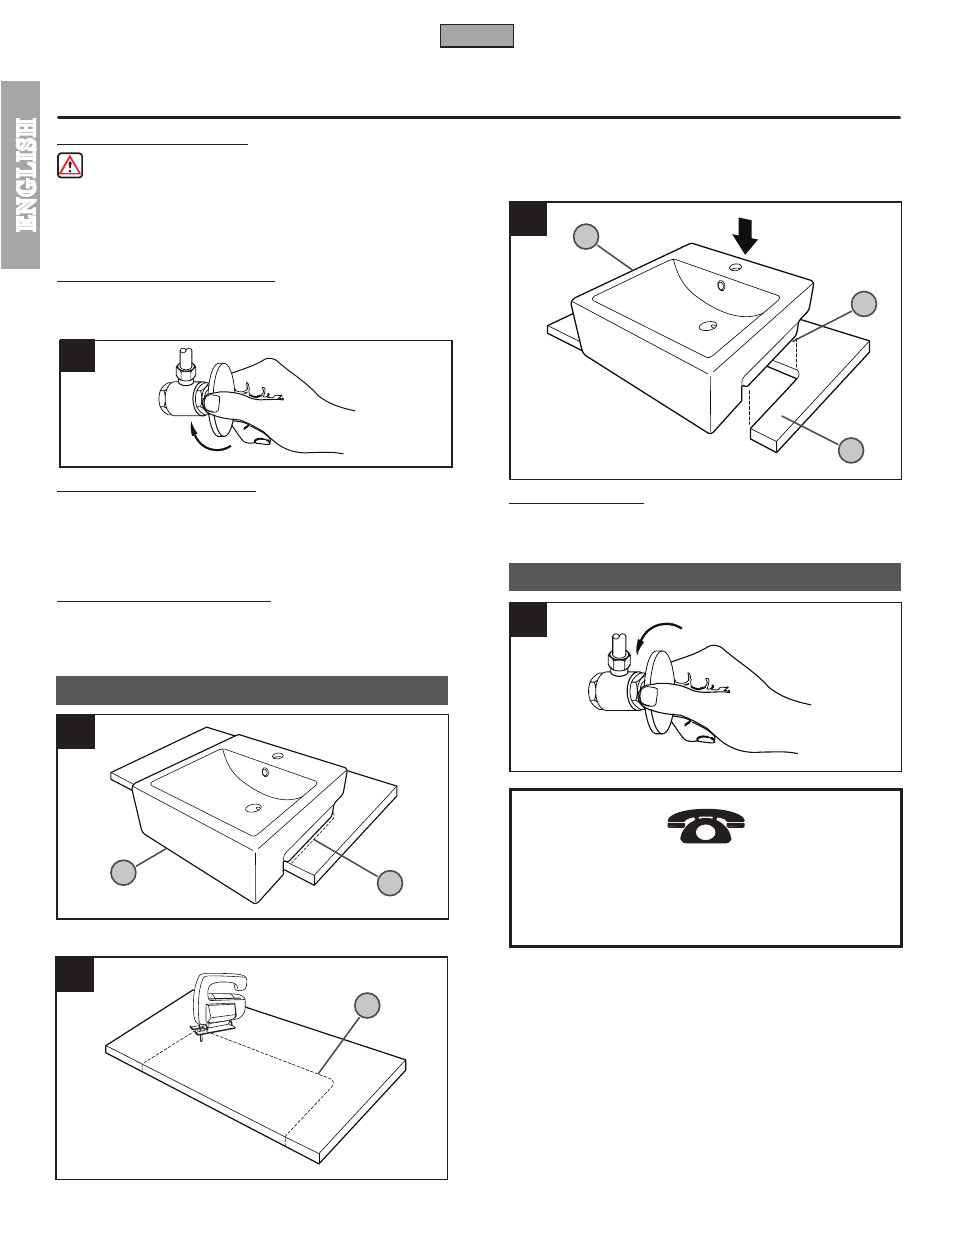
UNIT START UP
7
Carefully position the lavatory (6A) in the countertop cutout (6B) to verify proper fit.
Mark the lavatory and countertop in several places as a guide for installation location.
Apply a thin, bead of sealant (6C) around the lavatory edges. Carefully lower lavatory
in place, align with marks made earlier, and press down firmly.
For more information about the installation or care
and warranty information, please contact your local
Black & Decker HHI representative in your country or
visit www.pricepfister.com/international
3 TOOLS RECOMMENDED
• Silicon sealant
• Slotted screwdriver
• Adjustable wrench
• Pliers
• Electric drill
• Cloth
• Measuring Tape
• Safety glasses
• Jigsaw
Your installation may require new supply lines and / or shut-off valves or other
additional tools.
4 LAVATORY INSTALLATION
Position the lavatory (4A) on the countertop in its final installation location. Ensure
clearance between the lavatory, faucet, and backsplash. Verify cabinet clearance
beneath the countertop. Use a pencil to trace (4B) the recessed portion (bottom) of the
lavatory on the countertop.
6
2
5
5A
6A
6C
6B
4
4B
4A