English, Faucet functions – Pfister GT36-4DSS User Manual
Page 3
ENGLISH
ENGLISH
11
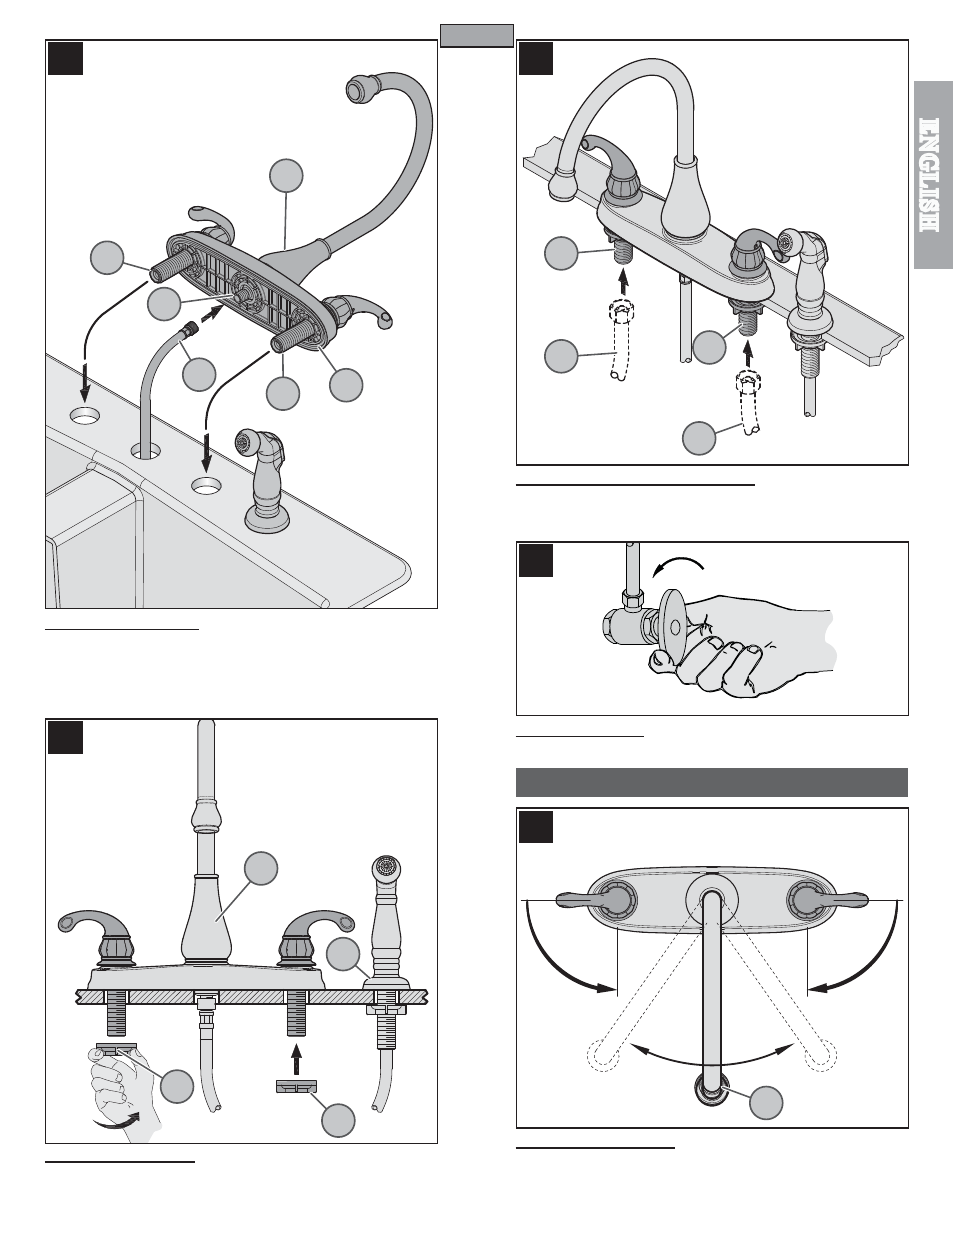
FAUCET FUNCTIONS
8
9
10
12
8 HOSE ATTACHMENT
Apply PTFE plumber’s tape to all threaded fittings according to manufacturer’s
instructions. Carefully tighten the Side Spray Hose (
8A) to the Spray Supply Tube
(
8B) located on the bottom of the Faucet Body (8C).
Following manufacturer’s
recommendations on use, apply plumber’s putty into putty groove in bottom plate (
8D).
Insert faucet Shanks (
8E) through the holes of the sink.
9 SECURING FAUCET
Align Faucet (
9A) to sink surface. From underneath sink, secure faucet and Hose Guide
(
9B) by using Wingnuts (9C). Hand tighten.
10 WATER SUPPLY CONNECTIONS
Connect water Supply Lines (
10A) to Faucet Inlets (10B). Hot water supply lines go
into left inlet. Cold water supply lines go into right inlet. (Supply lines not included).
Please follow manufacturer’s instructions when installing suppy lines.
11 UNIT START UP
Turn on water supply inlet valves and check for leaks.
12 FAUCET FUNCTION
COLD valve: close-counterclockwise, open-clockwise; HOT valve: close-clockwise,
open-counterclockwise. The Spout (
12A) can be rotated around the Faucet Body in
any direction.
3
8A
9A
10A
12A
9B
9C
9C
10B
10A
10B
HOT
COLD
ON
HOT
COLD
ON
8B
8C
8D
8E
8E