Powermate 024-0132CT User Manual
Page 4
4 - ENG
OPERA
OPERA
TING INSTRUCTIONS
TING INSTRUCTIONS
TYPICAL
TYPICAL
INST
INST
ALLA
ALLA
TION
TION
To begin using the tool:
1.
As a standard practice, drain water from the air
compressor tank and air lines prior to use each day
(reference your compressor operators manual for
detailed instructions).
2.
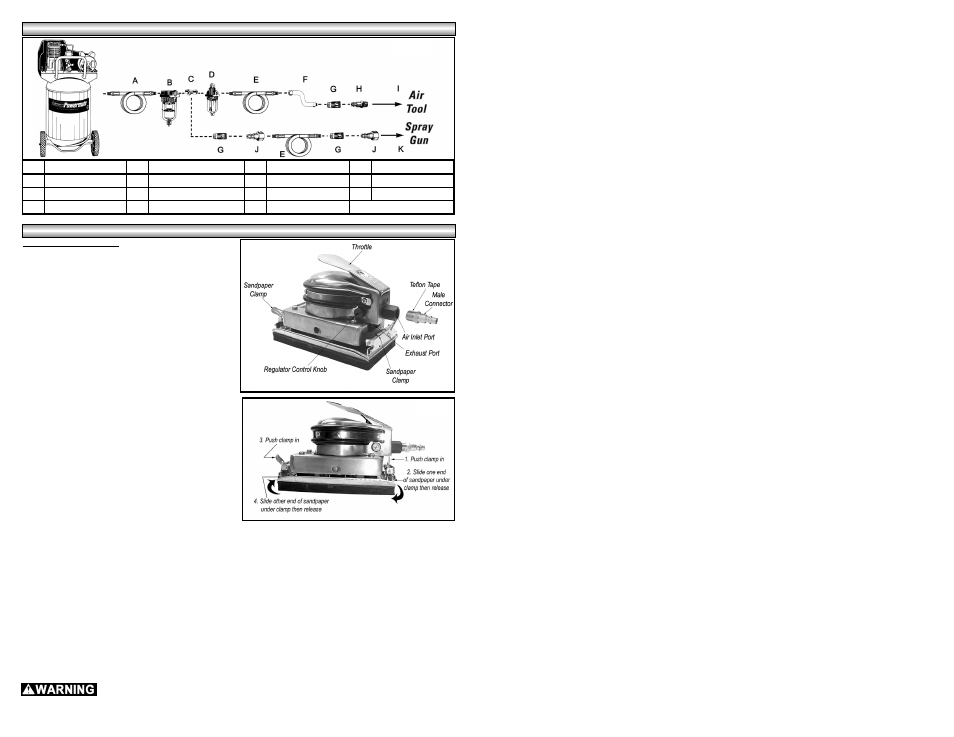
Install a 1/4” NPT male connector (not included)
into the air inlet port on the tool (see Figure 2).
Note: Use Teflon® Tape on all threaded
connections.
3.
Turn on the air compressor and allow it to build up
pressure.
4.
Assemble the sandpaper to the sander:
a.
Select the correct sandpaper for the
application. NOTE: This sander requires a 9”
x 3-5/8” piece of sandpaper (a standard 9” x
11” sheet of sandpaper can be cut into three
9” x 3-5/8” pieces).
b.
Install the sandpaper by pushing the
sandpaper clamp toward the tool. Insert the
sandpaper over the two teeth and close the
sandpaper clamp (see Figure 3). Do the same
on the opposite end of the tool.
5.
Adjust the air compressor’s regulator or the supply
line regulator to 90 PSI.
6.
Connect the tool to the air hose quick coupler.
NOTE: It is recommended that a whip hose with
a swivel (P012-0079SP - not included) be used to prevent twisting, kinking, and excessive wear to the
air hose (see figure 1 for recommended connections).
7.
Adjust the regulator control knob to the desired variable speed.
8.
Grip the jitterbug sander in the palm of your hand and gently apply pressure to the throttle by pushing down
with the palm of your hand.
9.
Start the sander off the work. Set it down flat on the work surface. Move the sander slowly back and forth in
wide overlapping areas. Let the sander do the work. Do not put additional pressure on the sander. This
slows down the speed of the pad, reducing sanding efficiency and puts additional burden on the air tool
motor.
10.
When finishing sanding, release the throttle to stop the tool.
NOTE: Proper sanding requires starting with sandpaper just course enough to remove the high spots and surface
roughness and changing to successively finer sandpaper until the desired surface finish is achieved.
Never change directly from a course grit to a very fine grit.
Always disconnect the tool from the air source before changing sandpaper.
Key
Description
Key
Description
Key
Description
Key
Description
A
Air hose
D
In-line Oiler
G
Quick Coupler
J
Female Connector
B
In-line Filter
E
Air Hose
H
Male Connector
K
Spray Gun
C
Tee Fitting
F
Whip Hose
I
Air Tool
Figure 1
Figure 2
Figure 3