Wiring the speakers, Extron, Installation, cont’d – Extron Electronics SI 3 System INTEGRATOR User Guide User Manual
Page 10
8
SI 3 Speakers • Installation
Installation, cont’d
Wiring the speakers
1.
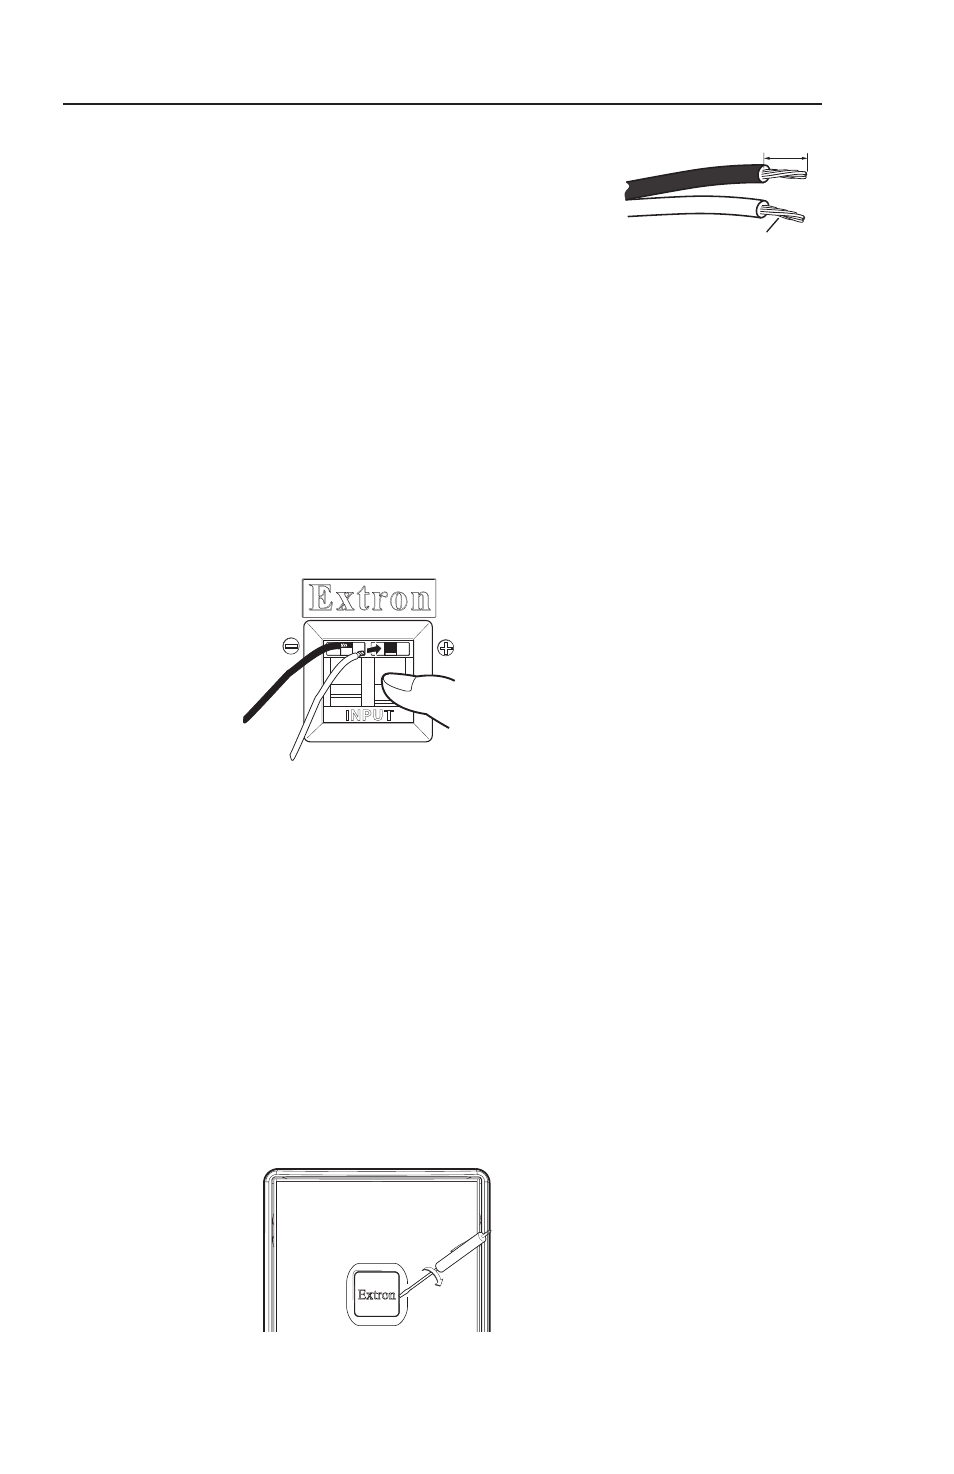
When both speakers are in place,
carefully pull enough speaker wire
to reach to the terminals at the back
of the each speaker and strip the
ends of the wire approximately 5/8" (15 mm). Twist the
bare strands so that they are held firmly in the connectors.
2
.
Press down on the spring loaded terminals to open the
holes at the top. Observing the correct polarity, (positive
wire to
,
terminal and negative wire to
.
terminal)
insert the twisted ends into the open holes (see figure 11)
and release the springs to secure them. Push any loose
wire back into the wall.
C
Do not connect the speaker wires from one channel
in parallel (together) with wires of the other channel
on the same terminal.
Push down on the spring terminals
at the back of the speaker, and insert
the wires. Release the springs to secure.
INPUT
Extron
Extron
Positive Wire
Negative
Wire
Figure 11 — Inserting wiring into the terminals
3.
Turn on the audio source and any associated devices.
Follow the manufacturer's instructions to adjust the source
and device settings as desired to get the optimum audio
output for your speaker application. It may be necessary
to adjust the angle of the speaker (see steps 5 and 6 below)
to get the best audio coverage area for your application.
4
.
To adjust the angle of the speaker, carefully remove the
Extron logo on the front of the speaker to expose the front
locking access (see figure 3, item
b
, for location). To do
this, carefully pry the logo away with your fingers or use a
small flat head screwdriver (see figure 12), taking care not
to damage the front grill or the logo.
Gently pry
away logo.
Figure 12 — Removing the logo from the front grill
Twist the bared wire.
Strip approx. 15 mm (5/8").