Wall mounting installation – Amcor AMH8 User Manual
Page 6
4
Wall Mounting Installation
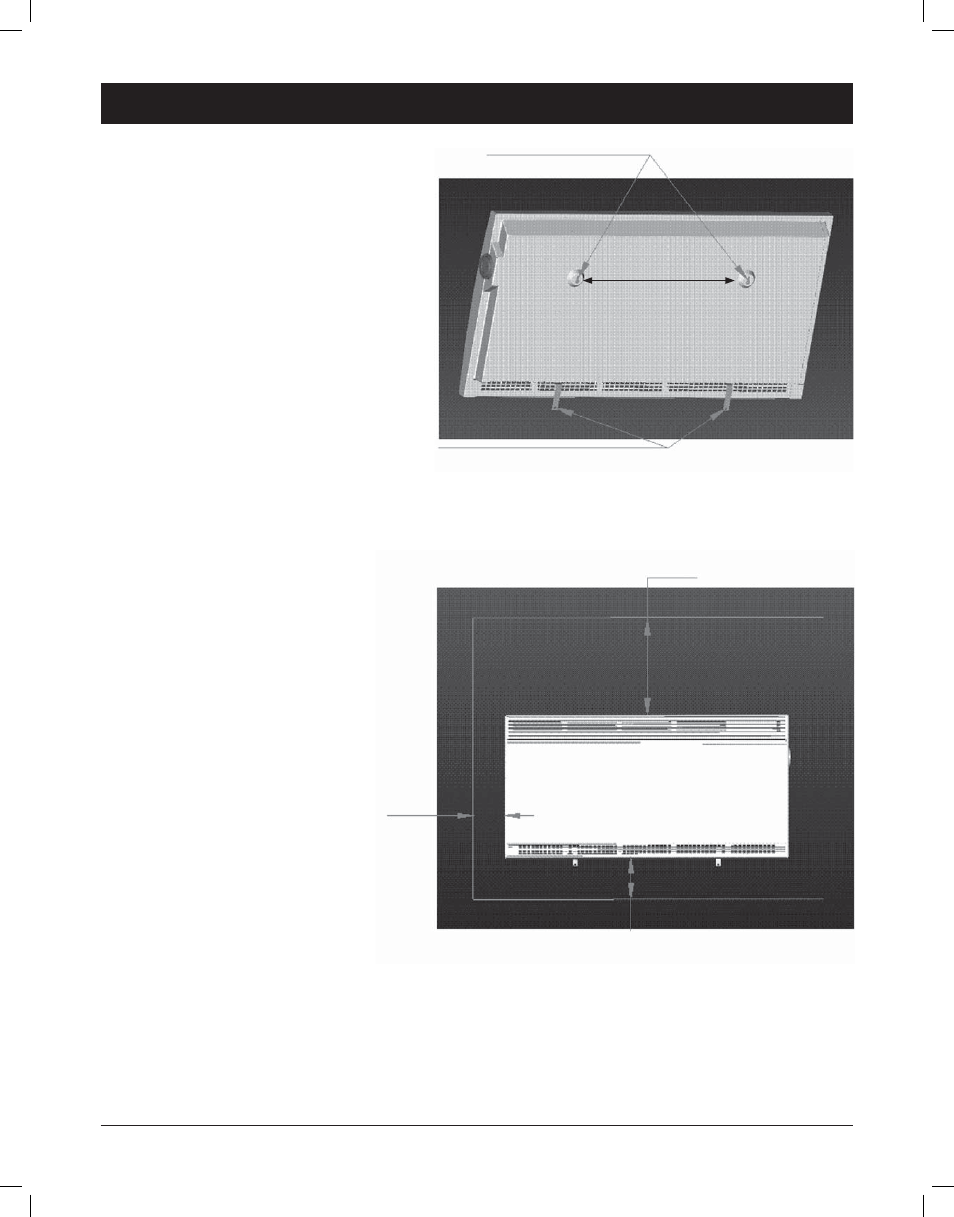
Fig. 1
• The heater must be mounted at four
points. Two mounting holes (keyhole
slots) are located on the upper rear of
the heater and two wall mount angle
brackets are provided for securing the
heater’s bottom to the wall.
• Fit the short edges of the angle brackets
to the heater and secure brackets with
the screws provided, ensuring the long
tabs protrude downward (see Fig. 1).
• The heater must be positioned on a wall
away from cold draughts or breezeways
which may interfere with the tempera-
ture control system (rotary thermostat).
• A clearance of at least 6" (152mm) to
BOTH sides of the heater, at least 20
inches (508mm) to the front and top of
the heater should be maintained.
• A clearance of at least 8" (205mm) must
be maintained above the fl oor or fl oor
coverings (see Fig. 2).
• The unit must NOT be positioned
directly under a power outlet.
• The unit should not be located
below air extraction vents.
Installation Instructions:
1. Mark the two screw points for the top
mounting screws on the wall at dimen-
sions shown at right (Fig. 1) 17.75"
(451 mm) apart.
2. Do not Screw Directly into
sheetrock or paneling only.
3. Screws must be securely screwed
into wall studs or by using suitable
anchors (not supplied), not
completely, leaving 4-5 mm’s
(0.16" - 0.2"). Consult a qualifi ed
electrican if in doubt.
4. Slide keyhole slots in heater over these
two screws.
5. Connect the two wall mount angle
brackets at the bottom of the unit as
shown at right (Fig 1).
6. Mark the two screw points (holes in the
brackets).
7. Repeat steps 2 & 3 above, only this time
screws must be screwed completely.
Fig. 2
Approximately 17
3
/
4
" between
the midpoints of the holes
At least 20" (508mm)
At least
6"
(152mm)
Install bottom of Heater not less than 8" (205mm)
above the fi nished fl oor.
Two Mounting Holes
Two Wall Mount Angle Brackets