Using the microscope specifications and the kit, Caution, Levenhuk 5st stereo microscope – Levenhuk 5ST Microscope User Manual
Page 3
Secondary objective
lens
1x
2x
2x
2x
0.5x
10x
5x
10x
15x
20x
2x
20x
40x
60x
80x
0.5x
15x
7.5x
15x
22.5x
30x
2x
30x
60x
90x
120x
Eyepiece
Objective
lens
Eyepiece
Objective lens
Interpupillary distance range
Microscope head inclination angle
10x
2x, 4x
55 mm – 75 mm (2.17-2.95 in)
60°
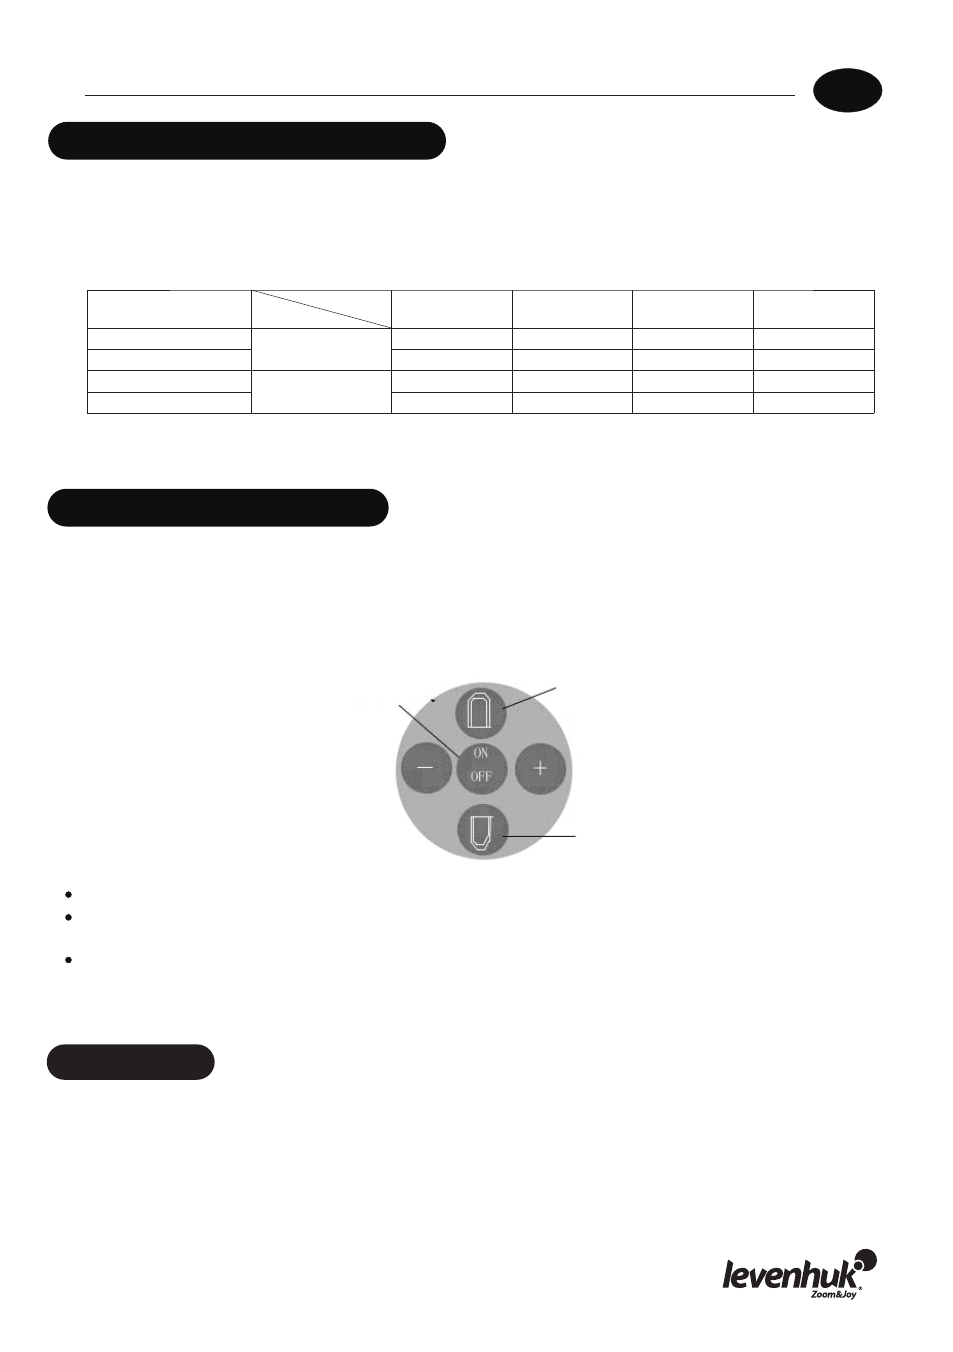
Illumination. You can turn on both illumination sources by pressing the ON/OFF button. By
pressing the ‘+’ and ‘-’ buttons you can set the brightness level.
Note: you can turn on either the upper or the lower illumination source individually by pressing
the corresponding buttons.
Using the microscope
Specifications and the kit
Illumination power button
Upper illumination source switch
Lower illumination source switch
The following accessories are not included in the kit and have to be purchased separately: 15x
eyepiece; 1x, 3x objective lenses; 0.5x, 2x secondary objective lenses
Magnification chart:
EN
Levenhuk 5ST stereo microscope
Place a slide on the stage and lock it in place with stage clips.
Adjust the interpupillary distance by holding both eyepieces with your hands and bringing them
closer or moving them apart until a double image turns into a single image.
Perform diopter adjustment, if necessary, and focus your view.
(1) Look through the right eyepiece. Focus the view by rotating the focus knob.
(2) Look through the left eyepiece. Focus the view by rotating the diopter adjustment ring.
Caution
Never, under any circumstance, look directly at the Sun, another bright source of light or at
a laser through this device, as this may cause PERMANENT RETINAL DAMAGE and may lead to
BLINDNESS.
Take necessary precautions when using the device with children or people, who have not
read and fully understood these instructions.
Do not try to take the device apart on your own. For repairs of any kind, please contact
your local specialized service center.