Chapter 5 – formatting attached drives, Figure 10 figure 9 figure 8 – Sonnet Technologies Echo Express SE eSATA Pro 4-Port User Manual
Page 11
7
Chapter 5 – Formatting Attached Drives
Figure 10
Figure 9
Figure 8
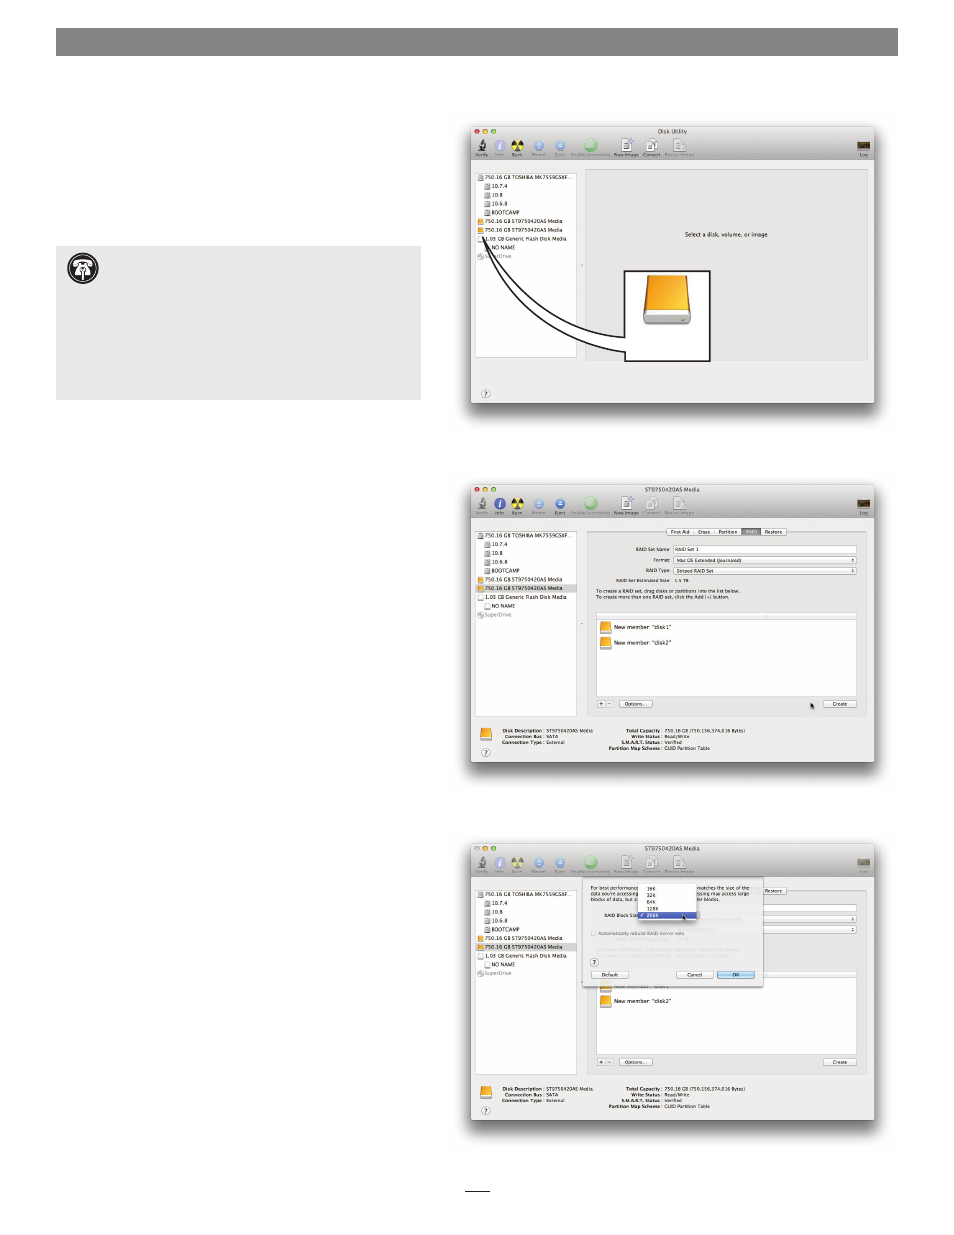
Formatting Drives into RAID Sets
This section describes the process of formatting (initializing)
multiple, new drives connected to the Echo adapter to create
striped (RAID 0) or mirrored (RAID 1) RAID sets using Disk
Utility under OS X Version 10.7; the process is nearly identical
under OS X Versions 10.6 and 10.8.
1. Turn on your storage system, and then turn on your
computer (with the Echo adapter connected). During
startup, one or more messages referring to unreadable
volumes will be displayed; click Initialize… to launch
Disk Utility. (Note that if you wait too long, the
messages will disappear, and Disk Utility will have to
be launched manually.) After Disk Utility launches,
click the Initialize button in each remaining message
window.
2. If it is not open, launch Disk Utility. Note that all drives
attached to the Echo adapter may be identified in the
information window by their icon along with the
“External” connection type
(Figure 8).
3. Select one of the drives you want to format in a RAID
set by clicking the drive symbol; a set of tabs will appear
in the right pane. Click the RAID tab, select all the
drives you will use to create your RAID set, and then
drag them into the disk field
(Figure 9). Be careful
NOT to accidentally drag in a drive you don’t want
included in the RAID set.
4. From the drop-down menus, select the volume format
and the RAID scheme (striped or mirrored RAID Set),
and then type in the name for your RAID set
(Figure 9).
5. Click the Options button. From the drop-down menu,
select a RAID block size
(Figure 10). If you are working
with video, selecting the largest block size will help
improve performance. If you are working with many
smaller files (databases, etc.) a smaller block size will
work well. Click OK.
6. Click Create. When a dialog asking you to confirm
you want to create a RAID set appears, click the Create
button; all of the selected drives will be formatted and
the RAID volume created. Close Disk Utility; your drives
are now ready for use and your installation is complete.
Support Note:
Depending on how you set it up, a
drive enclosure with a built-in hardware RAID
controller (like Sonnet’s Fusion D400QR5 or F3) may not
present it drives separately to the operating system. For
instance, if you choose a RAID 0 or RAID 5 configuration
in the enclosure, only one “drive” will appear in Disk
Utility. If this is the case, go back to “Formatting Individual
Drives (Not in a RAID Set)” on the previous page for drive
formatting instructions.
icon of drives
connected to
adapter