Drive installation and enclosure setup, Connect fusion d400q to sata host controller card – Sonnet Technologies Fusion D400Q (With Drives) User Manual
Page 4
Drive Installation and Enclosure Setup
4
Figure 3
1. Remove the Fusion disk enclosure and drive modules from their
packaging, and place them near the computer to which the
enclosure will be connected.
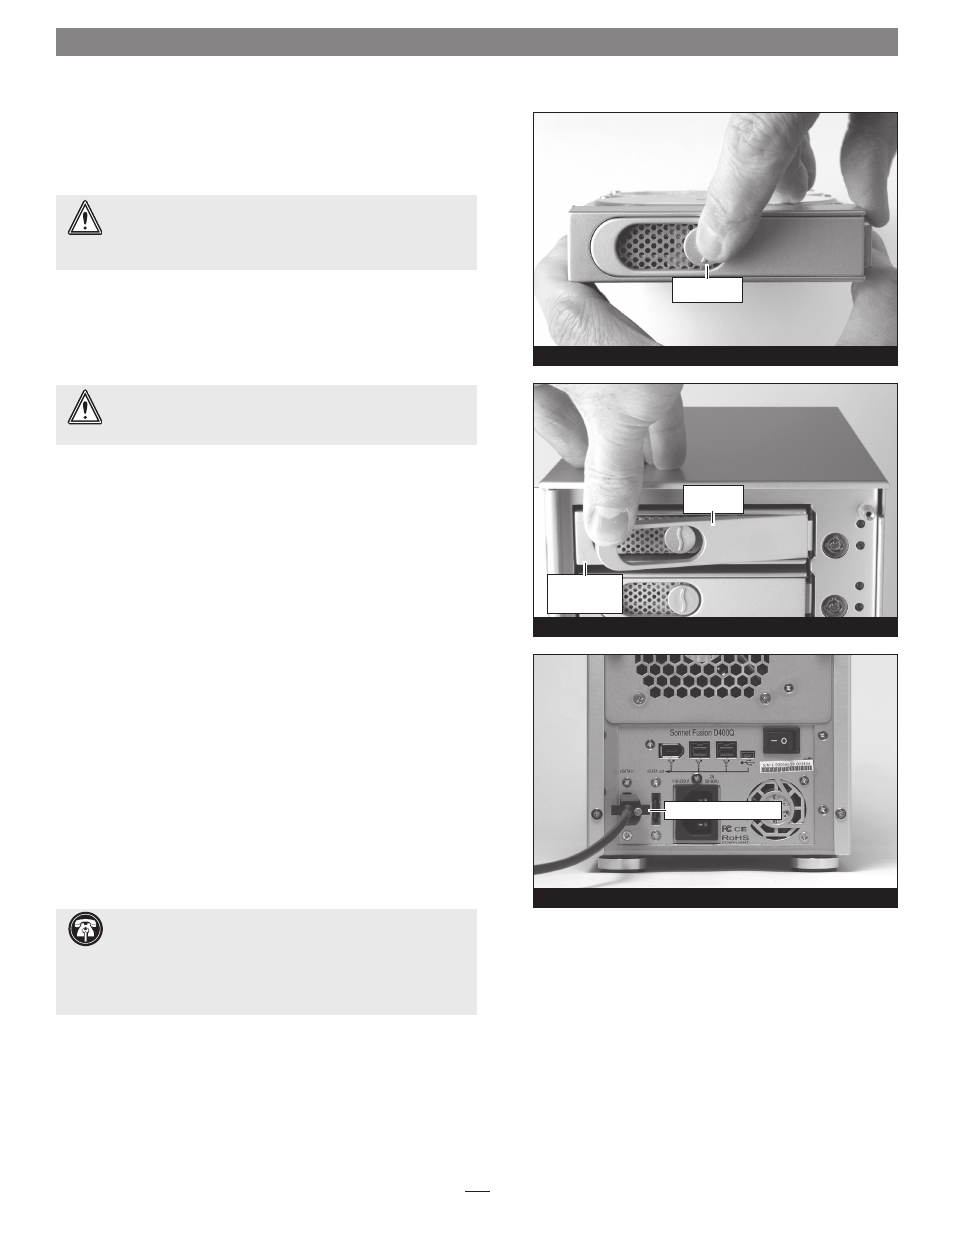
2. Take one of the drive modules and push its lever release button in
until the lever pops out.
(Figure 3).
3. Carefully slide the drive module into the enclosure until its lever
starts to close, and then push the lever in until it clicks to secure
the drive module inside the enclosure
(Figure 4).
4. Repeat steps 2-3 for each remaining drive module.
Connect Fusion D400Q to SATA Host Controller Card
This section describes the connection of the Fusion D400Q to your
computer’s SATA host controller card. If you intend to connect the
D400Q to a USB or FireWire port on your computer, skip to “Connect
Fusion D400Q to FireWire or USB Port” on the next page.
Note: Your
Fusion D400Q’s port layout may be different than what is pictured in this
guide.
1. Connect the supplied locking eSATA data cable between the
SATA in port on the enclosure and the SATA host controller in
your computer;
verify the connectors are plugged in securely
(Figure 5). Skip to “Finish Setup” on the next page.
WARNING:
When handling computer products, take care to
prevent components from being damaged by static electricity;
avoid working in carpeted areas. Handle hard drives only by their
edges and avoid touching connector traces and component pins.
WARNING:
When inserting the drive trays into the enclosure,
do not force the lever closed. If the lever does not close
easily, remove and reinsert the tray, and then push the lever in again.
Support Note:
The supplied Sonnet locking eSATA cable is
compatible with all eSATA ports and provides a far more
secure connection when used with Sonnet drive enclosures and host
controller cards with the matching connector. If necessary, you may
remove the locking mechanism from the connector by removing the
screws securing the two halves.
push in lever
release button
Figure 5
locking eSATA data cable
Figure 4
push lever
until it clicks
push tray in
until the lever
starts to close