Fusion f2 setup – Sonnet Technologies Fusion F2 User Manual
Page 5
Fusion F2 Setup
5
Windows Drive Formatting & Configuration (continued)
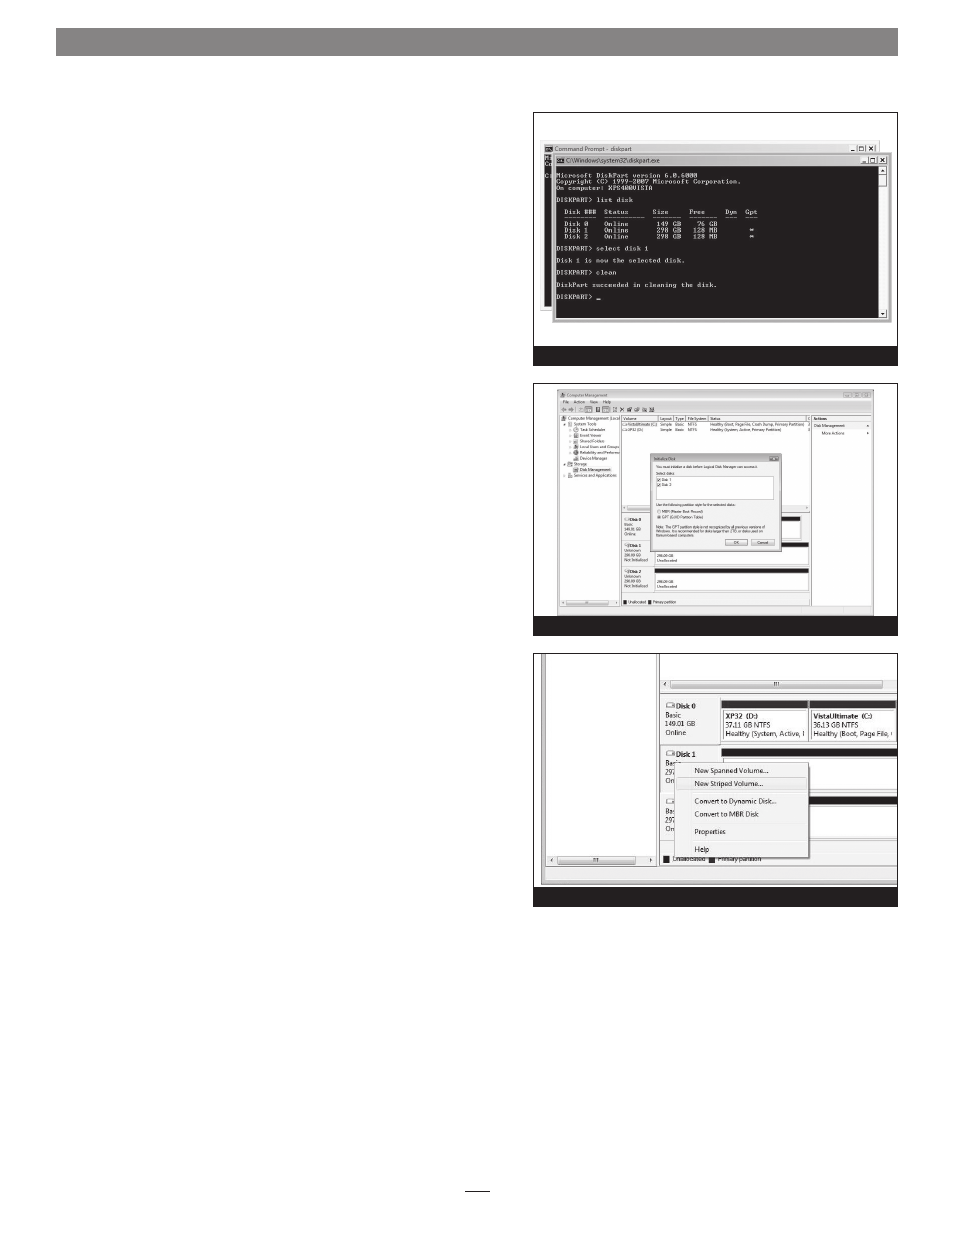
7. In the DISKPART window, type “list disk” and then press Enter to
display all the hard drives attached to the system
(Figure 9).
8. Select one of the Fusion F2’s drives by typing “select disk X”
(with X as the number of the disk as seen in the listing, e.g.
“select disk 3”), and then press Enter
(Figure 9).
9. Type “clean” and then press Enter to erase all the information on
the drive and prepare it for formatting by Windows
(Figure 9).
10. Repeat steps 8 and 9 for the other Fusion F2 drive, and then close
both the DISKPART and Command windows.
11. In the Administrative Tools window, click the Disk Management
link to launch the Disk Management application.
12. When the Initialize Disk window appears, select a partition style,
and then click OK; both Fusion F2 drives will be initialized
(Figure 10).
13. Right click the name field of one of the Fusion F2 drives and
select the formatting type you wish to use for the Fusion F2’s
drives
(Figure 11).
14. Depending on the formatting type you chose, a Wizard may
appear; follow the onscreen instructions to complete formatting
of the drive(s). Once the drives are finished being formatted, they
are ready to use.
Figure 10
Figure 11
Figure 9