Flush mount assembly – Elite Screens A56-E25B User Manual
Page 3
www.elitescreens.com
By removing the upper and lower extension you
can flush the projector to the ceiling. This
installation is designed to bring the projector
closer to the ceiling to accommodate room size.
The extension does not necessarily have to be
removed for the projector to be mounted. The
design of this particular mount has the ability to
be extended or flushed closer to the ceiling. The
extra accessories can be removed and replaced
with additional parts. The extra hardware is
designed to fit 90% of the different projector
types in the US. Some screws may be required
for the projector. For proper installation, please
make sure the projector has the option of being
ceiling mounted. Please reference in the
projector’s manual for mount options. The
projector mount has the capability to tilt at a 20‐
30% angle in a circular motion.
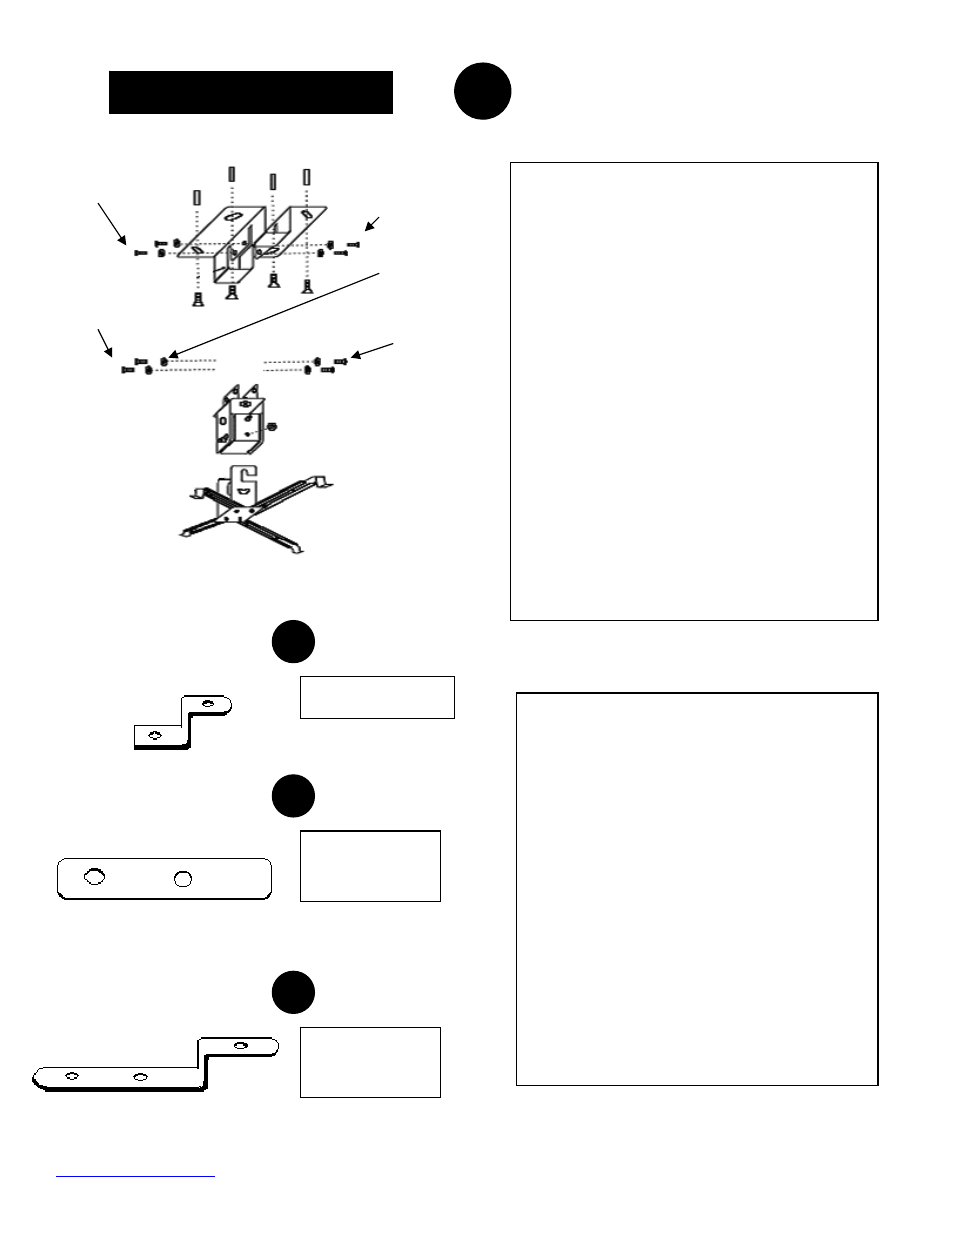
Flush Mount assembly
M5 x 12 Hex screws
M5 x 12 Hex screws
M5 x 12 Hex screws
M5 x 12 Hex screws
M5 Washer
d
f
e
Short extension
Extension for
spider leg.
Extension for
spider leg.
These extensions are extra parts for mounting
purposes. By simply removing either extension
from the mount you can have it shortened or
extended. Depending on the size and model of
your projector. The spider legs are
manufactured to extend if needed to provide
extra extension to reach the correct mount
screw. By adding extension (e) you can have the
spider legs extended further for mounting.
Extension (d) can be placed with extension (e)
by securing it with screw type (b). Extension (f)
is an extra accessory; the mount has 2
extensions similar to extension (f). This will only
be required if the extensions are not long
enough for your projector.
#1