Installation – Poweramp POWERSTOP A 11.1996 User Manual
Page 9
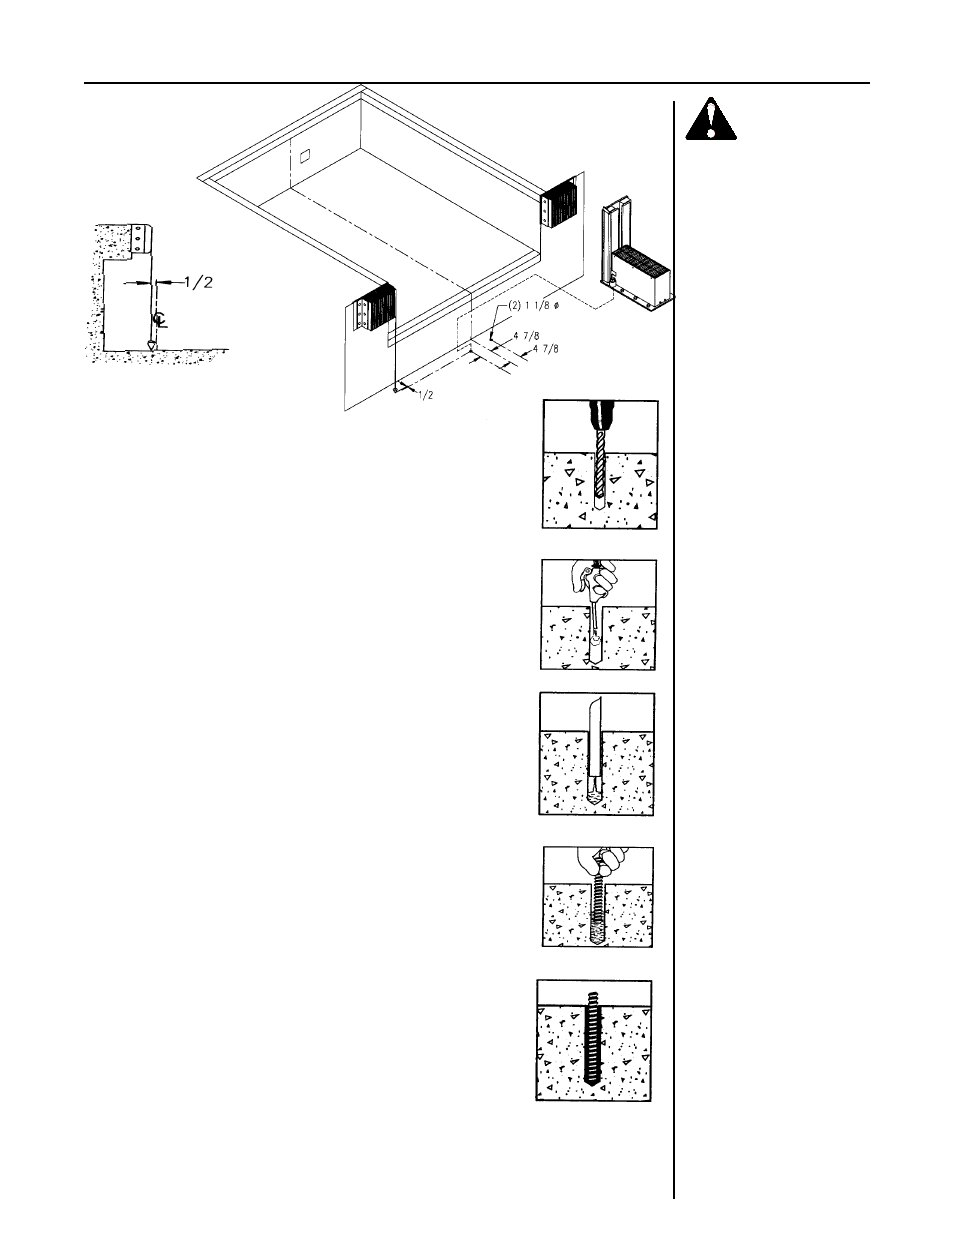
Installation
1" Main Anchors
Figure 7
Plumb line
WARNING
Proper safety apparal
should be worn when
installing the truck restraint.
as shown in Figure 7. After locating and marking the
primary anchor locations (qty. 2) on the drive surface, drill
1-1/8" diameter holes 7 to 7-1/2" deep. If drill breaks
through concrete at a depth of less than 6", consult
factory. The remaining (6) 3/4" anchor holes can be
drilled at this time.
4. Preparation of the anchor hole is necessary to assure a
long lasting installation. Prepare the 1-1/8" diameter
holes in the following manner:
A. Blow the hole clean with compressed air, brush out
using 1" nylon brush, blow clean again. Holes
should be clean and sound. They may be dry or
damp, but should be free of standing water or frost.
Be sure rod fits into hole. If larger hole is required,
the diameter should be as close as possible to the
rod diameter.
B. Fill the hole approximately half way with adhesive
mortar starting from the rear of the hole. Slowly
withdraw the nozzle as the hole fills to avoid creating
air pockets within the hole.
C. Push the threaded rod into the hole while turning
slightly to insure positive distribution of the adhesive
mortar. Be sure rod is fully seated at the bottom of
the hole and that the mortar has flowed from the top
of the hole. If an insufficient amount of adhesive is
placed in the hole, indicated by a lack of filling to the
top of the hole when the rod is inserted, the rod must
be extracted, additional adhesive added and rod
reinserted. The threaded rod used must be free of
dirt, grease, oil or other foreign material. Allow the
adhesive mortar to cure for the time specified in chart
prior to applying any load. See Figure 10. Do not
Figure 8
6