Mach III Clutch T4C2H-21L, T4C2H-21LCA, T4C2H-21LSS User Manual
Page 4
7/9/2013
TORQLIM_NEMA_MANUAL
Page 4 of 5
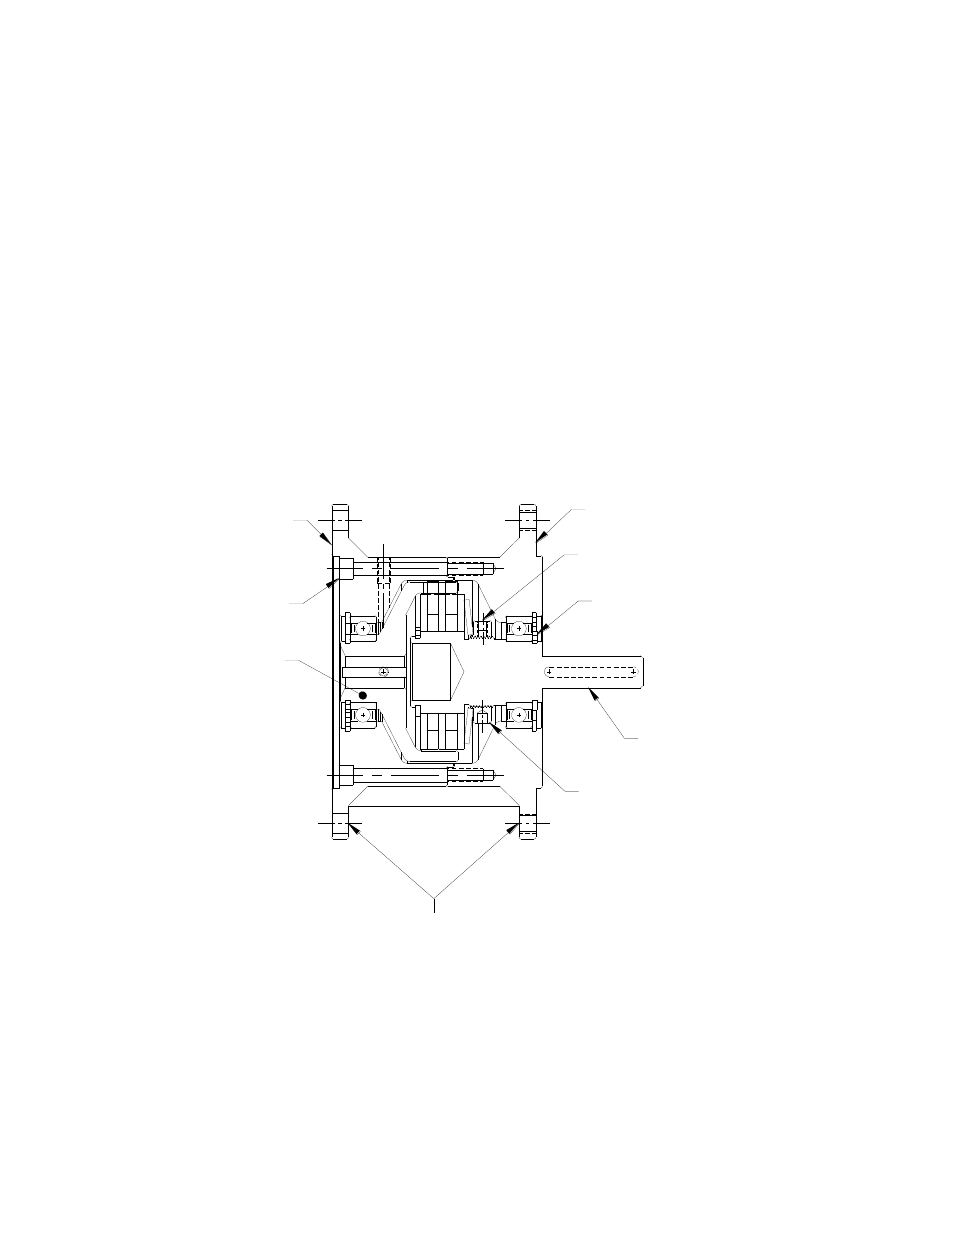
MOUNTING
HOLES
G
D
C
F
E
B
A
H
B. FRICTION DISC & SPRING REPLACEMENT
(1)
Remove the spring, drive discs and friction discs.
(2)
Drive discs should be clean, dry and free of burrs or nicks.
(3)
Reassemble drive & friction disc section according to reference drawing using new
spring, drive discs & friction discs as necessary.
(4)
Assure that drive discs move freely on the drive hub and that the lugs of the friction disc
discs move freely in the drive slots of the sleeve.
C. REASSEMBLY
(1)
Replace the spring and nut.
(2)
Adjust to desired torque by placing the tabs of the friction discs into the slots of the
female hub which should be attached to a fixed shaft. A torque wrench can be attached
to the drive hub and adjustments to the nut should be made until the desired torque is
achieved.
(3)
Tighten locking screw in adjustment nut.
(4)
Insert drive hub into bearing using Loctite
®
#609 retaining compound on inner race of
the bearing (if needed old Loctite
®
can be removed using a scraper) and replace
retainer ring.
(5)
Place housing halves back together and reinstall the 3 cap screws.
(6)
See “Torque Limiter Installation” portion of these instructions for the proper procedure
for reinstalling to the motor.
VII.
Torque Setting Instructions
(1) Remove the (3) socket head cap screws (REF. A) from the female adapter (REF. B).
(2) Separate the two halves of the torque limiter.
(3) Remove the retainer ring (REF. C) from the drive hub (REF. D).
(4) Using a non-marring mallet, remove the drive hub from the male adapter (REF. E).
Note: Using a press to remove the drive hub is also acceptable.